Open the template
If you haven’t already, make sure you launch QLab 5  as opposed to QLab 4
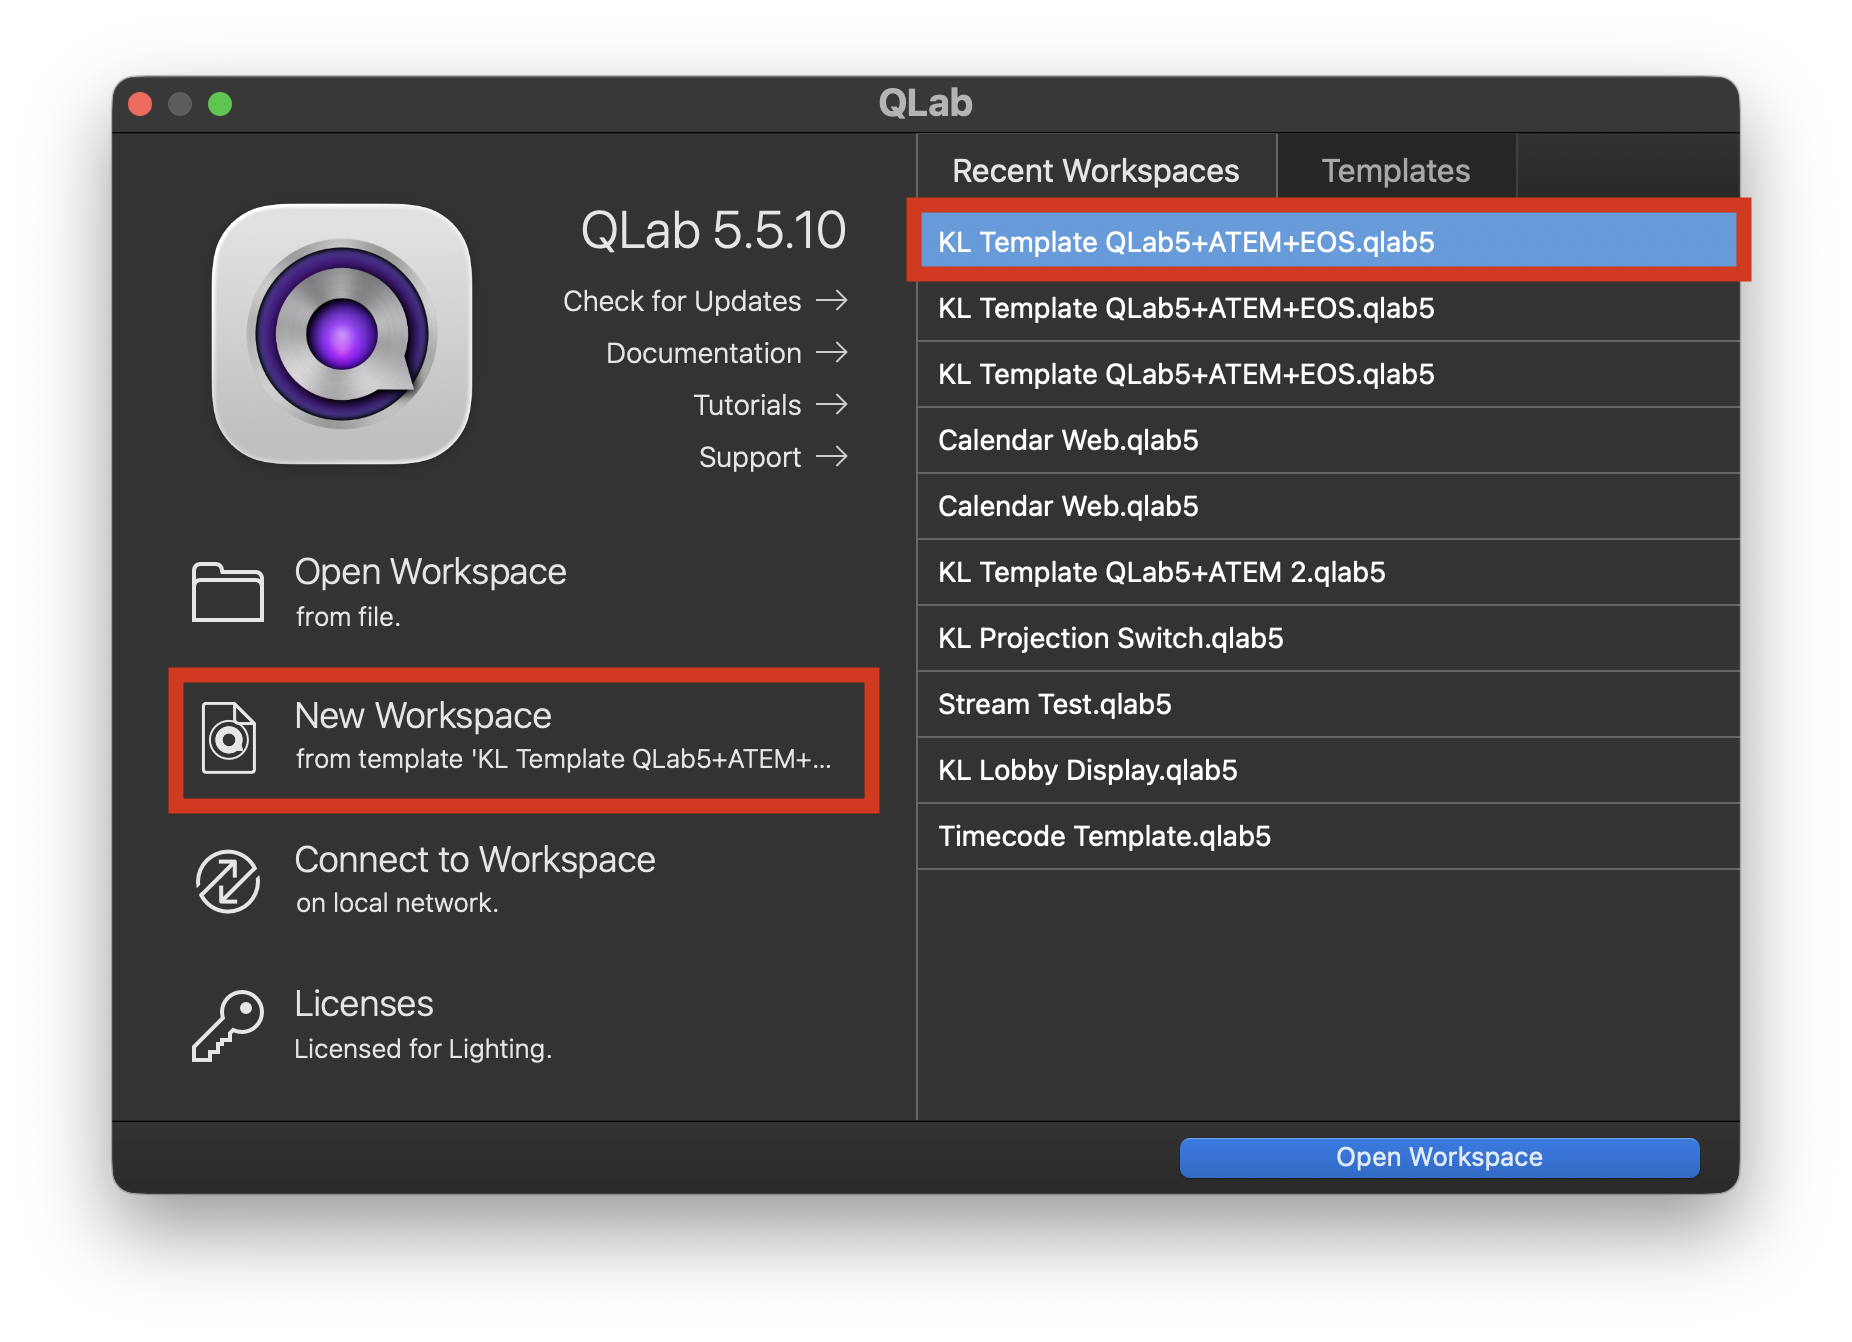
  in the dock. When you do, you will be greeted with an interface that asks you to select the template. You want to select ‘‘KL Template QLab5+ATEM+EOS’’:
1. Check the desktop of your computer.
2. Select New Workspace from template “KL Template…“.
3. Download from here.
Understand that options 2 and 3 might present you with obsolete show files.
Check here for common troubleshooting techniques if you have trouble getting started.
Save the template as a new file
Once you’re in, you will see the following workspace:
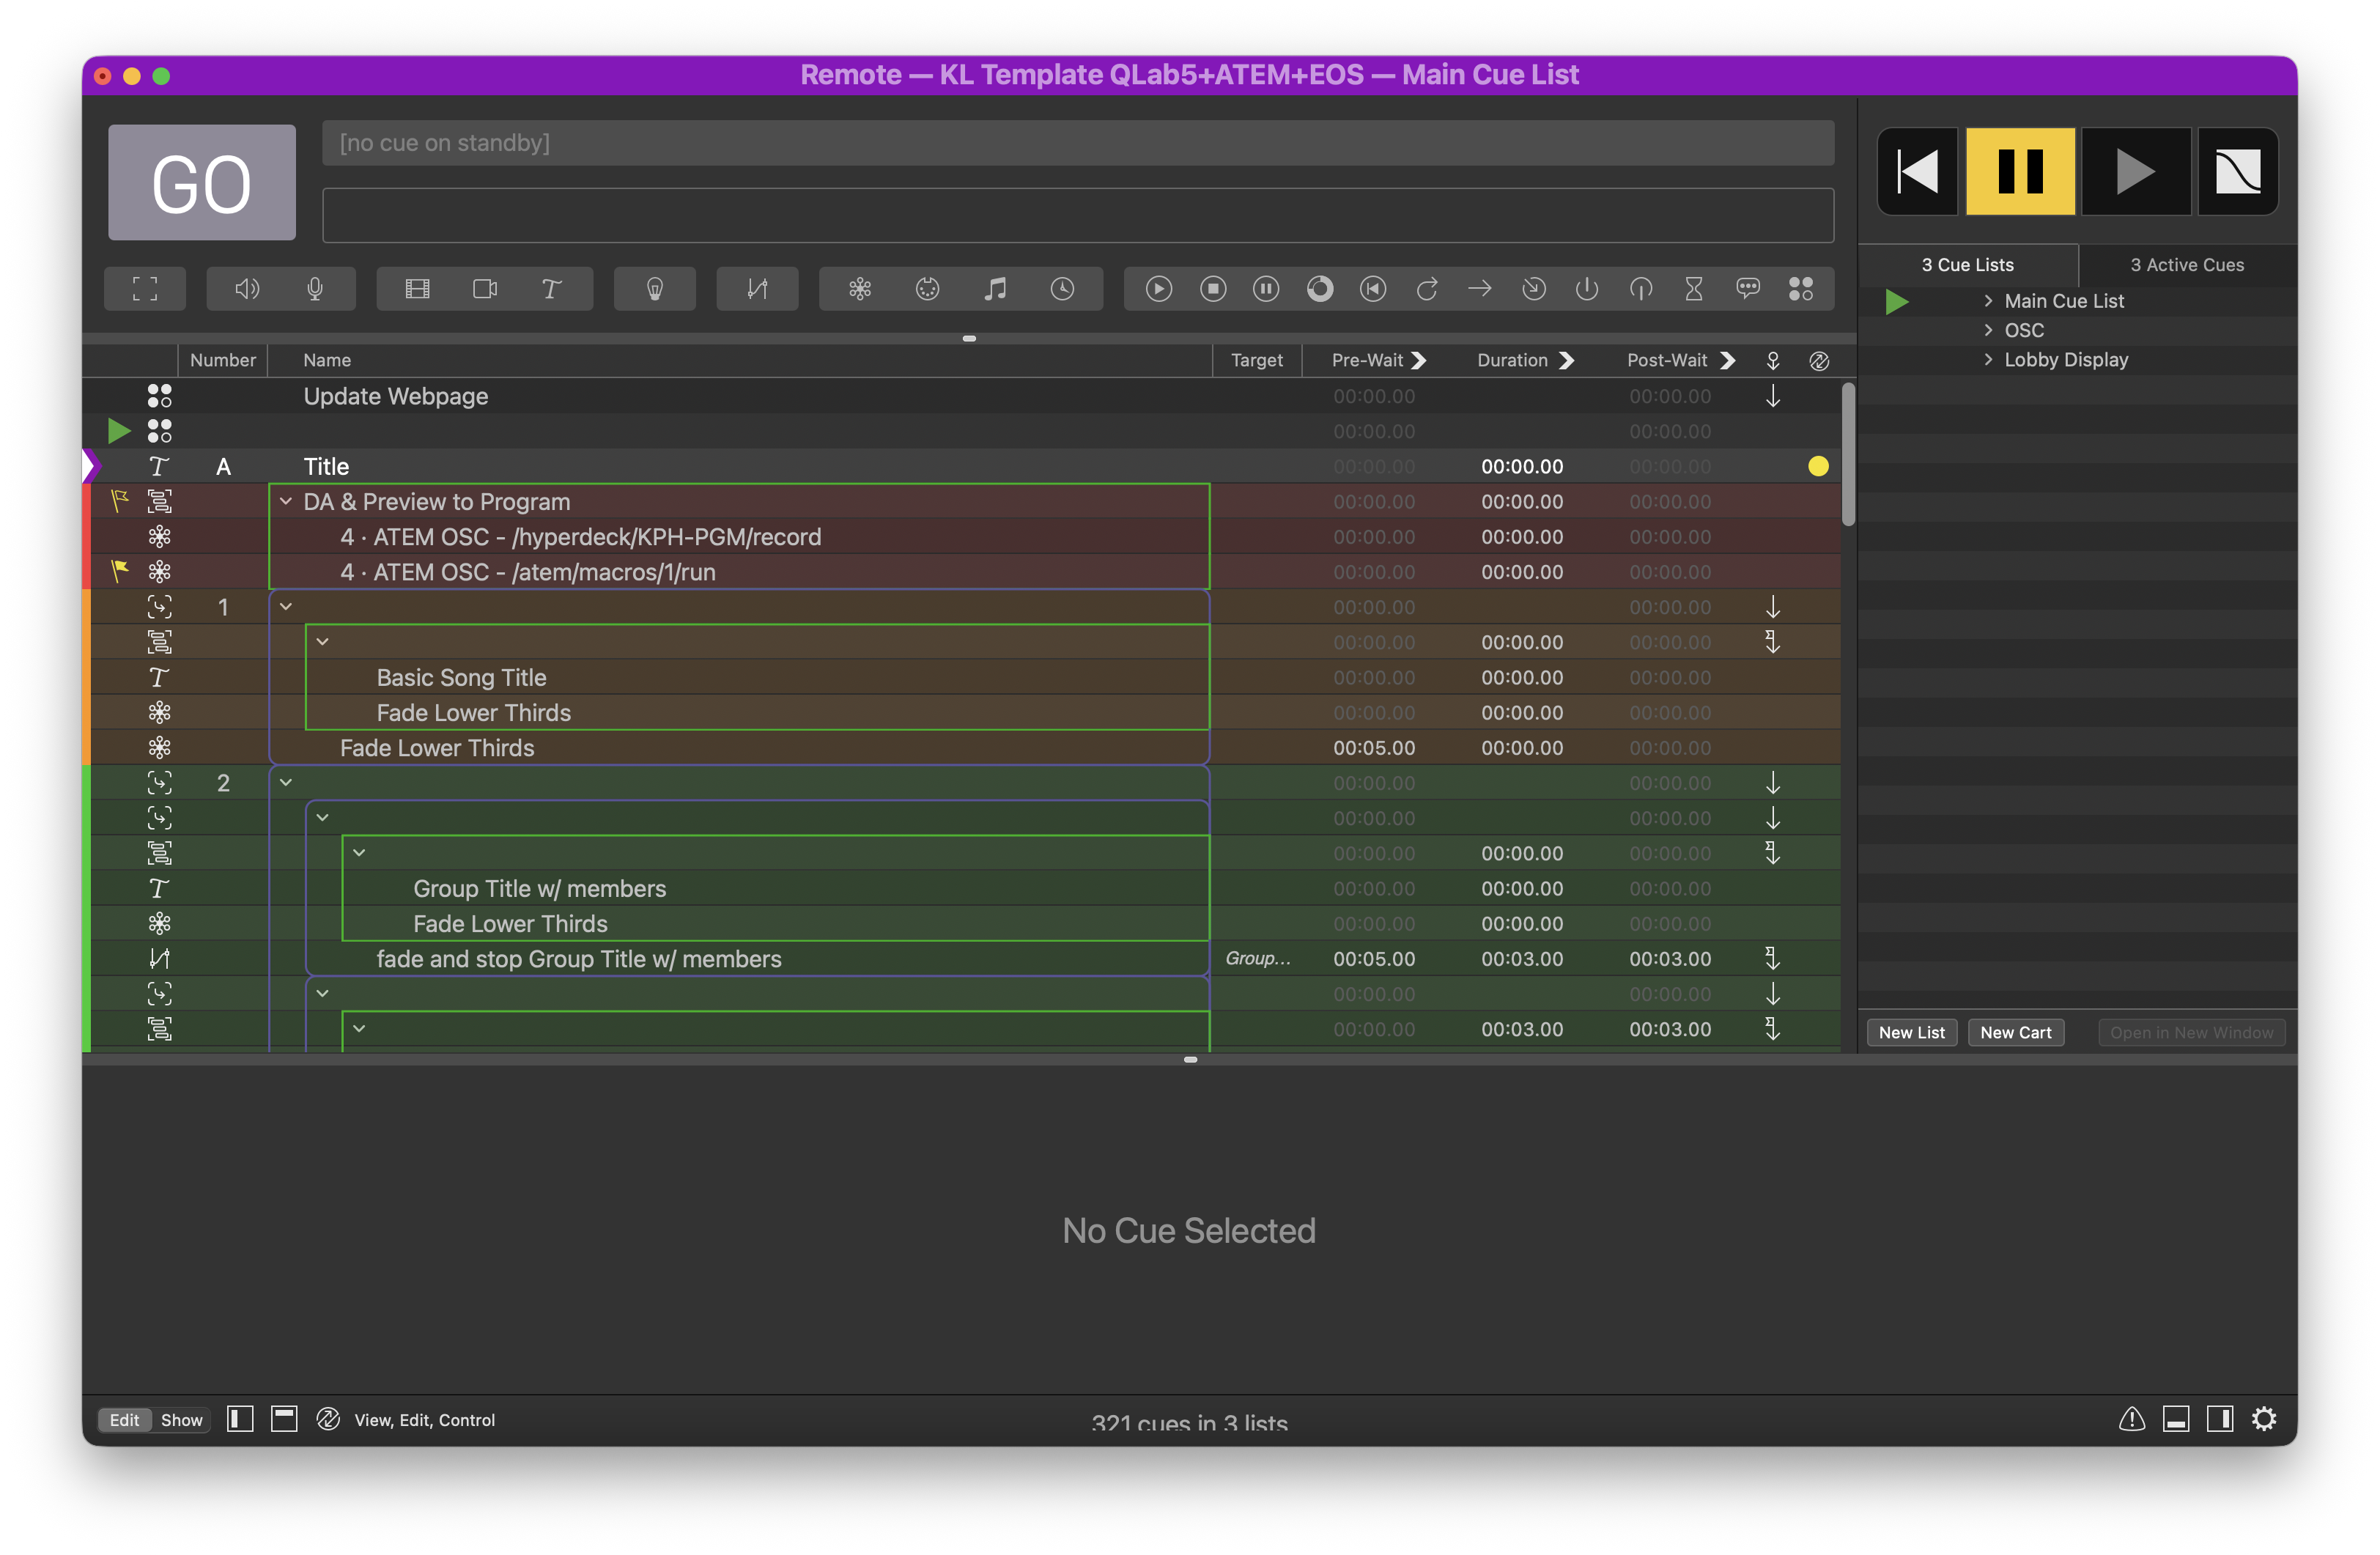
Check here if you see red X warnings. (Your app title bar won’t be purple. I remoted into the system when I wrote this, which is why it’s showing purple.)
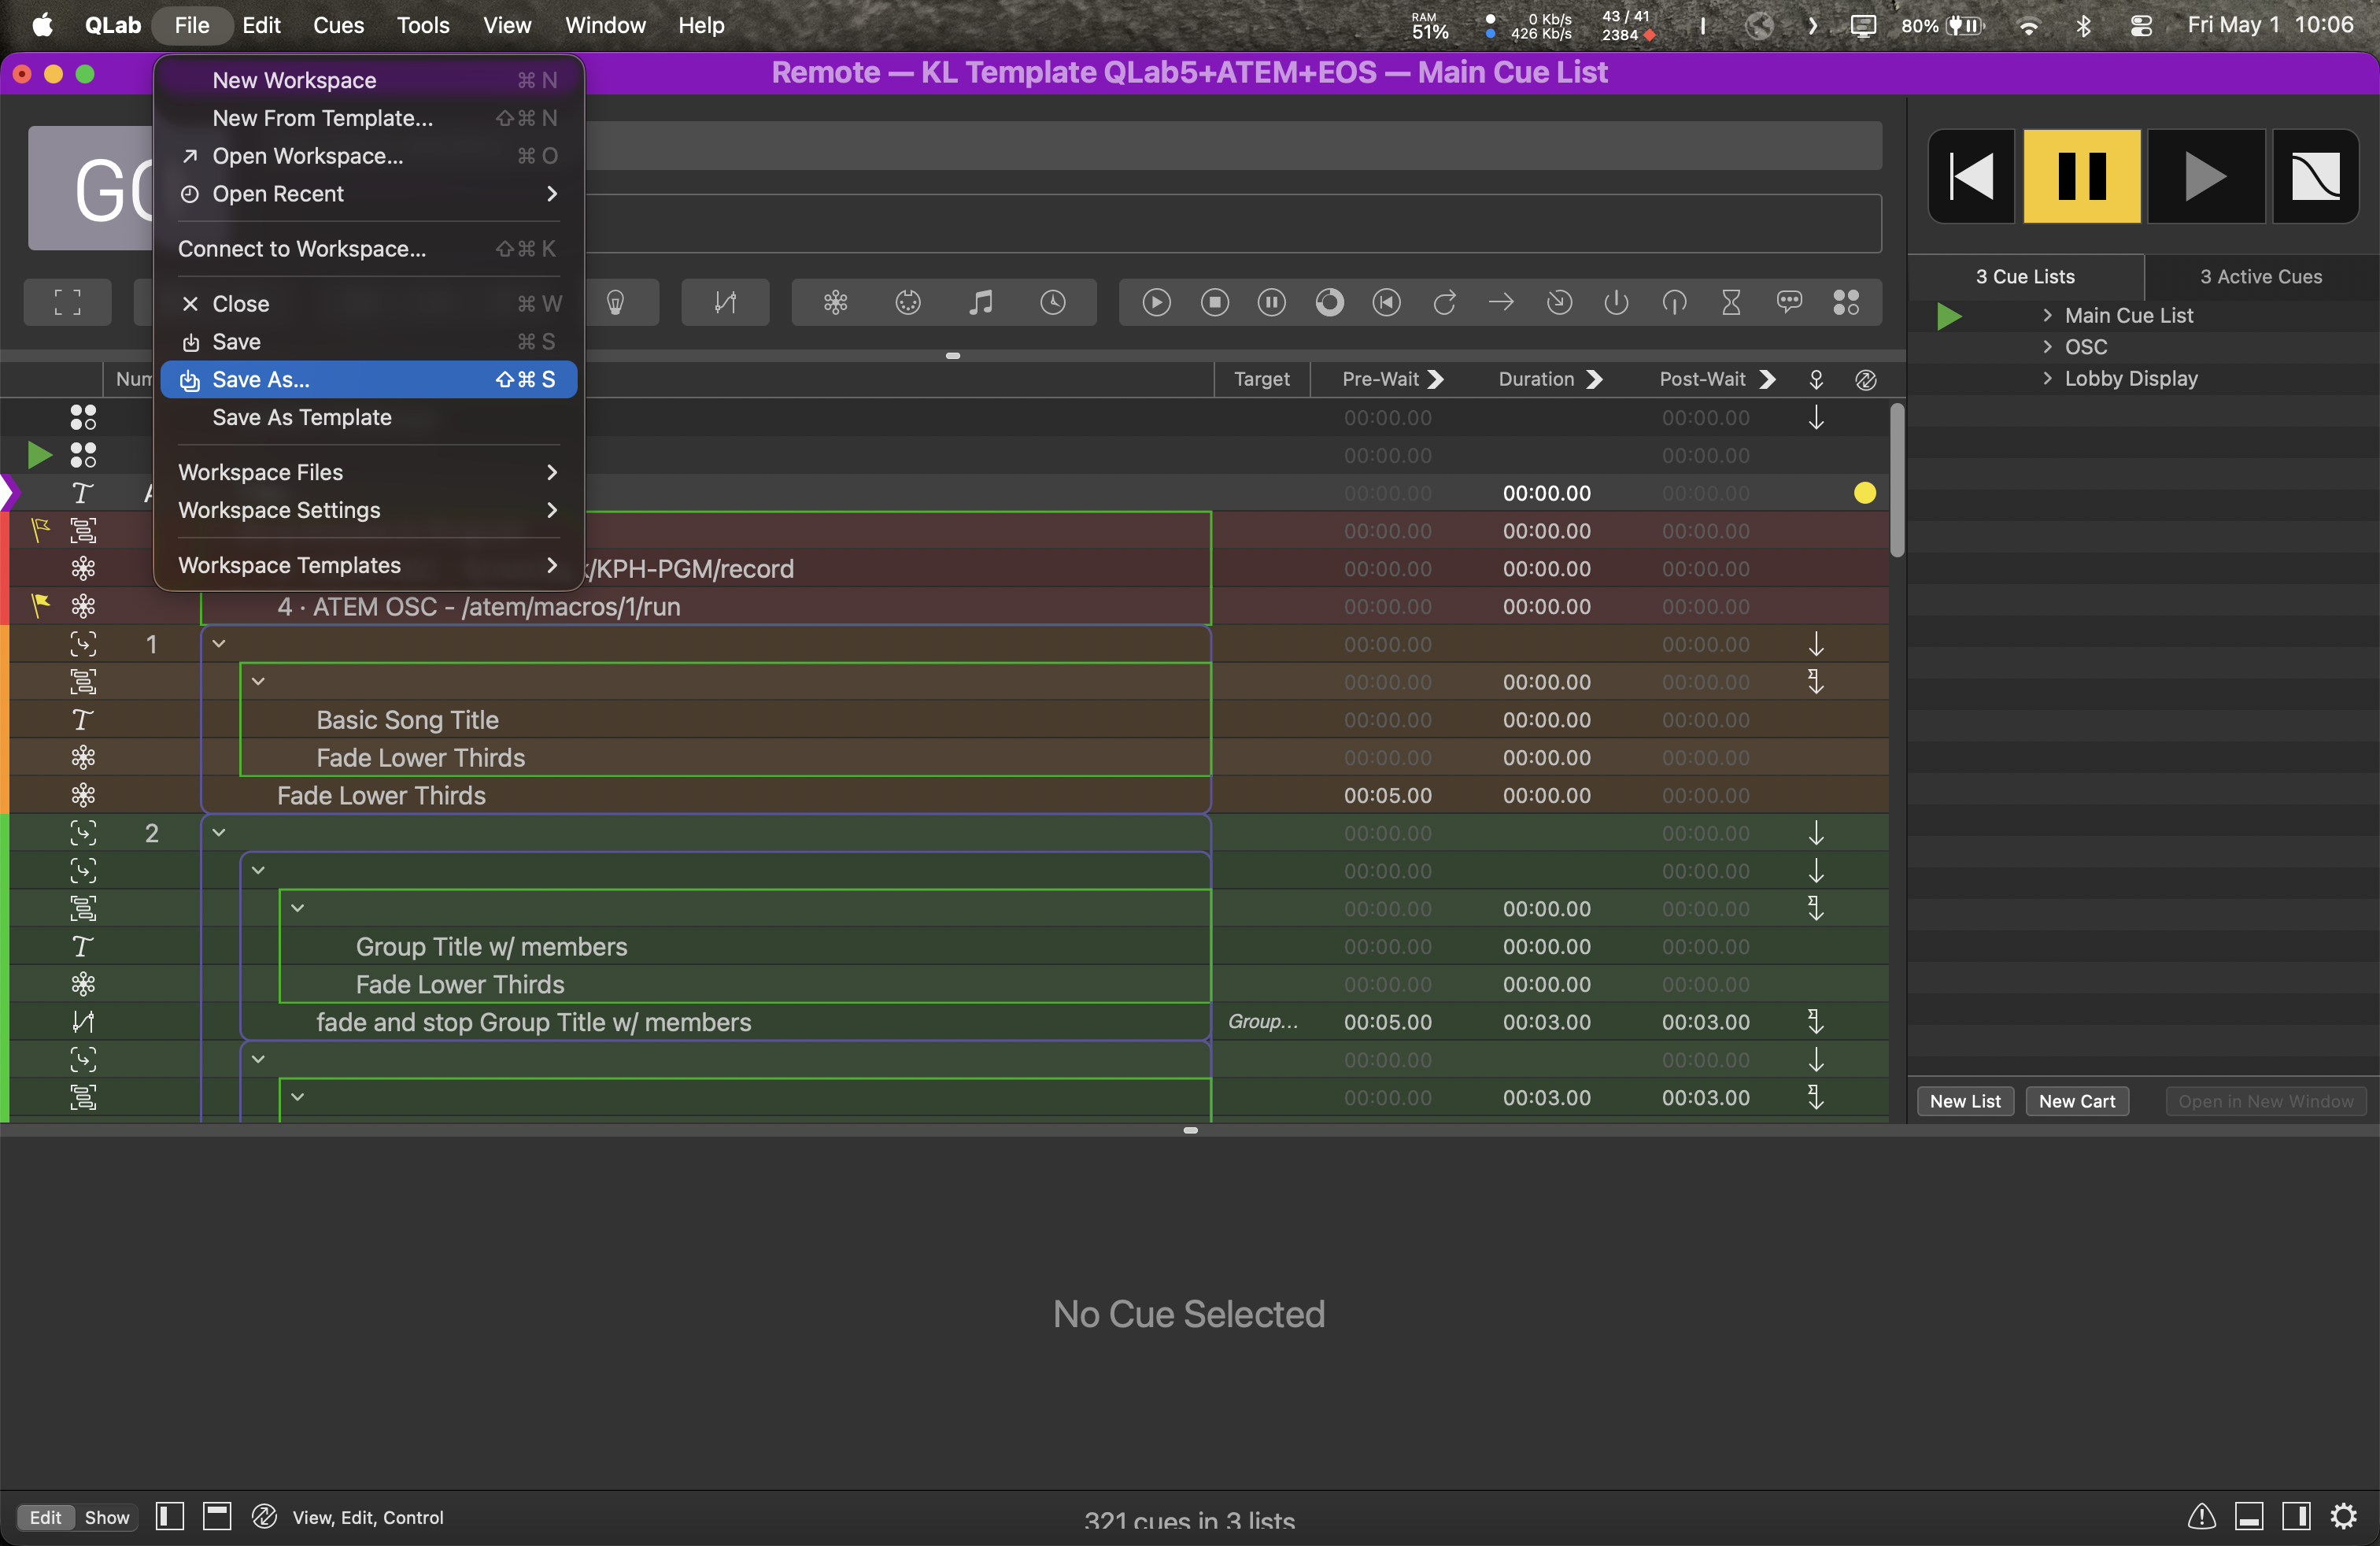
To do this, go to File and select Save As.... Alternatively, press command+shift+s.
For good practice, keep the files organized in a folder with consistent naming conventions. An example of such a folder/directory is Documents → QLab Archive → 2025-2026 → 3. S26 QLab. An example of a workspace name is 04262026_Kingston-Recital.
Edit the template
Now we’re onto actually filling in the details according to a show. We will use several examples throughout to illustrate the different scenarios you might encounter.
If you need a refresher navigating the workspace, check here. For our purposes, the part that matters to us the most is the playhead, which controls what cue is being selected/pending/on standby (highlighted in blue).
- You can click to select any cue, and that puts it in into standby.
- To play a cue, hit
spaceto play the cue on standby. - To stop cues, hit
escapeto ‘‘panic all’’ cues; this fades everything down in 1 second, making the stop seem intentional when it’s not.
Title
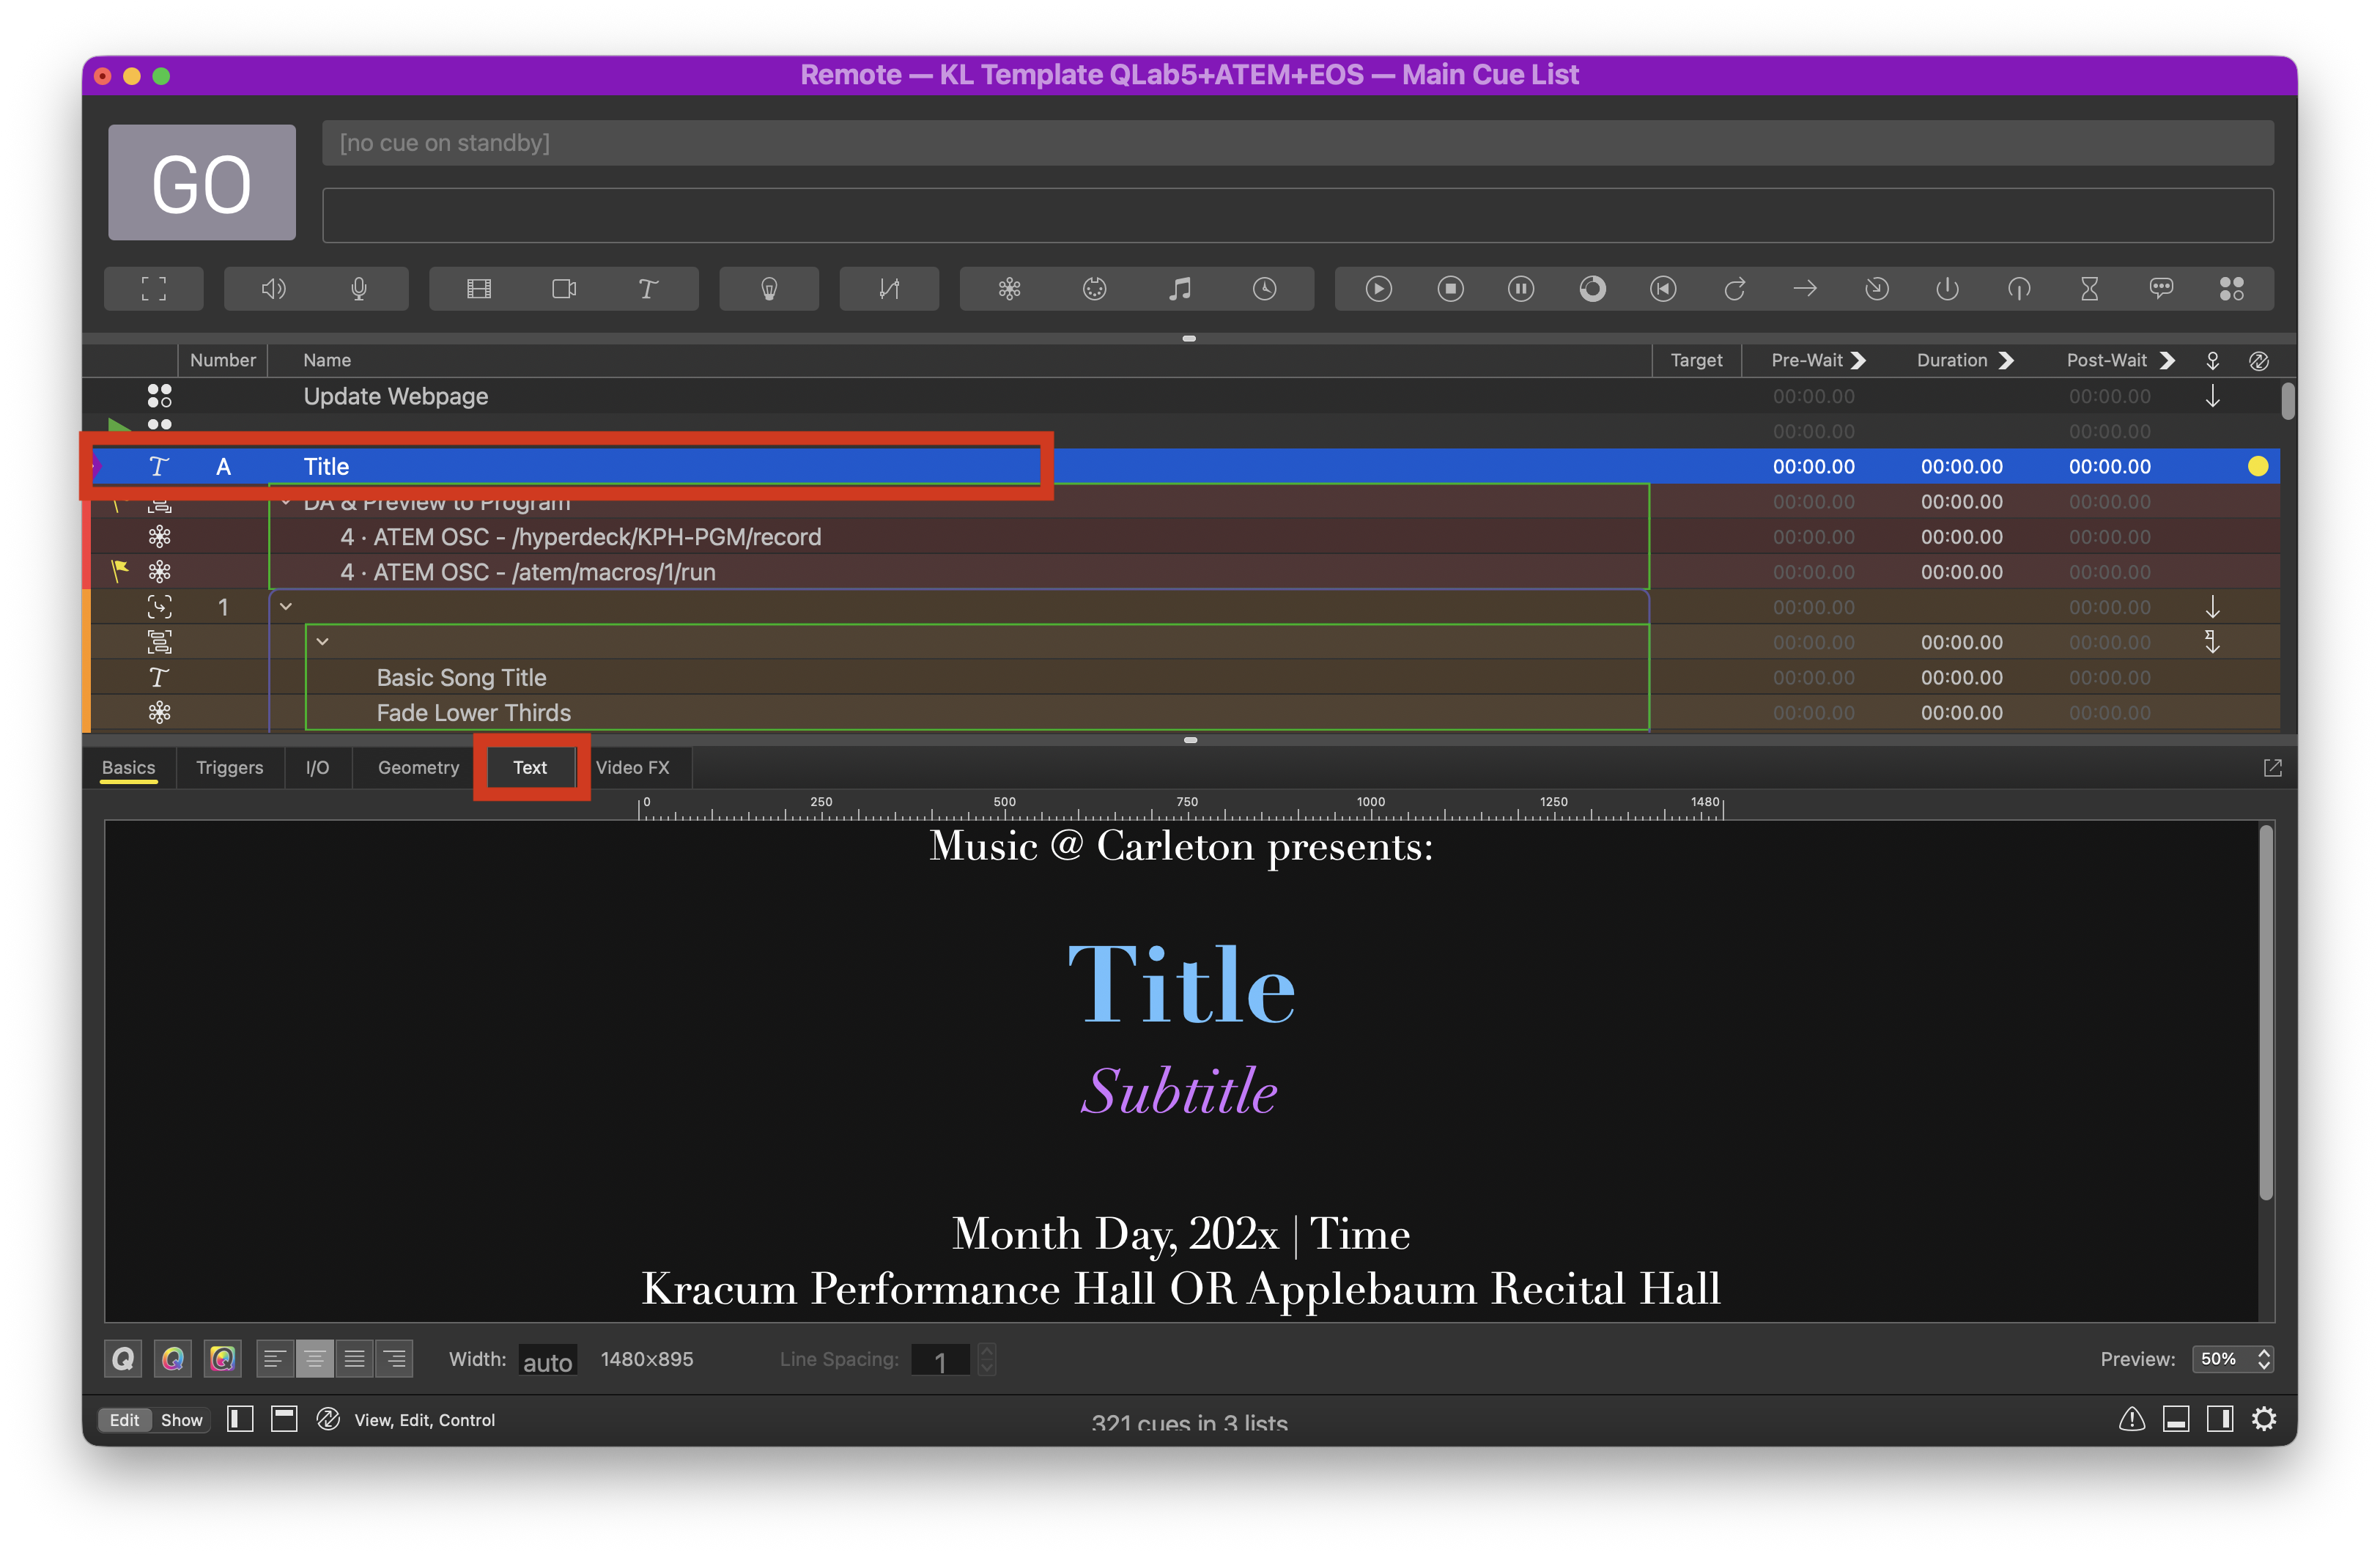
First navigate to the Text column of the Title cue (cue name: Title; cue number: A). This is where you enter the appropriate information. Notice the  icon at the top of the playhead. This indicates that it is a text cue, which displays its content as a static png file onto the designated output.
If the template is set up correctly, you should see the static image on input 7 of the ATEM Multiview. Check here if you’re seeing otherwise. (Your multiview will not look like this. I’m using the multiview here to show you both the QLab progress bars and the program output.)
Take a look at this following program.
Usually, there’s just enough information to fill out the titles and subtitles (optional). In this case, we have too much information, so we have to make a decision. Typically, the title is the name of the concert, i.e., Orchestra Concert, Jazz Area Concert, etc.; the subtitle consists of the directors, soloists, etc. Here, we not only have the event name—Fall 2025 Concert Collaboration—but also the different ensembles and their respective directors. In this case, we omit the directors. The result would look something like this:
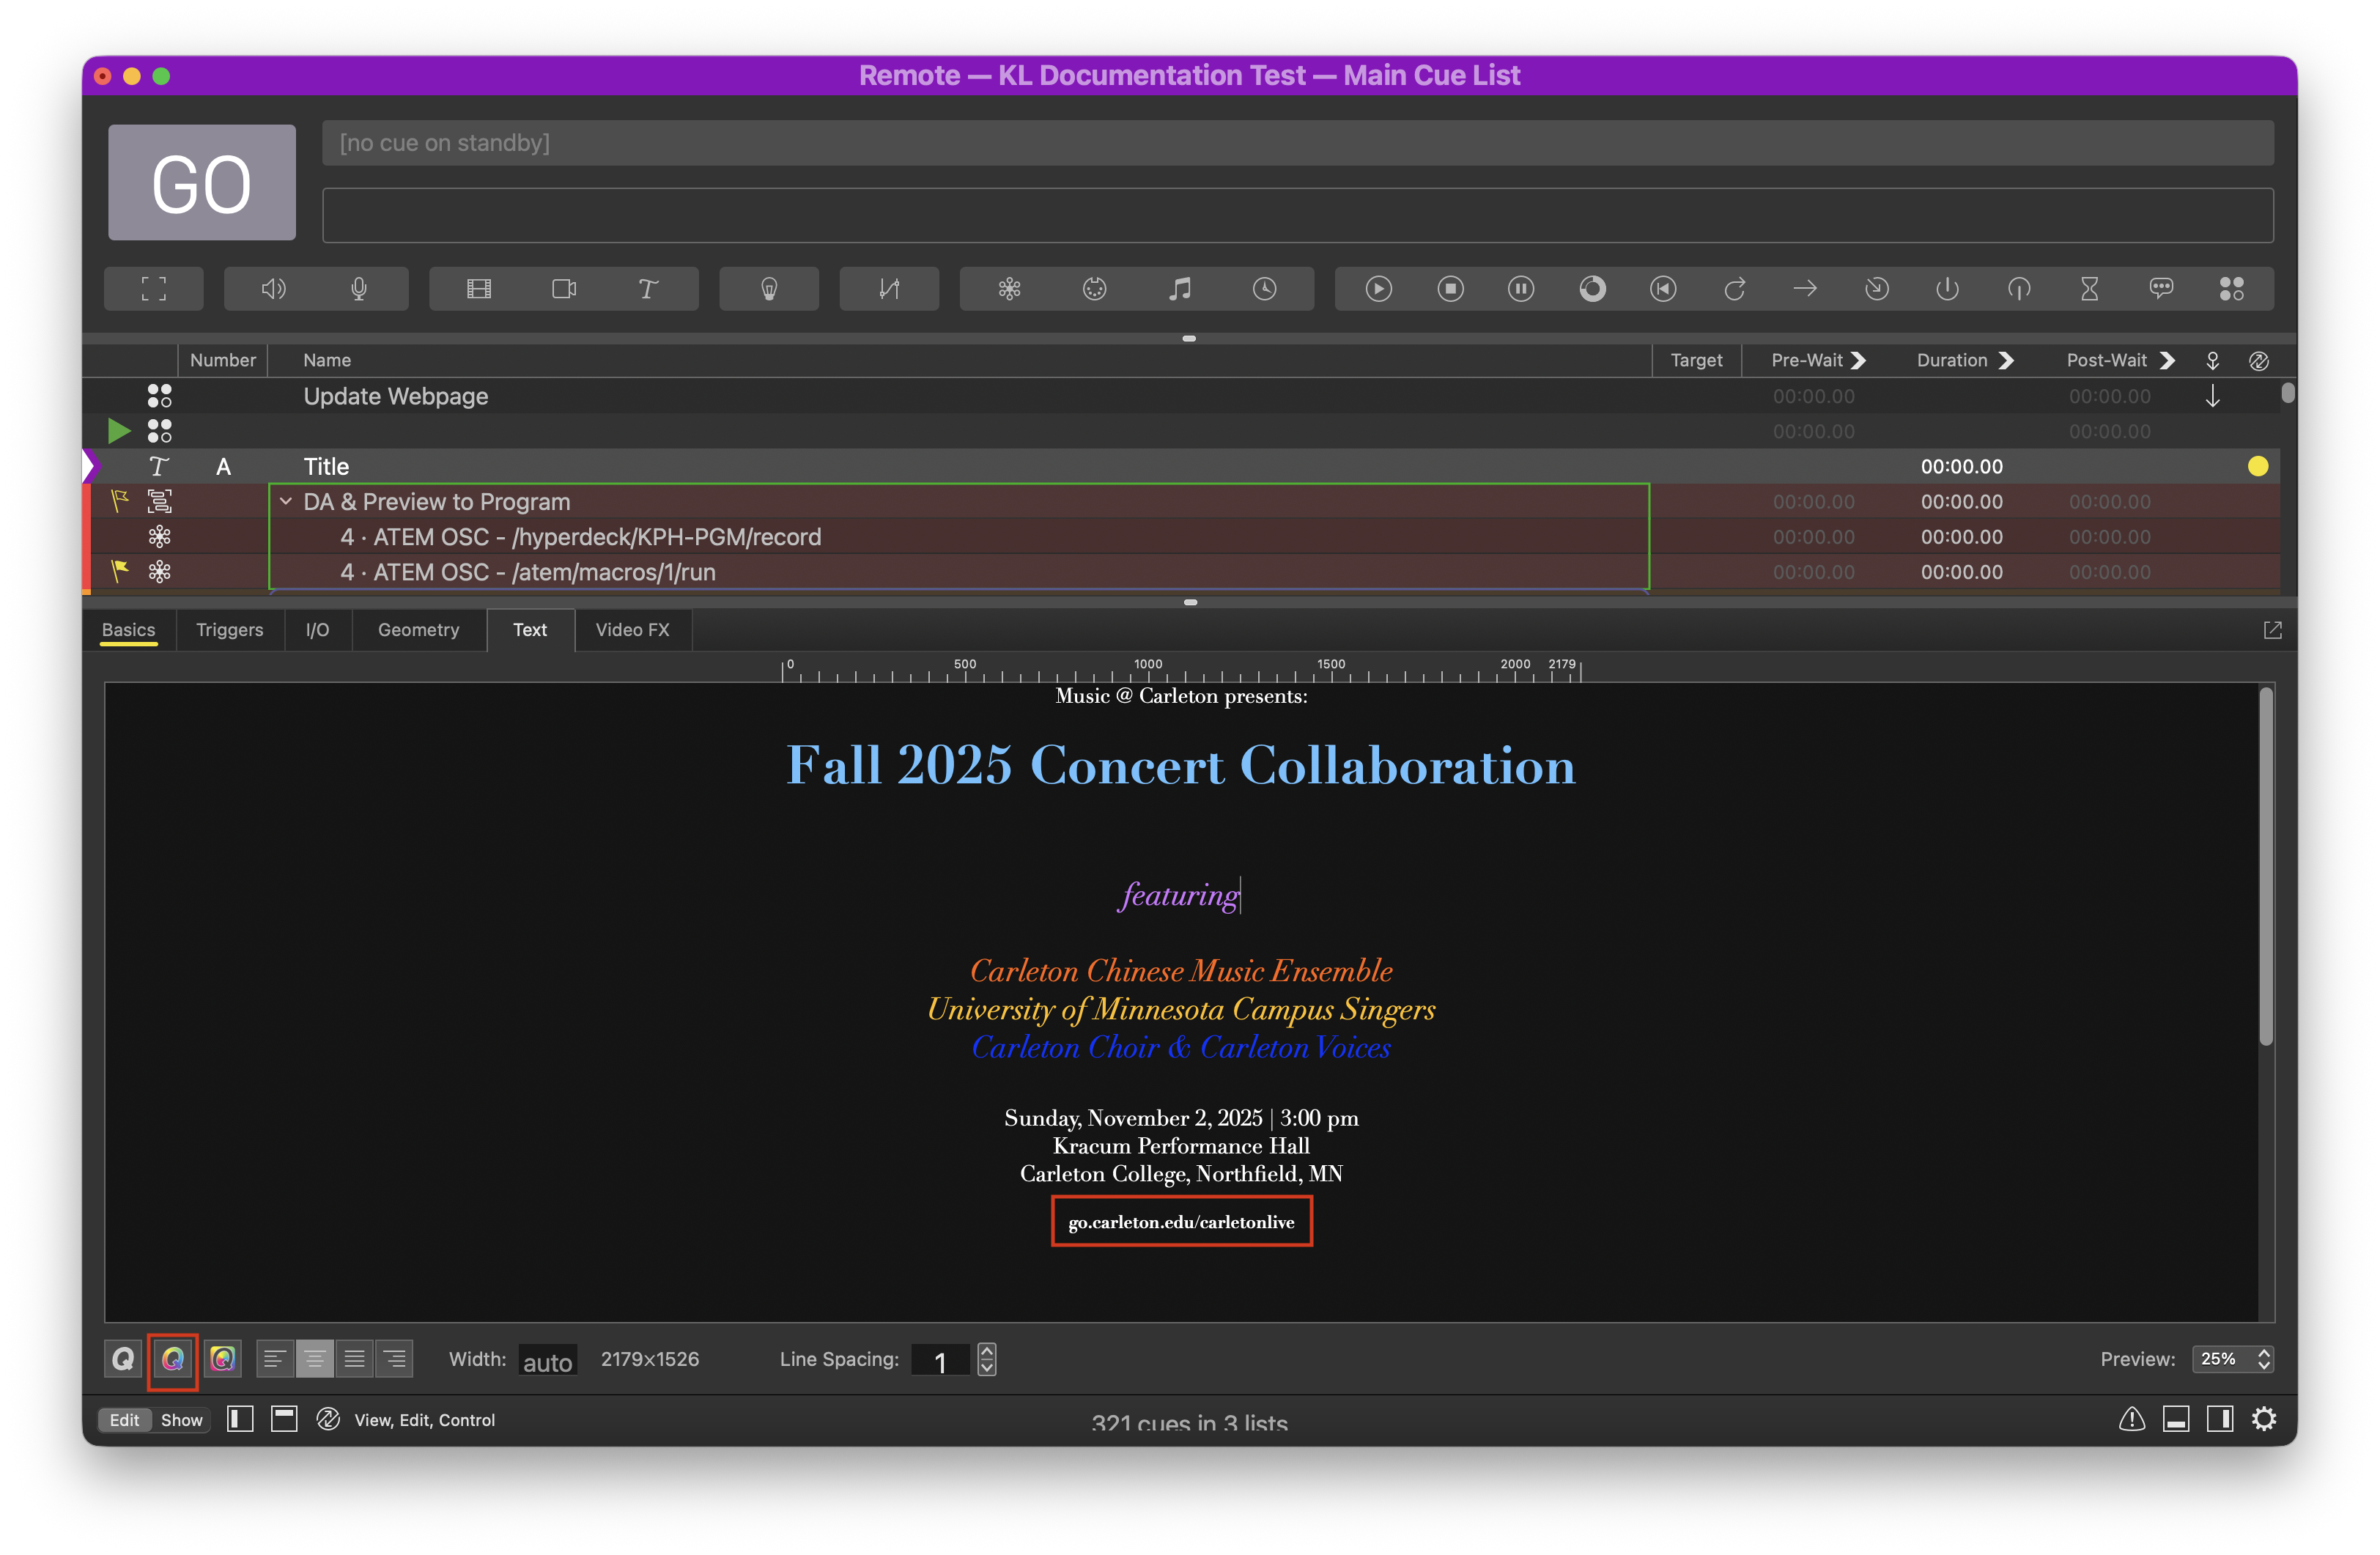
You can select the text and change its color however you desire using the text color panel. When we livestream an event, leave the Carleton Livestream URL go.carleton.edu/carletonlive in. Otherwise, delete the link. Contact Alexi Carlson if you don’t know whether the event is being streamed or not.
Scale of the entire cue in the Geometry tab. You can also adjust the Translation and Rotation of cues, if the properties apply. All these parameters are ‘‘draggable’’, so you don’t have to enter the values manually.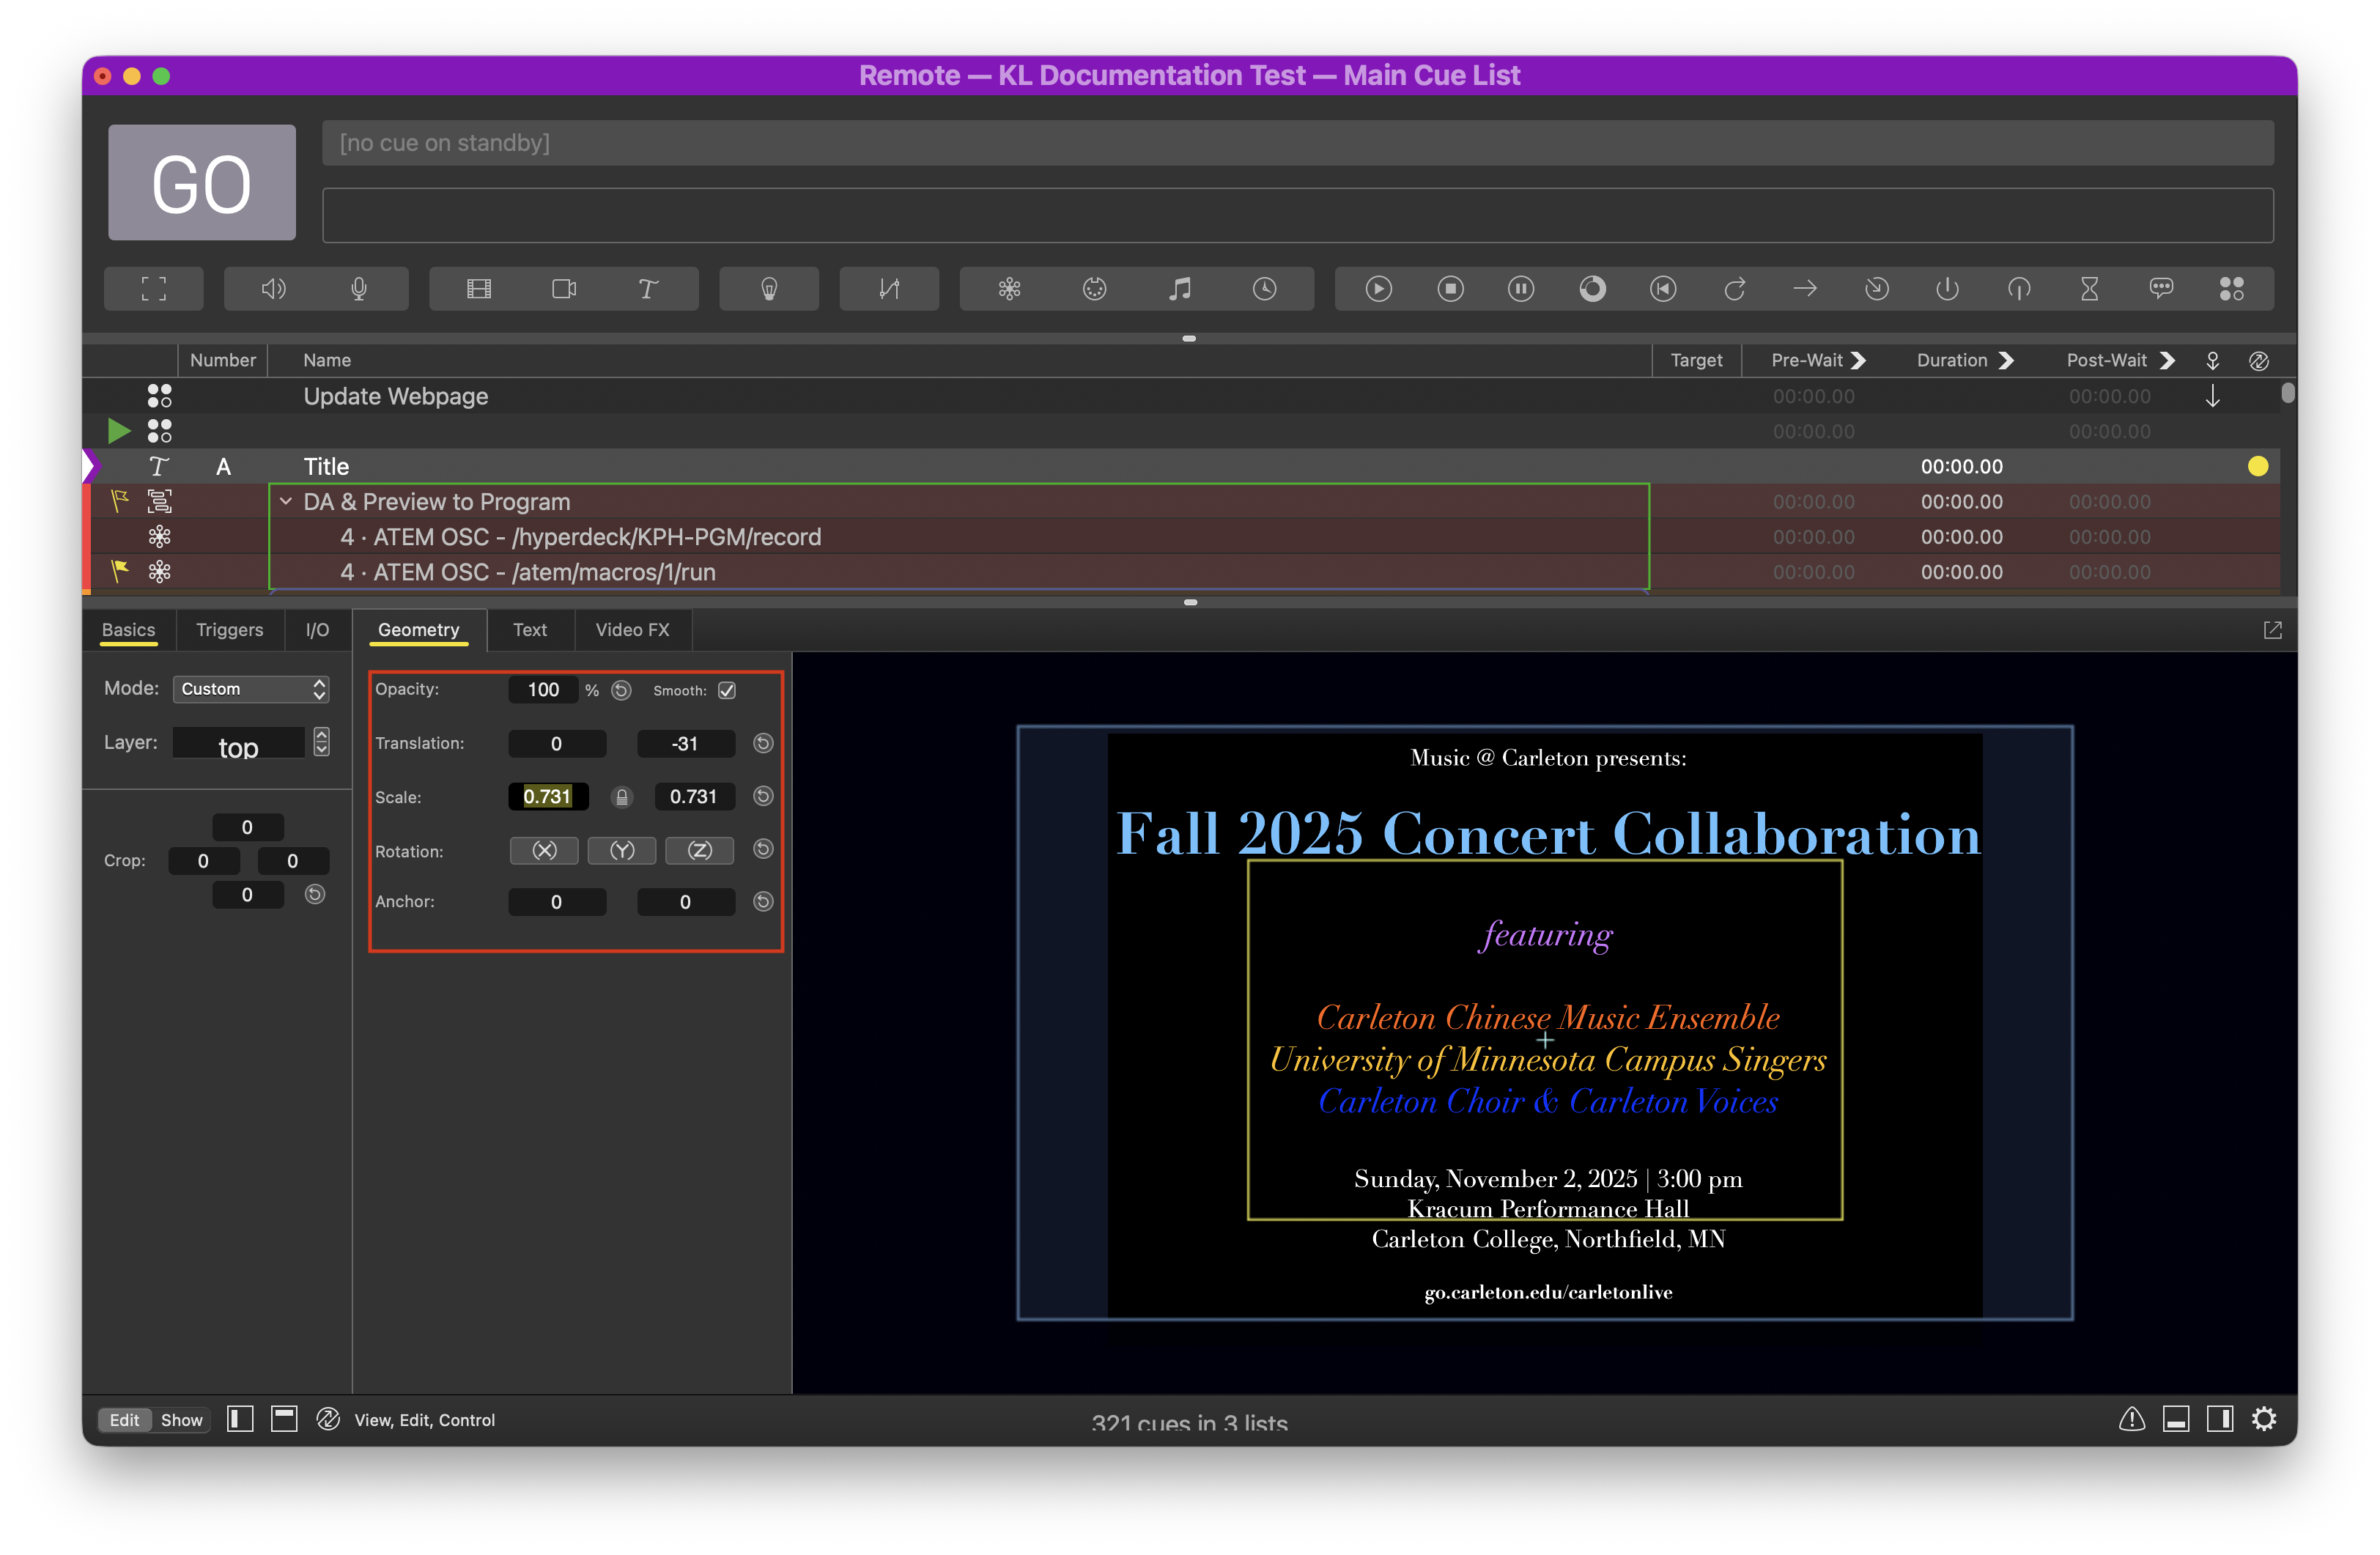
Lower-Thirds
We want to give credits to all the performers that make events possible. We use lower thirds to indicate the performers, the piece they’re performing, the composer of the piece, and any group name if applicable. There are a few different types of lower thirds, and we use them according to which scenario we encounter:
1. When there’s only one artist performing the concert, or when the artist or group has been introduced at a previous lower-third.
Typically, when there’s only one artist performing, their name is introduced in the title or the subtitle. We avoid redundancy here by only introducing the piece they perform and the composer of that piece. (Similarly for when a group has been introduced.) Take a look at the following program.
The only two performers Susie Park and Timothy Lovelace are both introduced in the titles, so we use cue 1 as a template here. To edit a lower third, as it is the case with all other cues in this template, the only type of cues you need to edit is a Text cue. Go to the Text tab of the text cue, and enter the piece information.
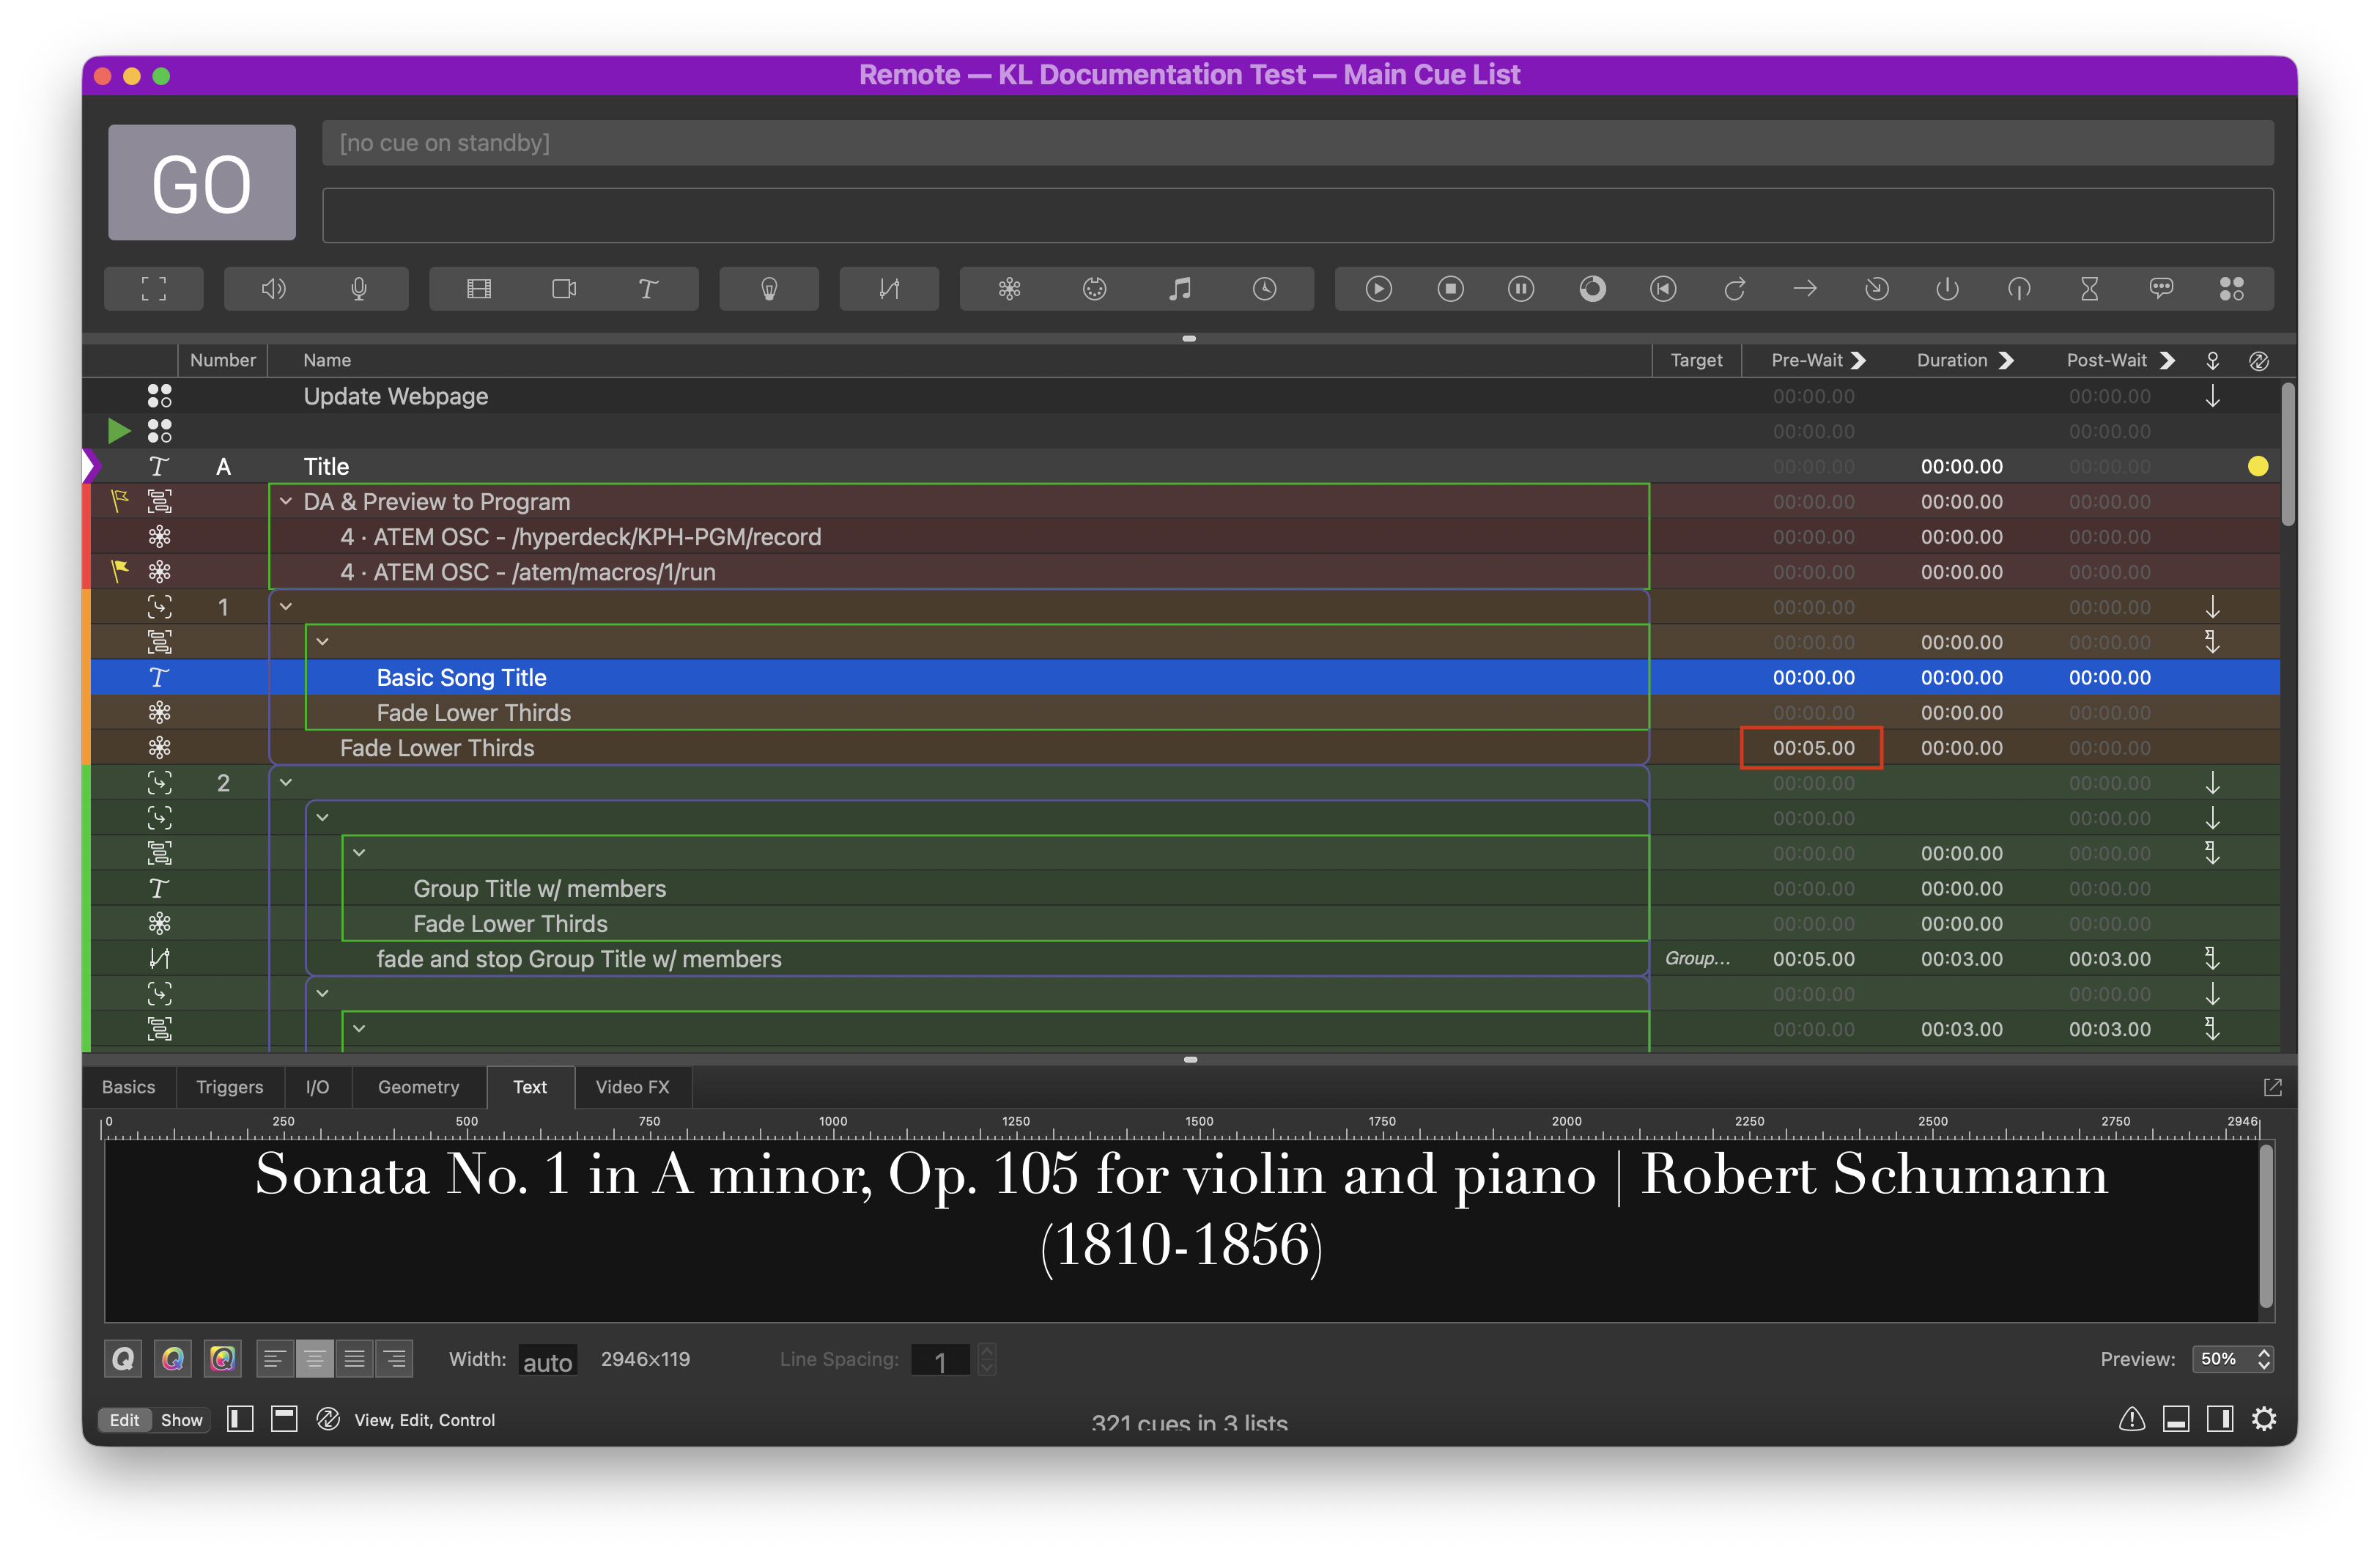
You will note that I also omitted the movements. This is because the sonata only contains three movements. The real-estate of a lower-third limits how much information we can put out. We only include movements when not all movements are being played. For instance, if an artist is playing only the second movement, we would write Sonata ...., Movt. II. When there are multiple movements, we use a dash to connect them: ..., Movt. I-III.
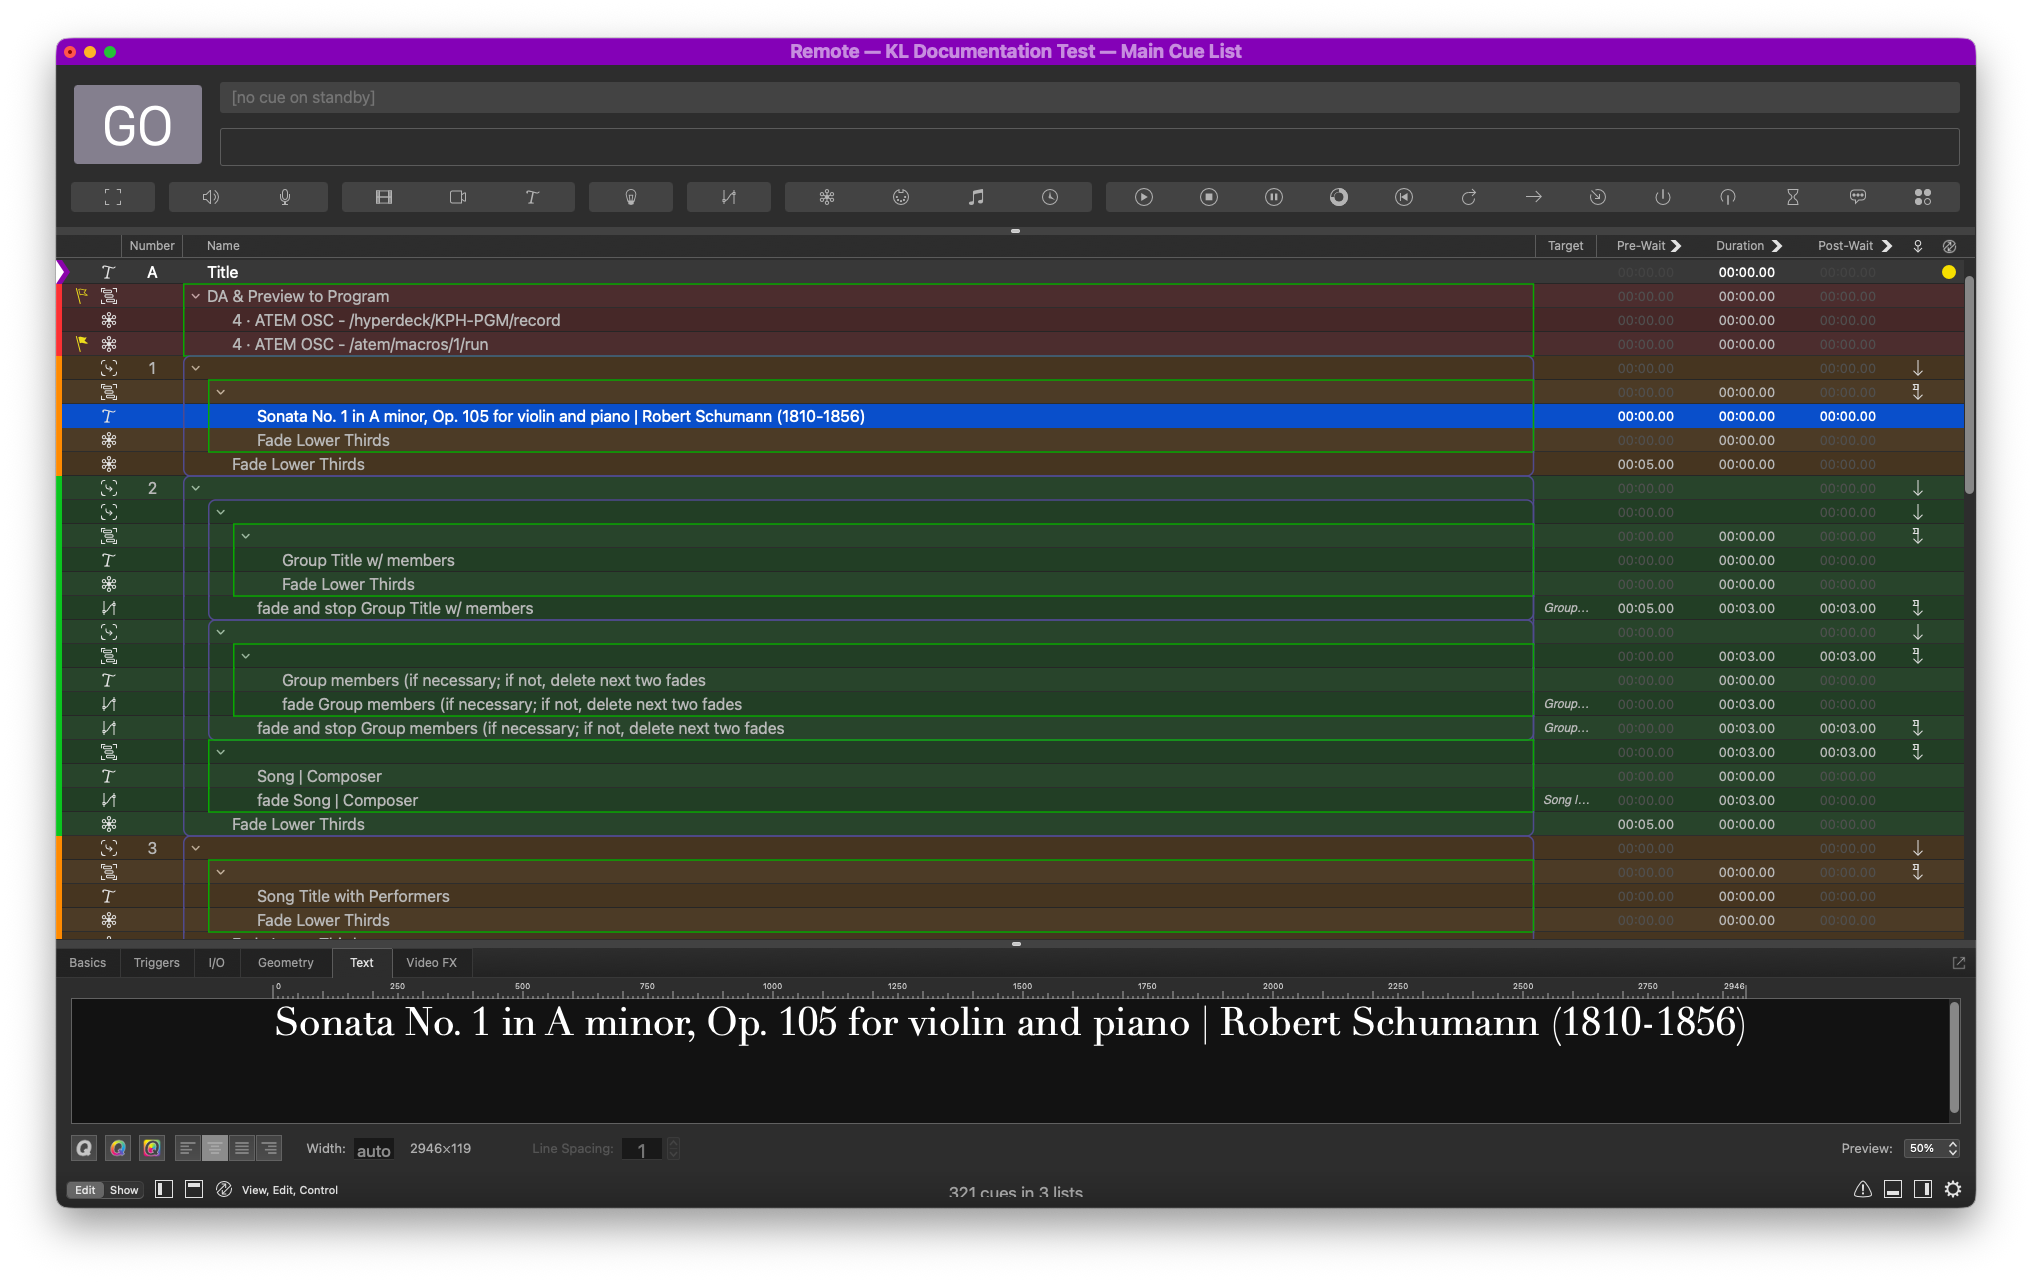
Name tab or use the keyboard shortcut Q. The keyboard shortcut for renumbering is N. Cues whose cue name is empty will display its text content or filename. To play this lower-third, you want to go to the top of the group cue, i.e., Cue 1, and hit space. From there, you don’t need to do anything. The automation scripts will bring up the Downstream Keys in ATEM and the text cue you just created and take them out after a specified amount of time, i.e., 5 seconds.
Geometry or play the cue before show starts to make sure there’s no overflow. 2. When there is a named group or a large group performing.
We always introduce the group before they perform their first piece. When the group is large enough that we can’t fit them into a single lower-third, or when the group has a group name, we use the second template. When a group is performing multiple pieces, use Cue 2 to introduce the group and the first piece. For brevity, use Cue 1 for the remaining pieces until a different group performs or when there’s a soloist to highlight. Let’s see this in action. Take a look at this program again. We want to do the lower-thirds for the first piece performed by Carleton Voices, i.e., Hey Harmonika.
- Group Titles
Since we didn’t highlight the directors in the subtitles, we put the directors here. So the first text cue under Cue 2 will be the following. We use | as the delimiter between two performers; you don’t need a delimiter at the end of a line. This first text cue will always contain the group title (and the director, if applicable).
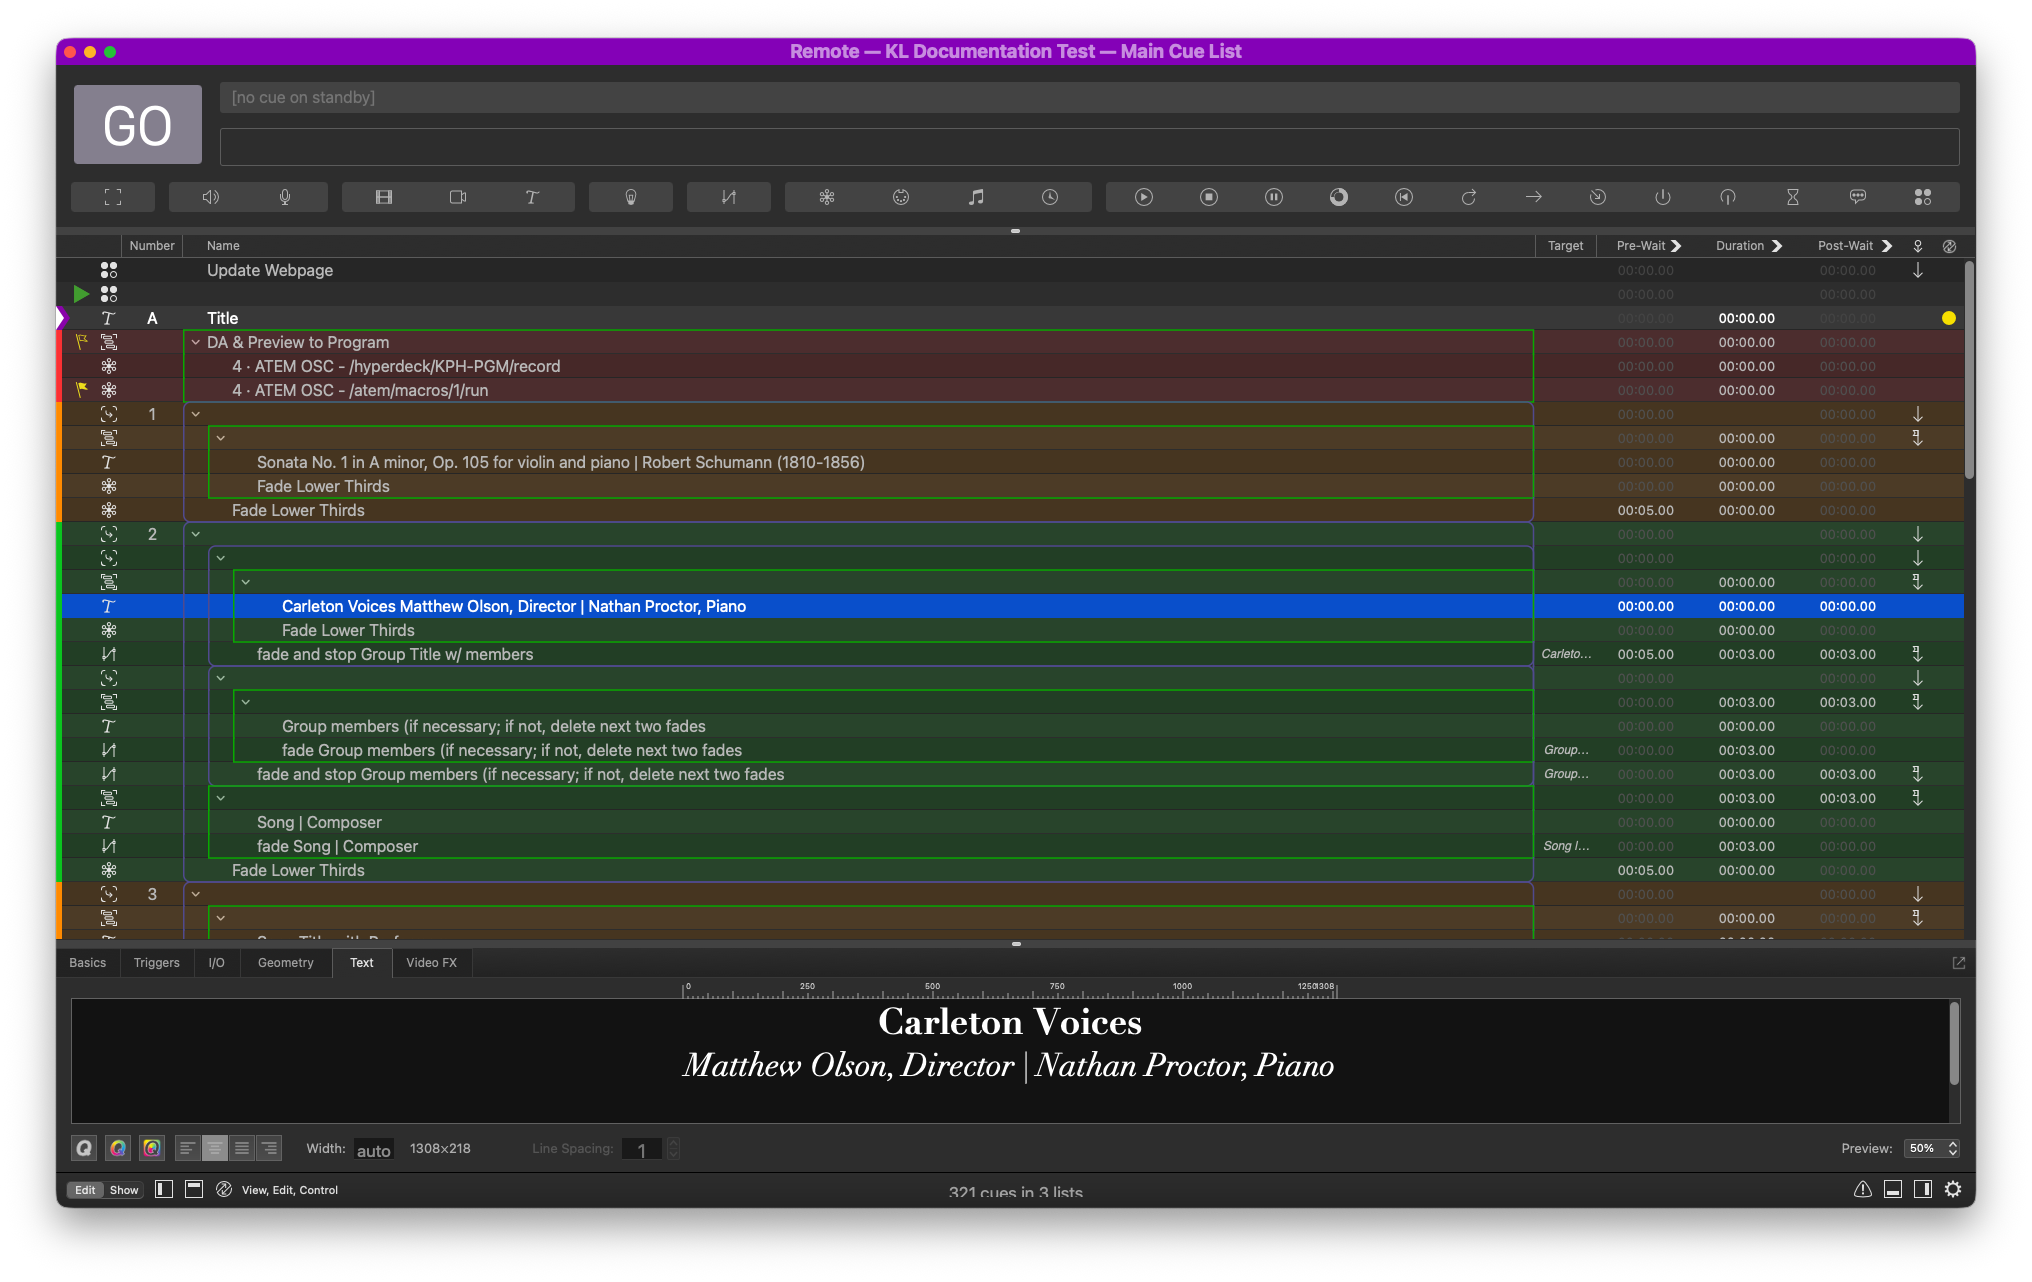
- Group Members
The second text cue is where we fill in the group members or the soloists. For a large ensemble like choir, it is usually infeasible to list all members. In this case, we only highlight the soloists.
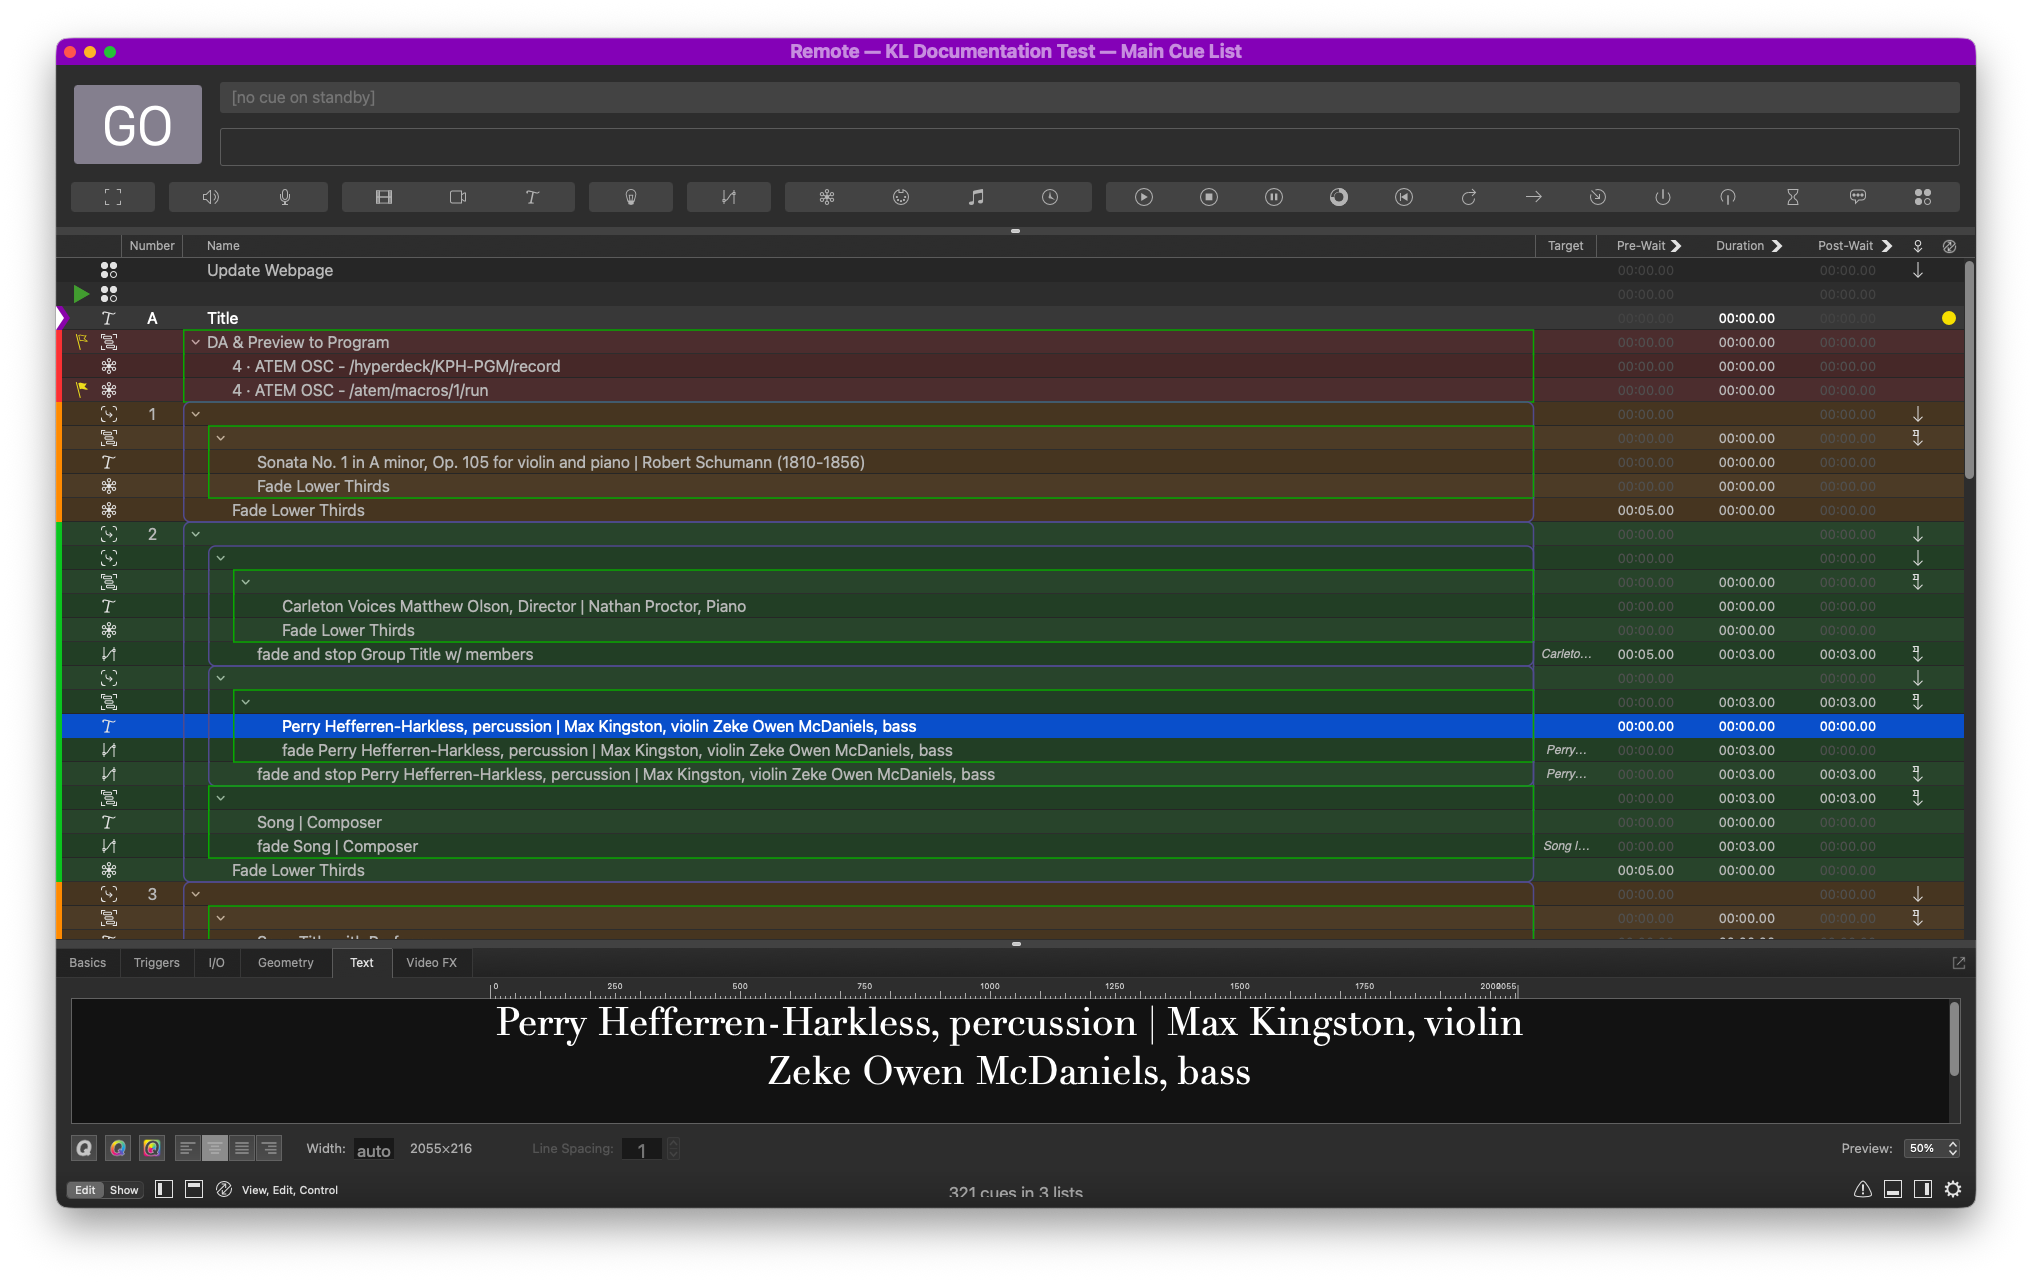
- There are a few scenarios where you don’t need this second group of cues.
- If there are no soloists, you can delete the second group cue.
- If there are too many people in the ensemble to list completely, my advice is to not list anyone at all; in this case, you can also delete the second group cue.
- If there are very few soloists (1-4 artists) that you think you can fit under the first text cue, go ahead and do that and delete the second group cue.
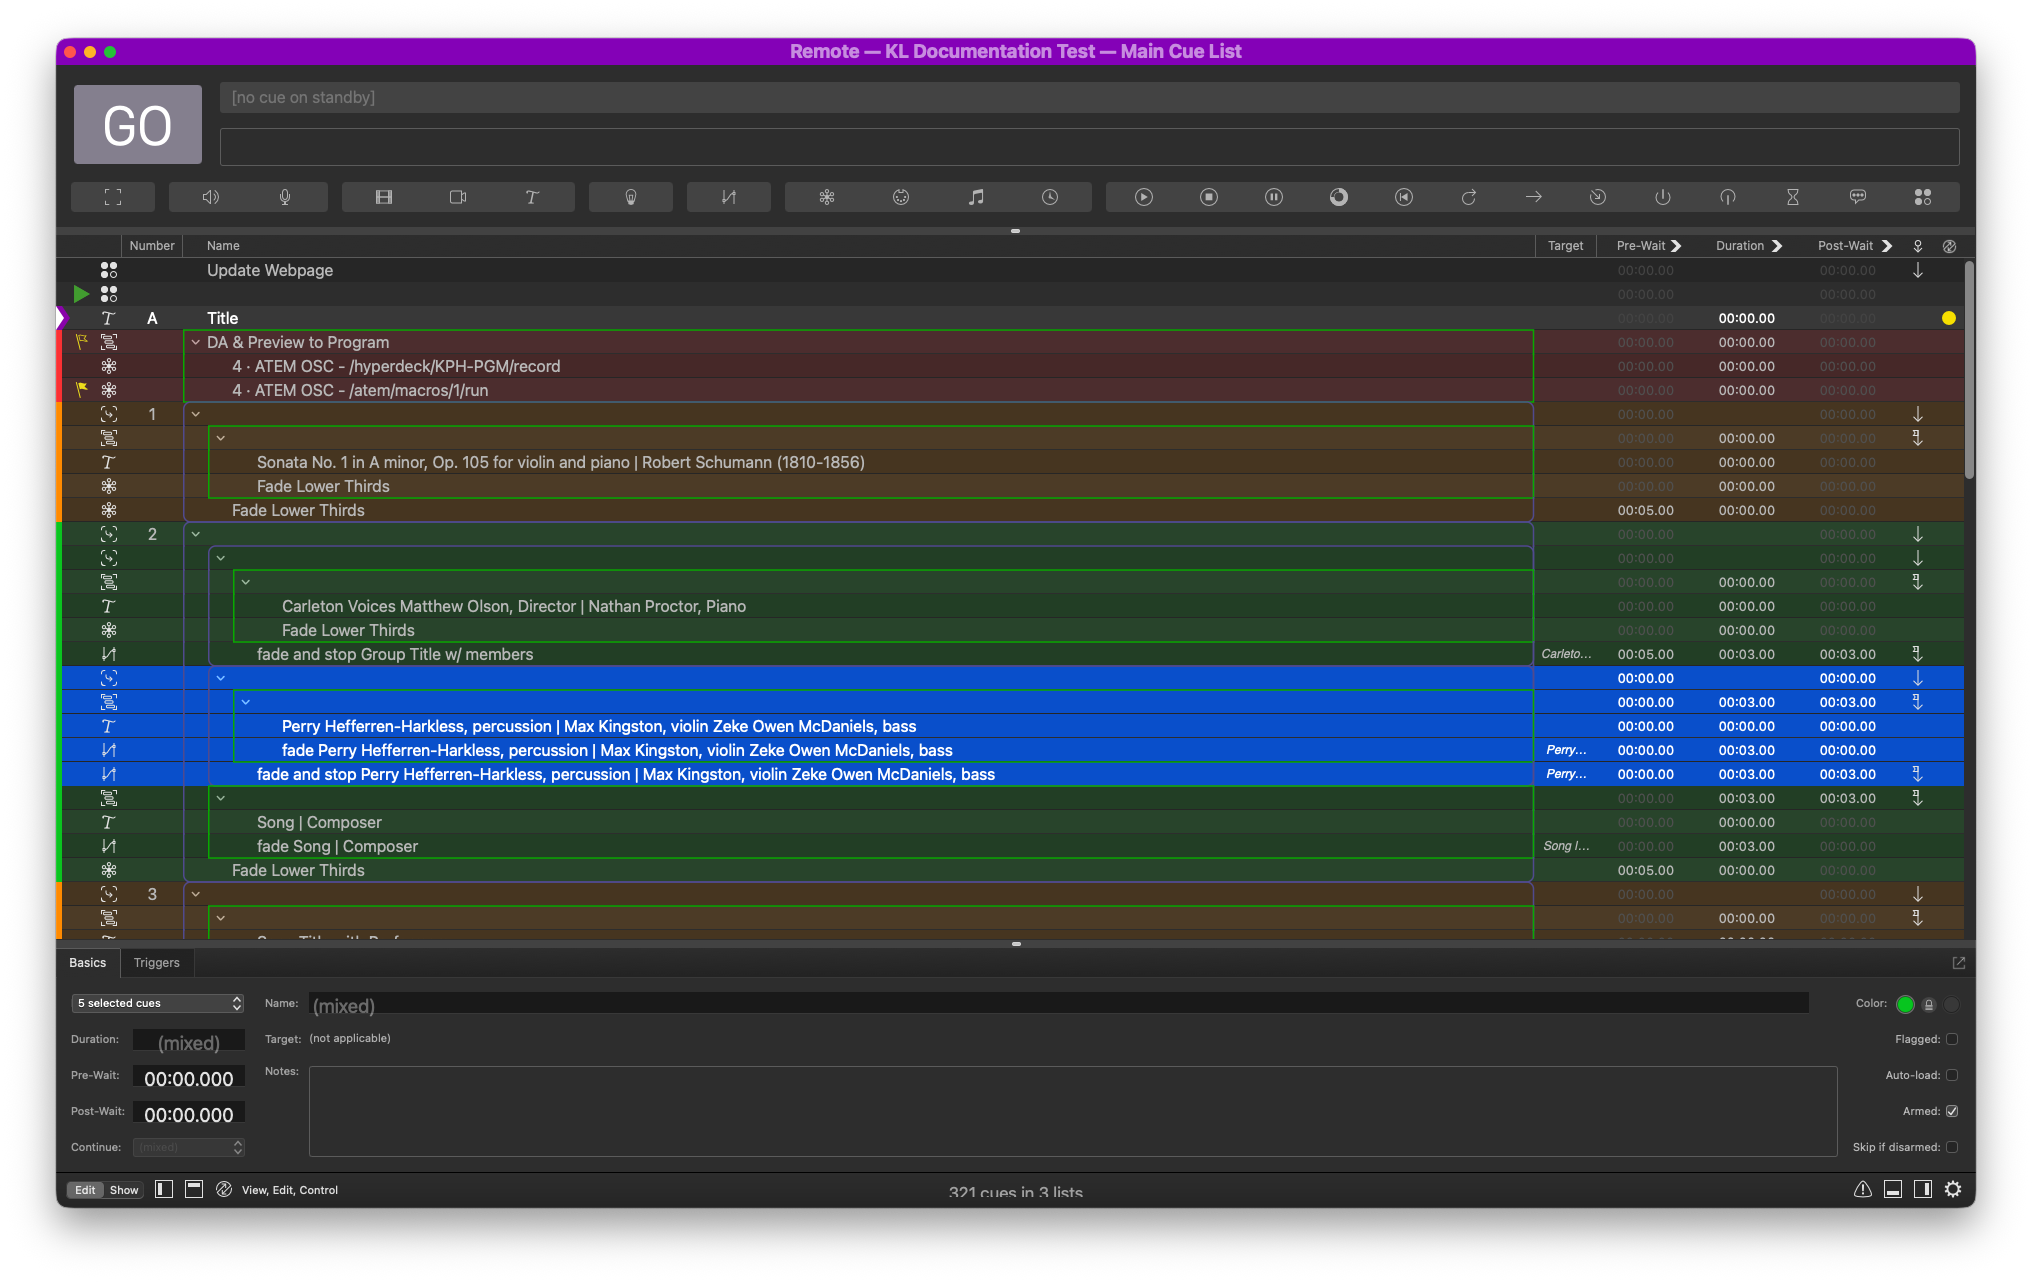
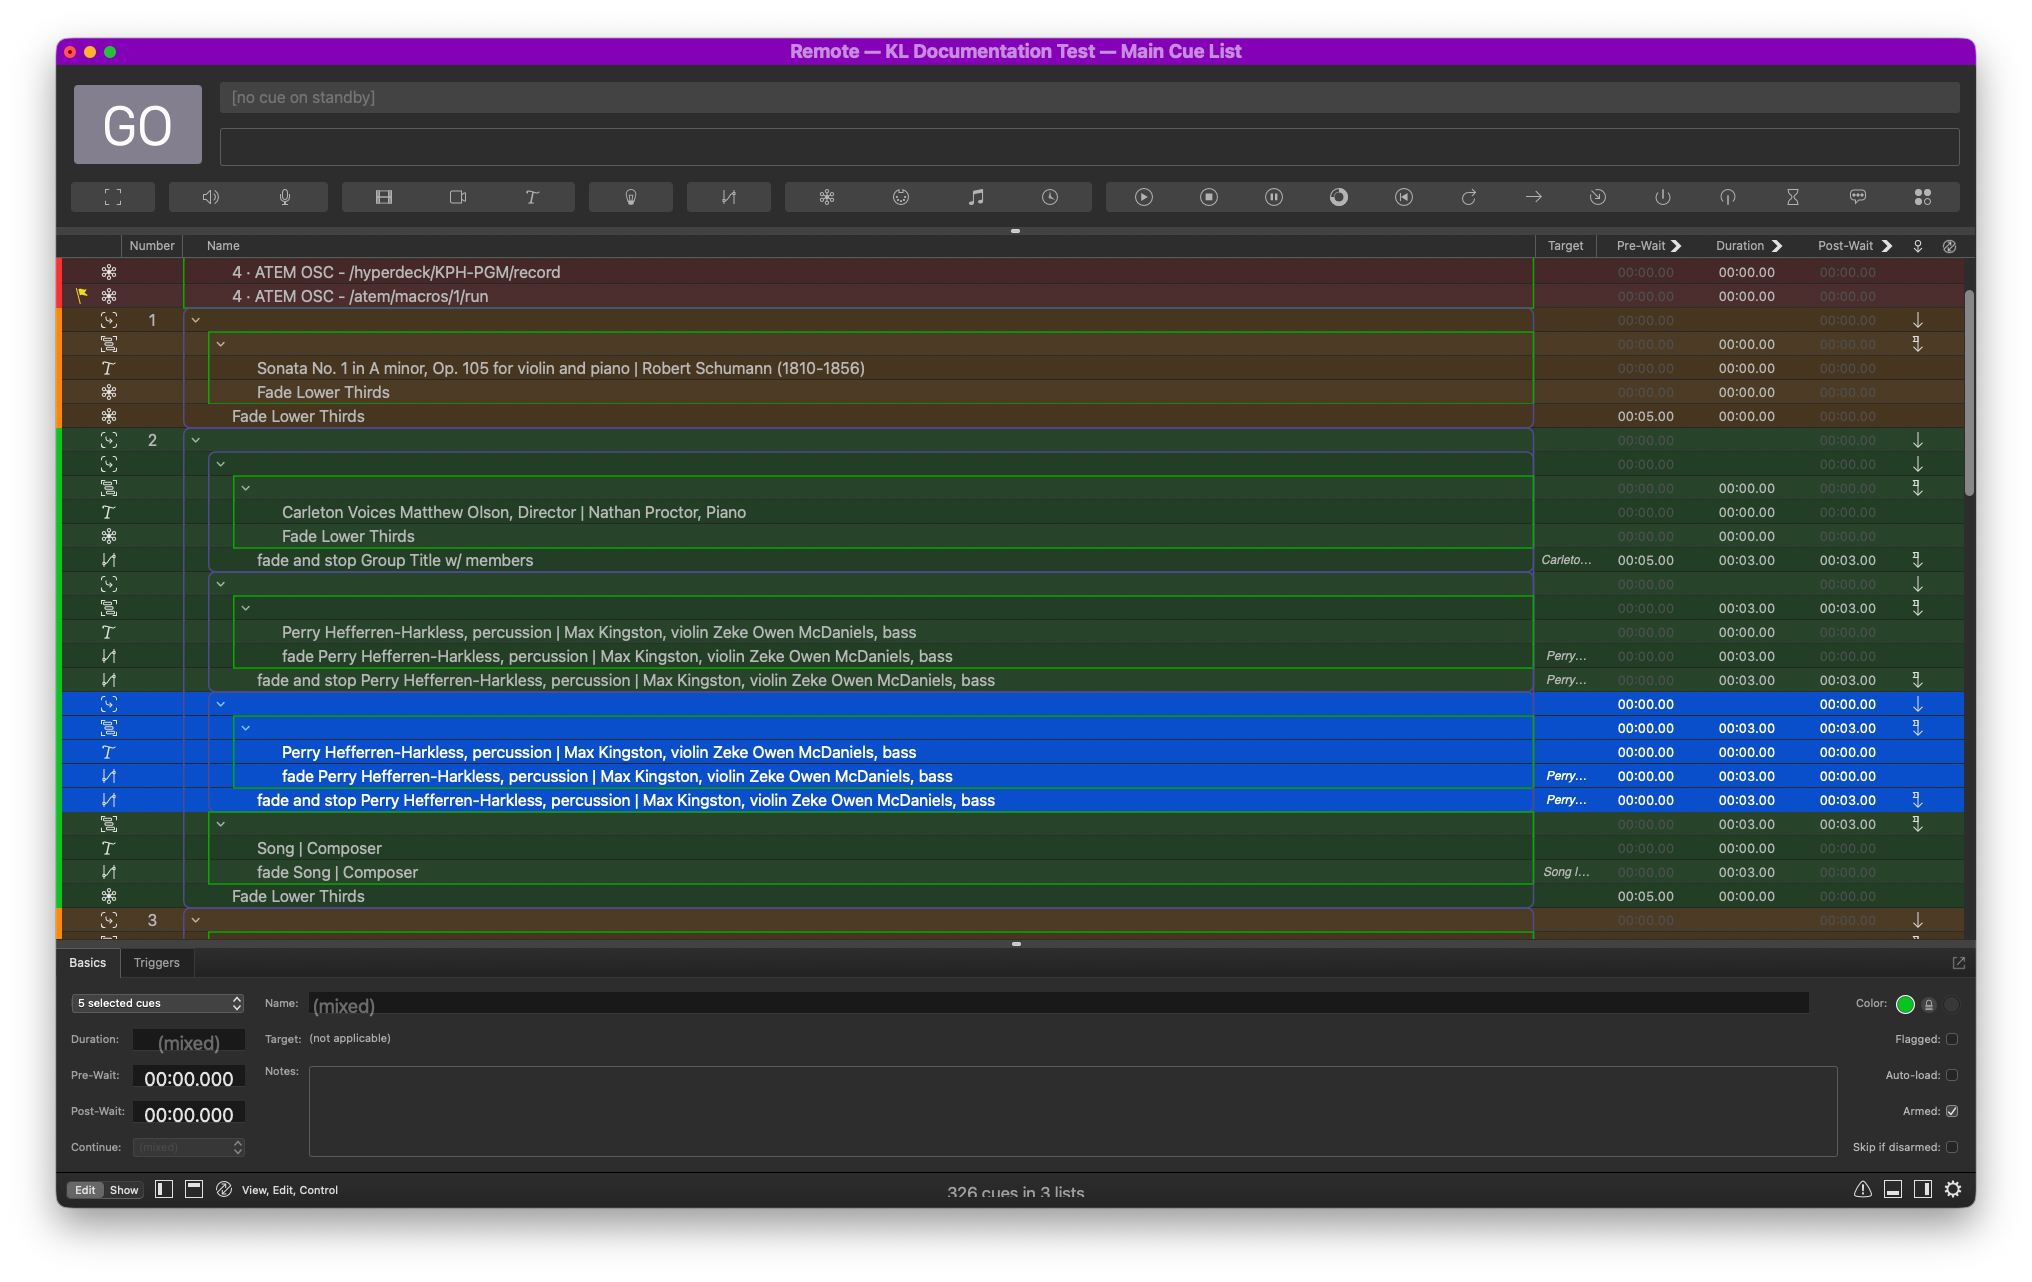
- If you’re feeling adventurous, you can list all members in an ensemble. Here’s how you do it.
- Select all cues in the second group like above, and copy with
command+c. - Go to the top of this group and paste with
command+v. The reason you want to paste at the top of the cue is because otherwise the pasted group will be nested inside the original group.
- Select all cues in the second group like above, and copy with
- The first piece
The last group of this cue simply presents the first piece that the group performs. Note that the text cue is identical to that under Cue 1. Follow the instructions above to fill in the details.
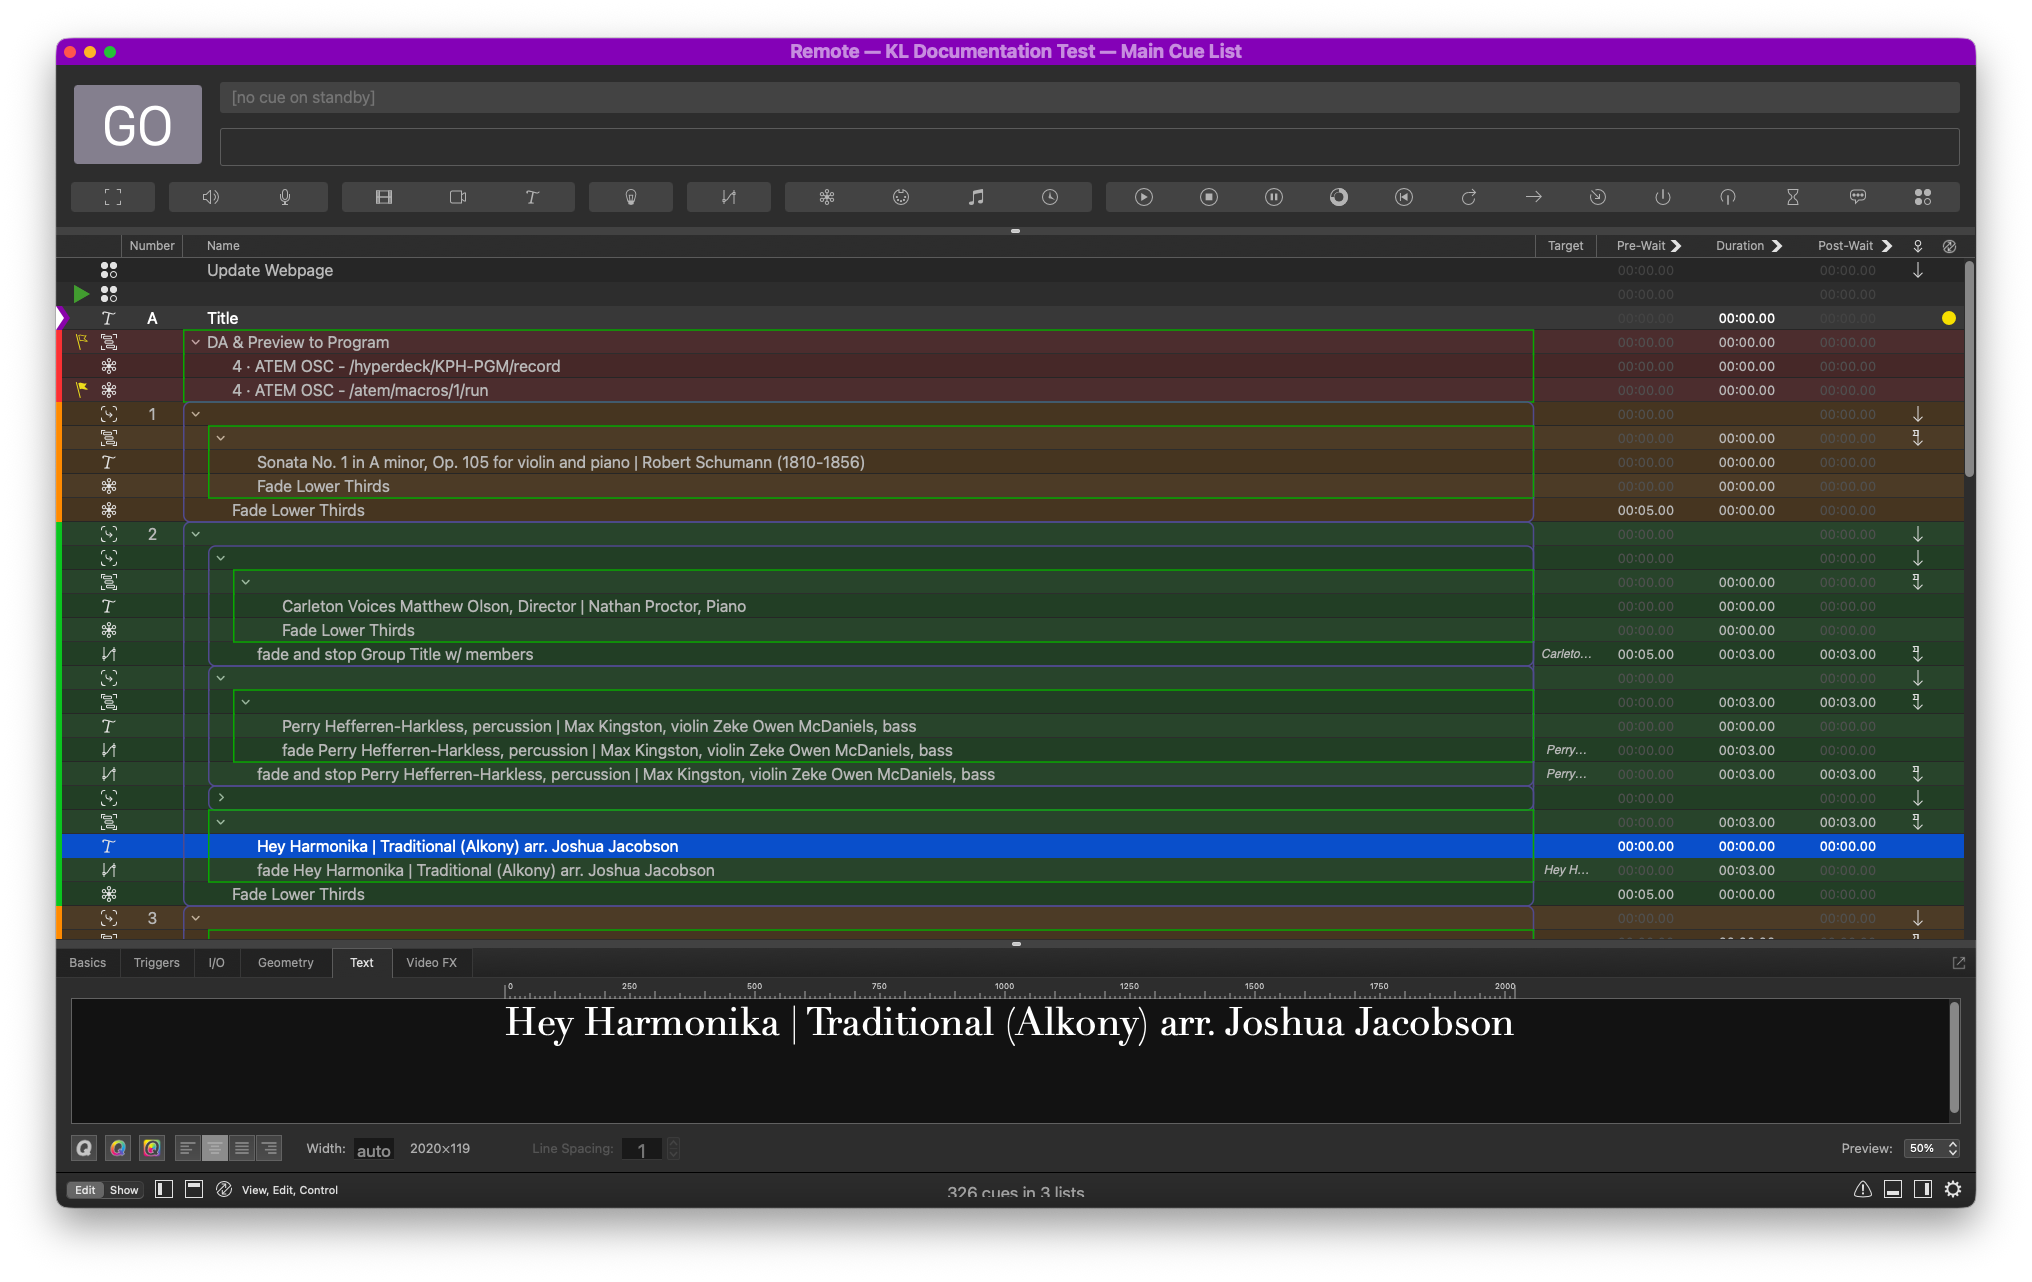
To play, you go to the top of Cue 2 and hit space for go. You would use Cue 1 to present the remaining pieces of this group that don’t need to highlight new soloists. Just to illustrate, in that same program above, Carleton Choir performs three pieces. The first piece has a group of soloists, the second piece has no soloists (or the same group of soloists), and the third has a different group of soloists. You should use Cue 2 for the first piece, Cue 1 for the second piece, and Cue 3 for the third piece, which we will introduce next.
3. When there is a small group performing.
As we said, when there’s only a small group performing, we use Cue 3 as a template. This is common for chamber and studio recitals, where typically there’s only 1-3 students performing one or two pieces. Take a look at this following program.
Joshua Lee is performing one piece. In particular, through Googling, only the first movement. We abbreviate it like the following.
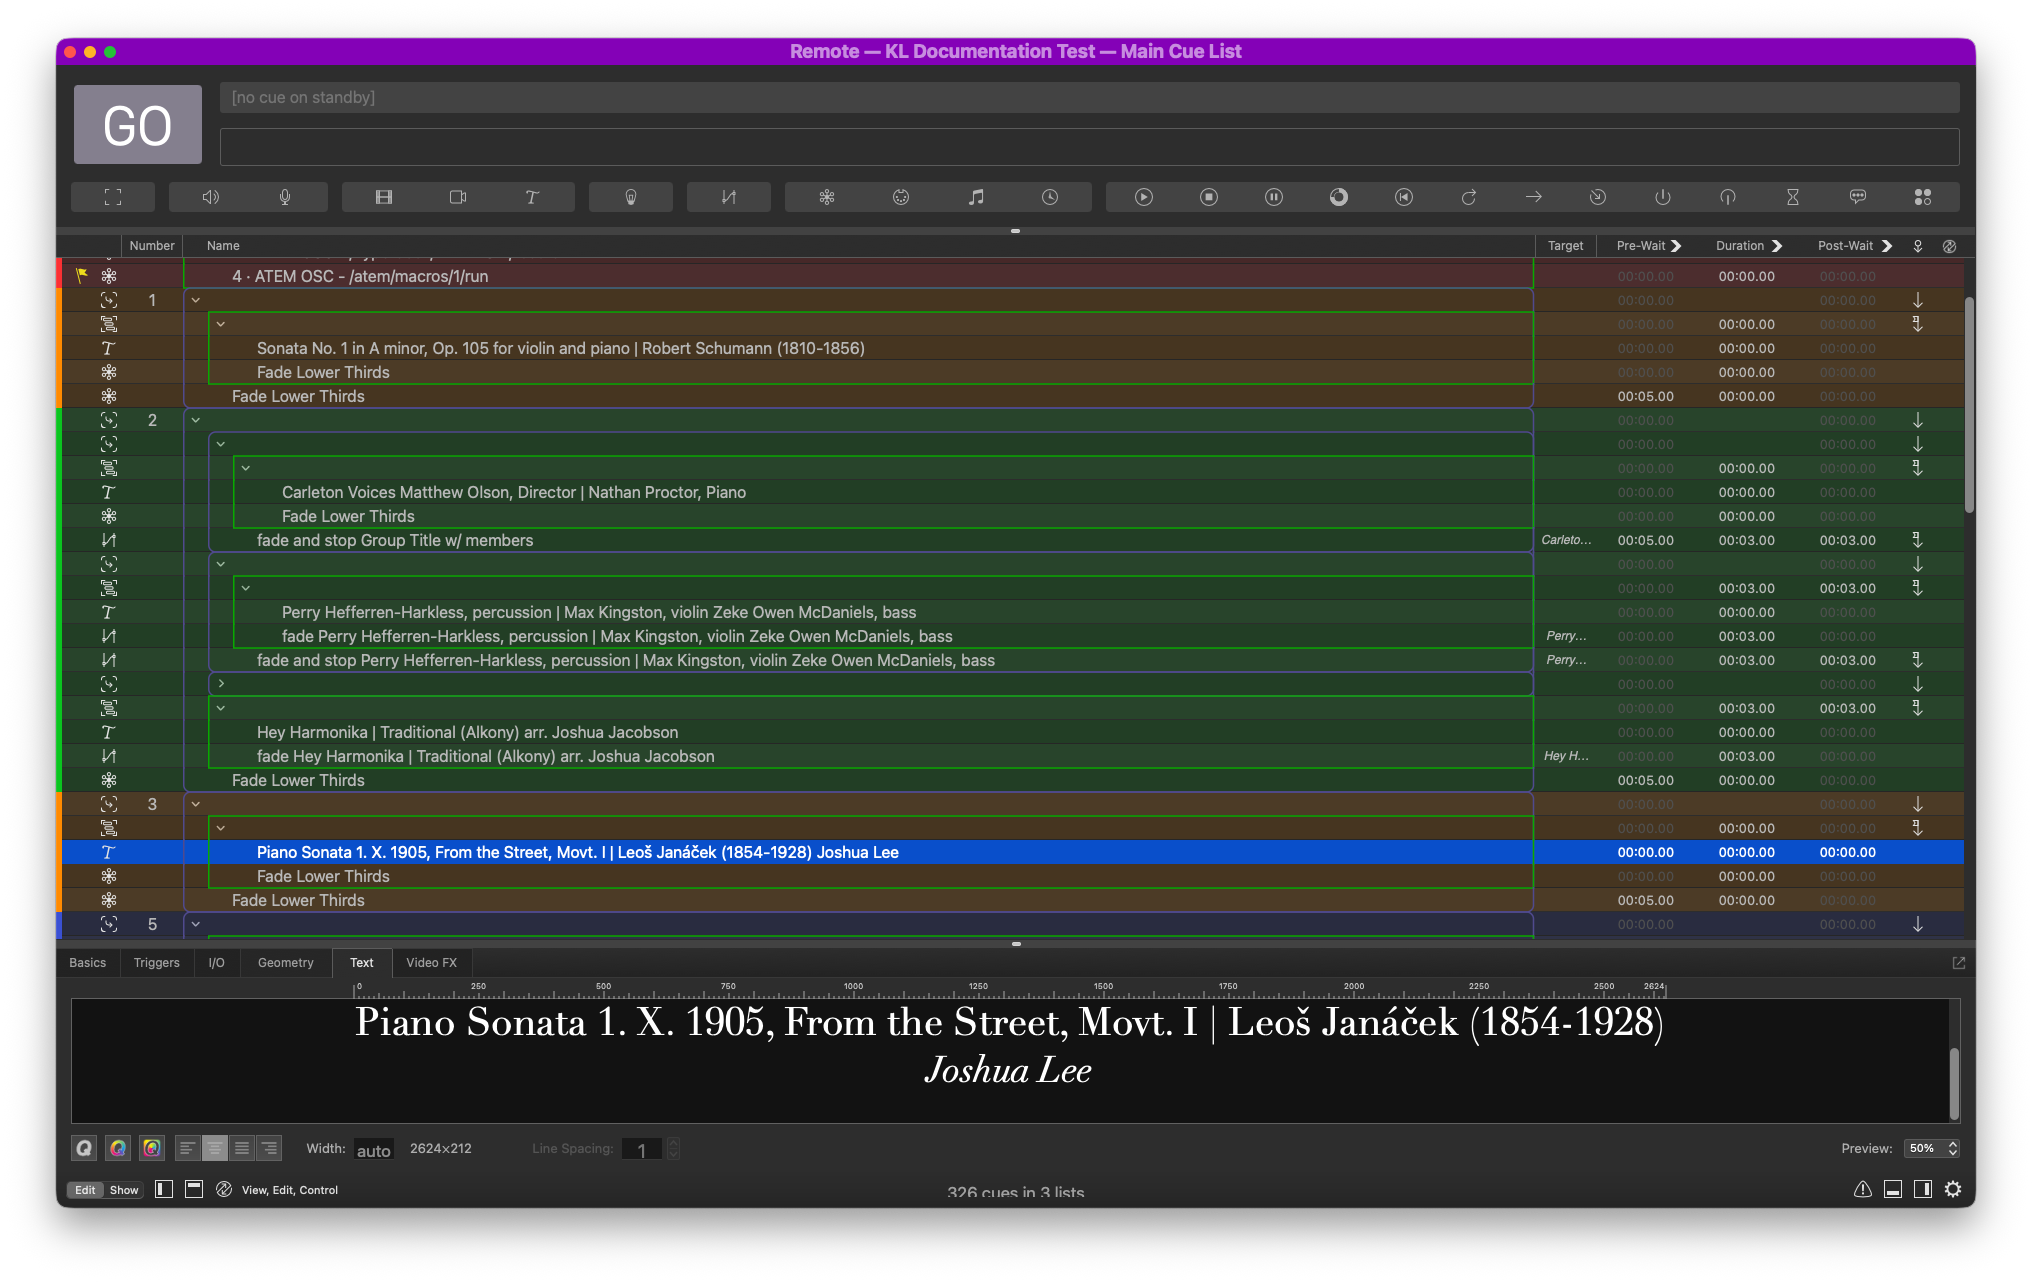
option and type the letter associated with that accent, listed in the following image. For more information, check this Apple help article. 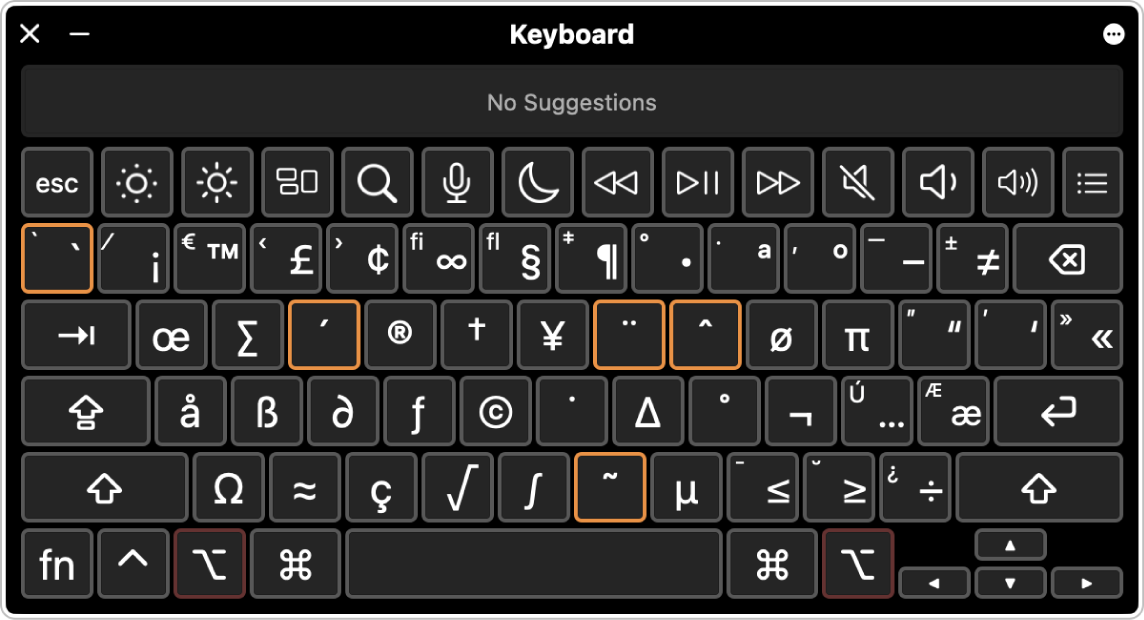
Play the lower thirds by putting Cue 3 into standby and hit space for go.
4. Chinese Music Ensemble.
You might encounter non-Western music here at Carleton, and they often contain foreign language characters. If you know how to input them, go ahead. The Kracum QLab Mac has Simplified Chinese (Pinyin) installed; you can switch input by pressing fn. Otherwise, my advice is to get the program PDF, copy the characters, and paste into the template. Contact Alexi Carlson if you have trouble accessing the program.
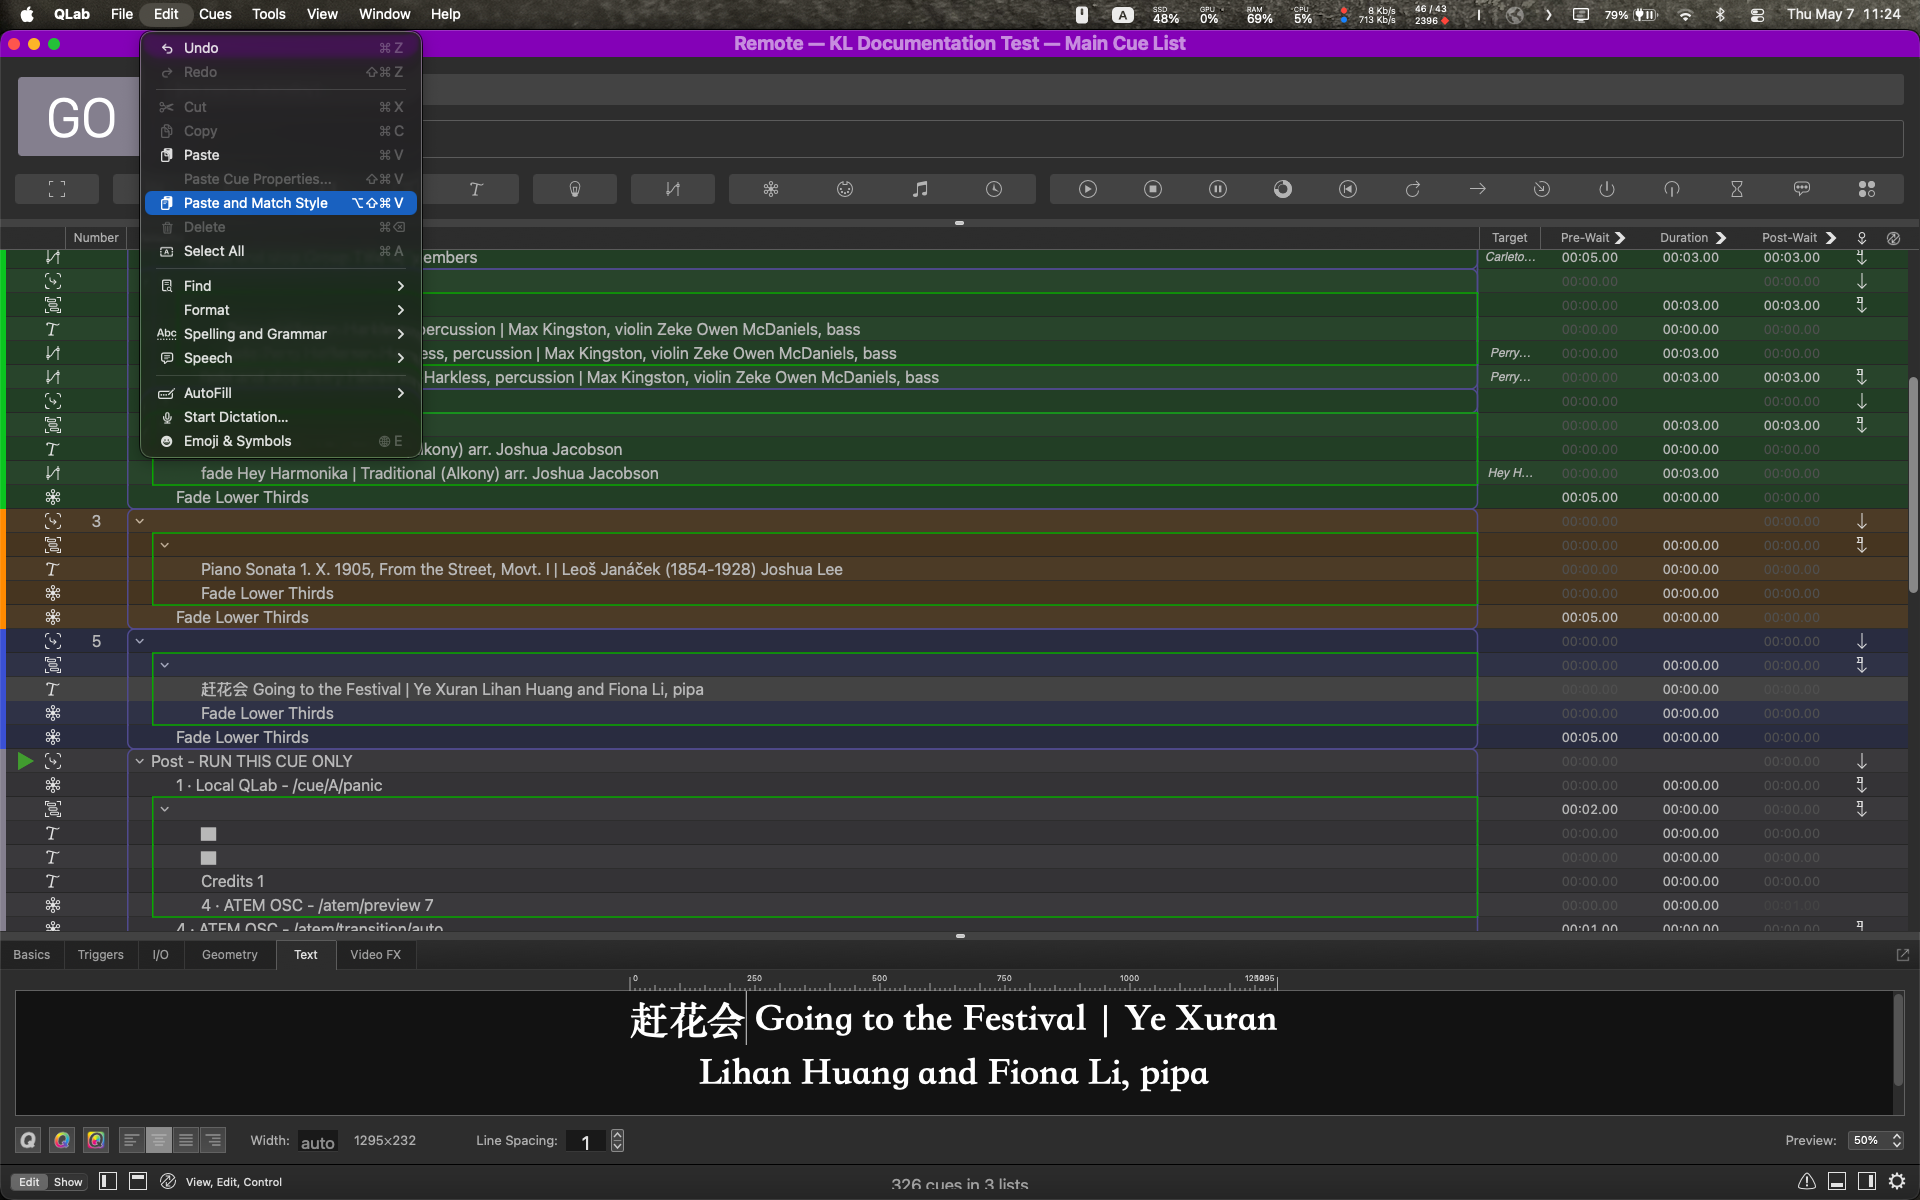
Paste and Match Style, under the edit menu. The default keyboard shortcut is command+option+shift+v. You can define whatever keyboard shortcut you’d like; the Kracum Mac has it set to command+shift+v to match the common shortcuts. To learn how to do that, check this Apple help article. Play the lower thirds by putting Cue 5 into standby and hit space for go.
Post-show Credits
Now that we’ve given credits to the performers, we want to give credits to ourselves 🥳. Not every event will have a program, but every event will have a Event Info Sheet, like the following.
Here, you will find information about the schedule, the staff assigned, recording/streaming needs, and strike notes if applicable. (You find out whether the show is being streamed here.) We want to fill out the personnel’s working any particular show (though there are separate text cues acknowledging all students on the roster and all staff members that have helped with the production.) You will note that this last group cue contains an unusually large amount of cues. This is because a large portion of the switching/fading has been automated to reduce repetitive workloads and to ensure consistency. The only cues you will need to edit are Text Cues, which are coded in red.
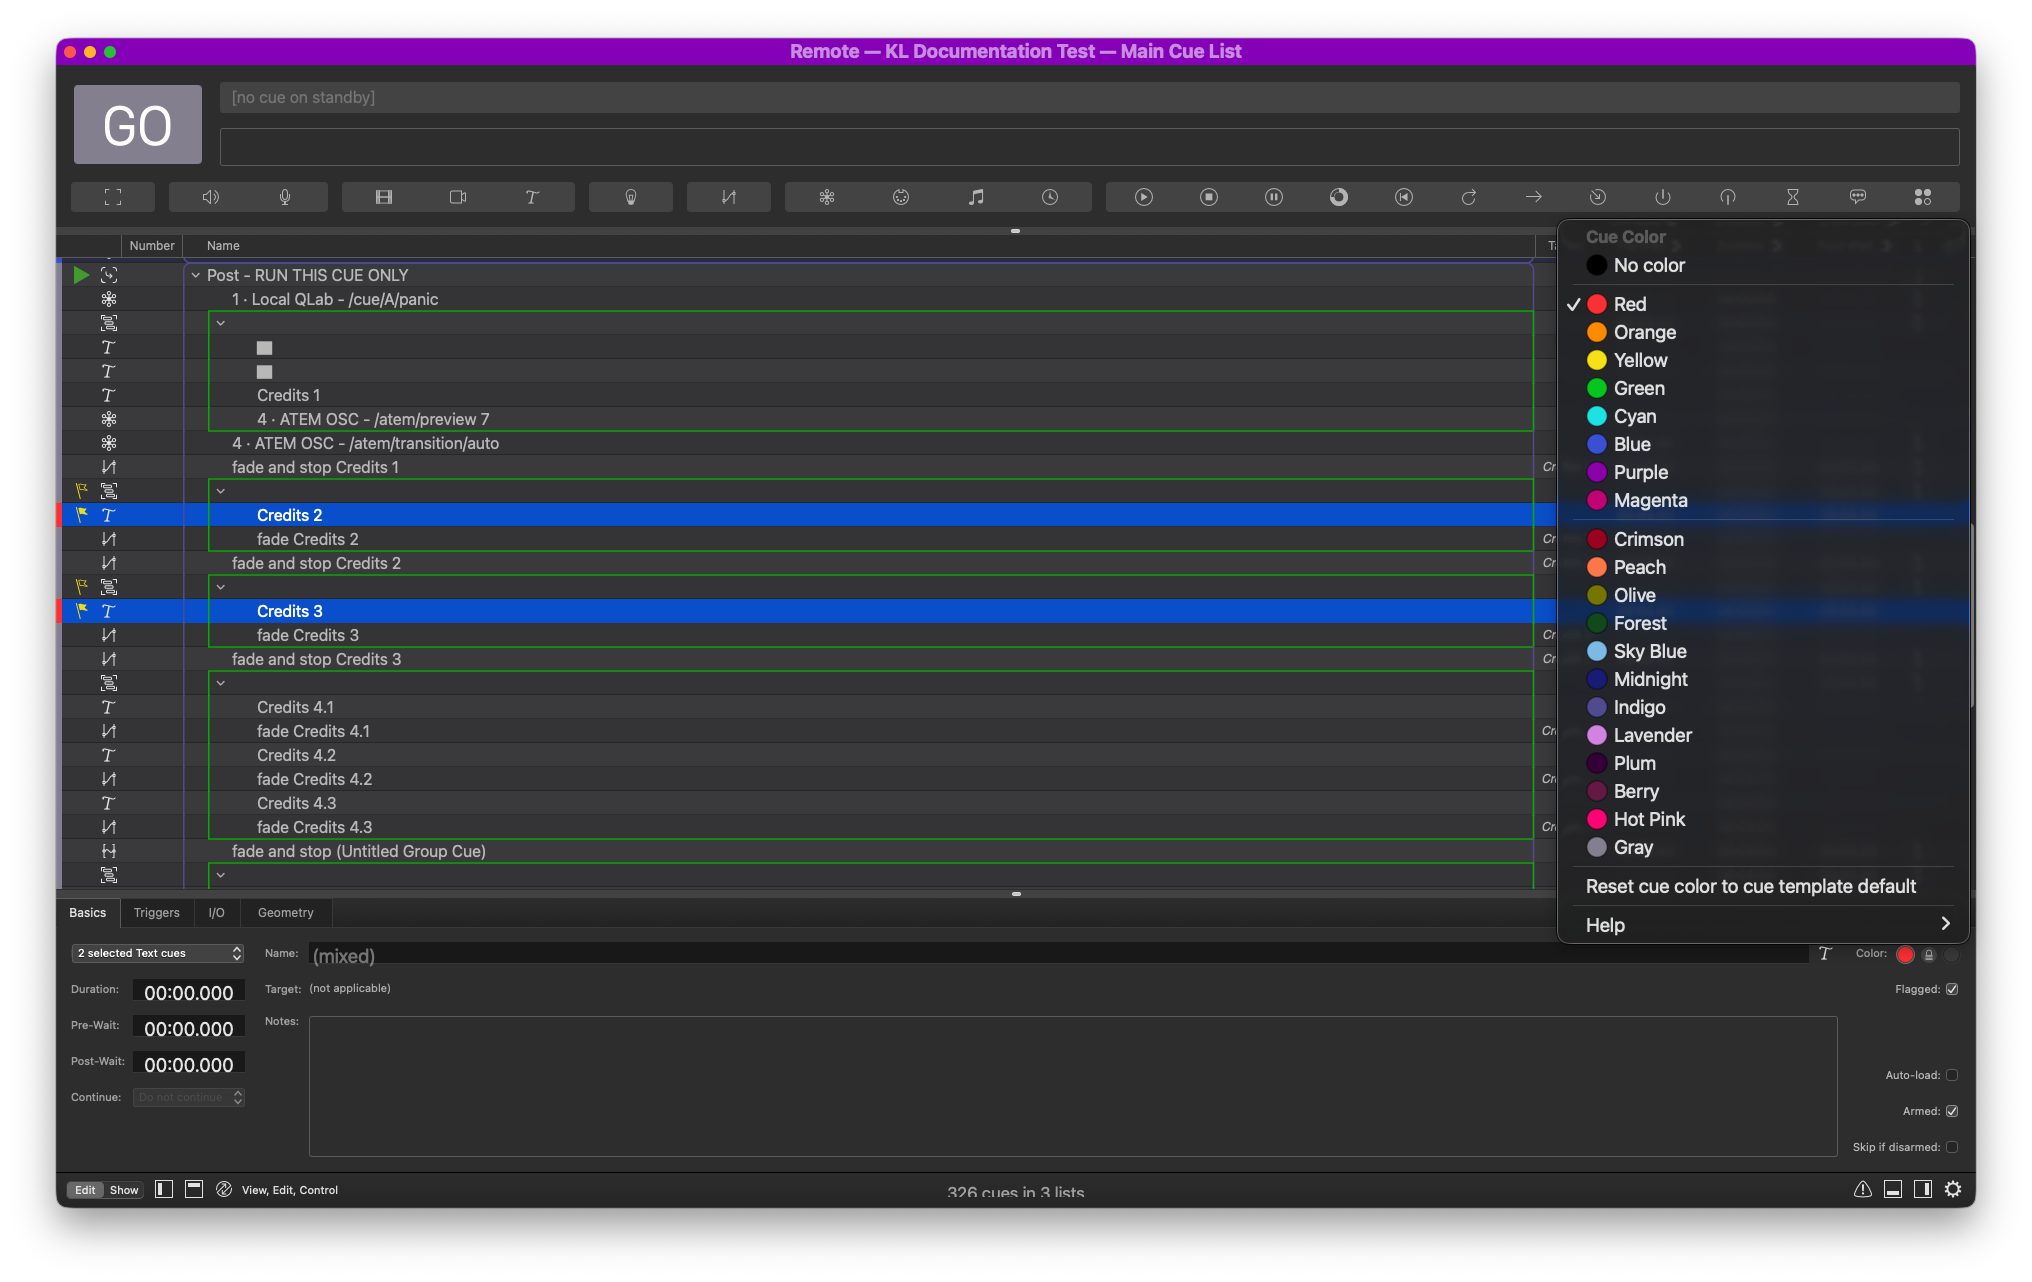
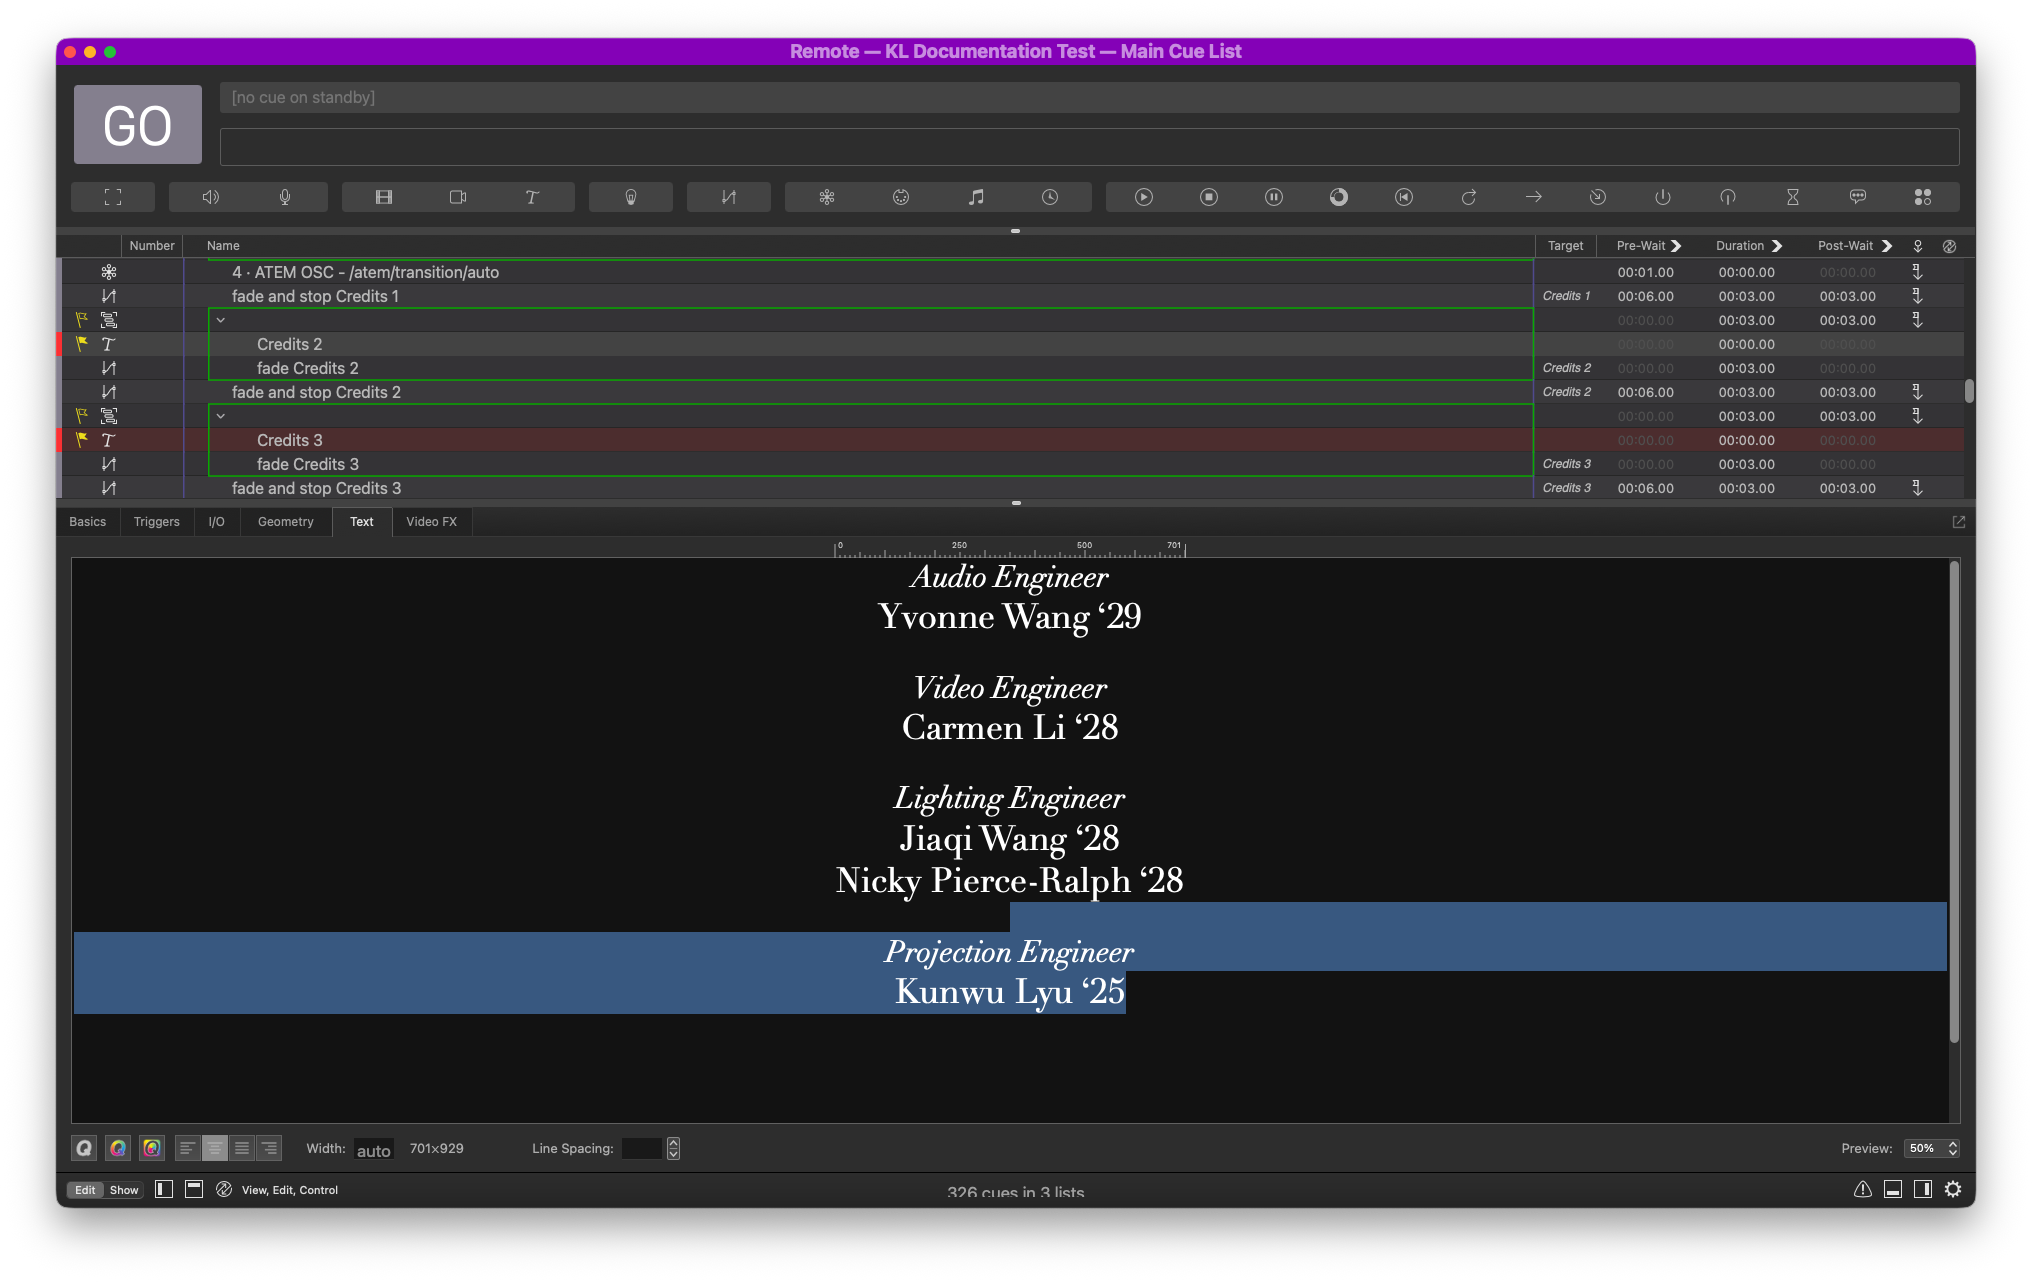
Credits 2 contains all the tech people. If there are no projectionists, simply delete the entry.
| Abbreviation | Position |
|---|---|
| Proj | Projection |
| A1, A2, A3, etc. | Audio |
| LBO | Light Board Operator |
| Video | Video |
| SM | Stage Manager |
| HM | House Manager |
| Stage | Stage Hand |
| U | Usher |
| Door | Door Access (Obsolete) |
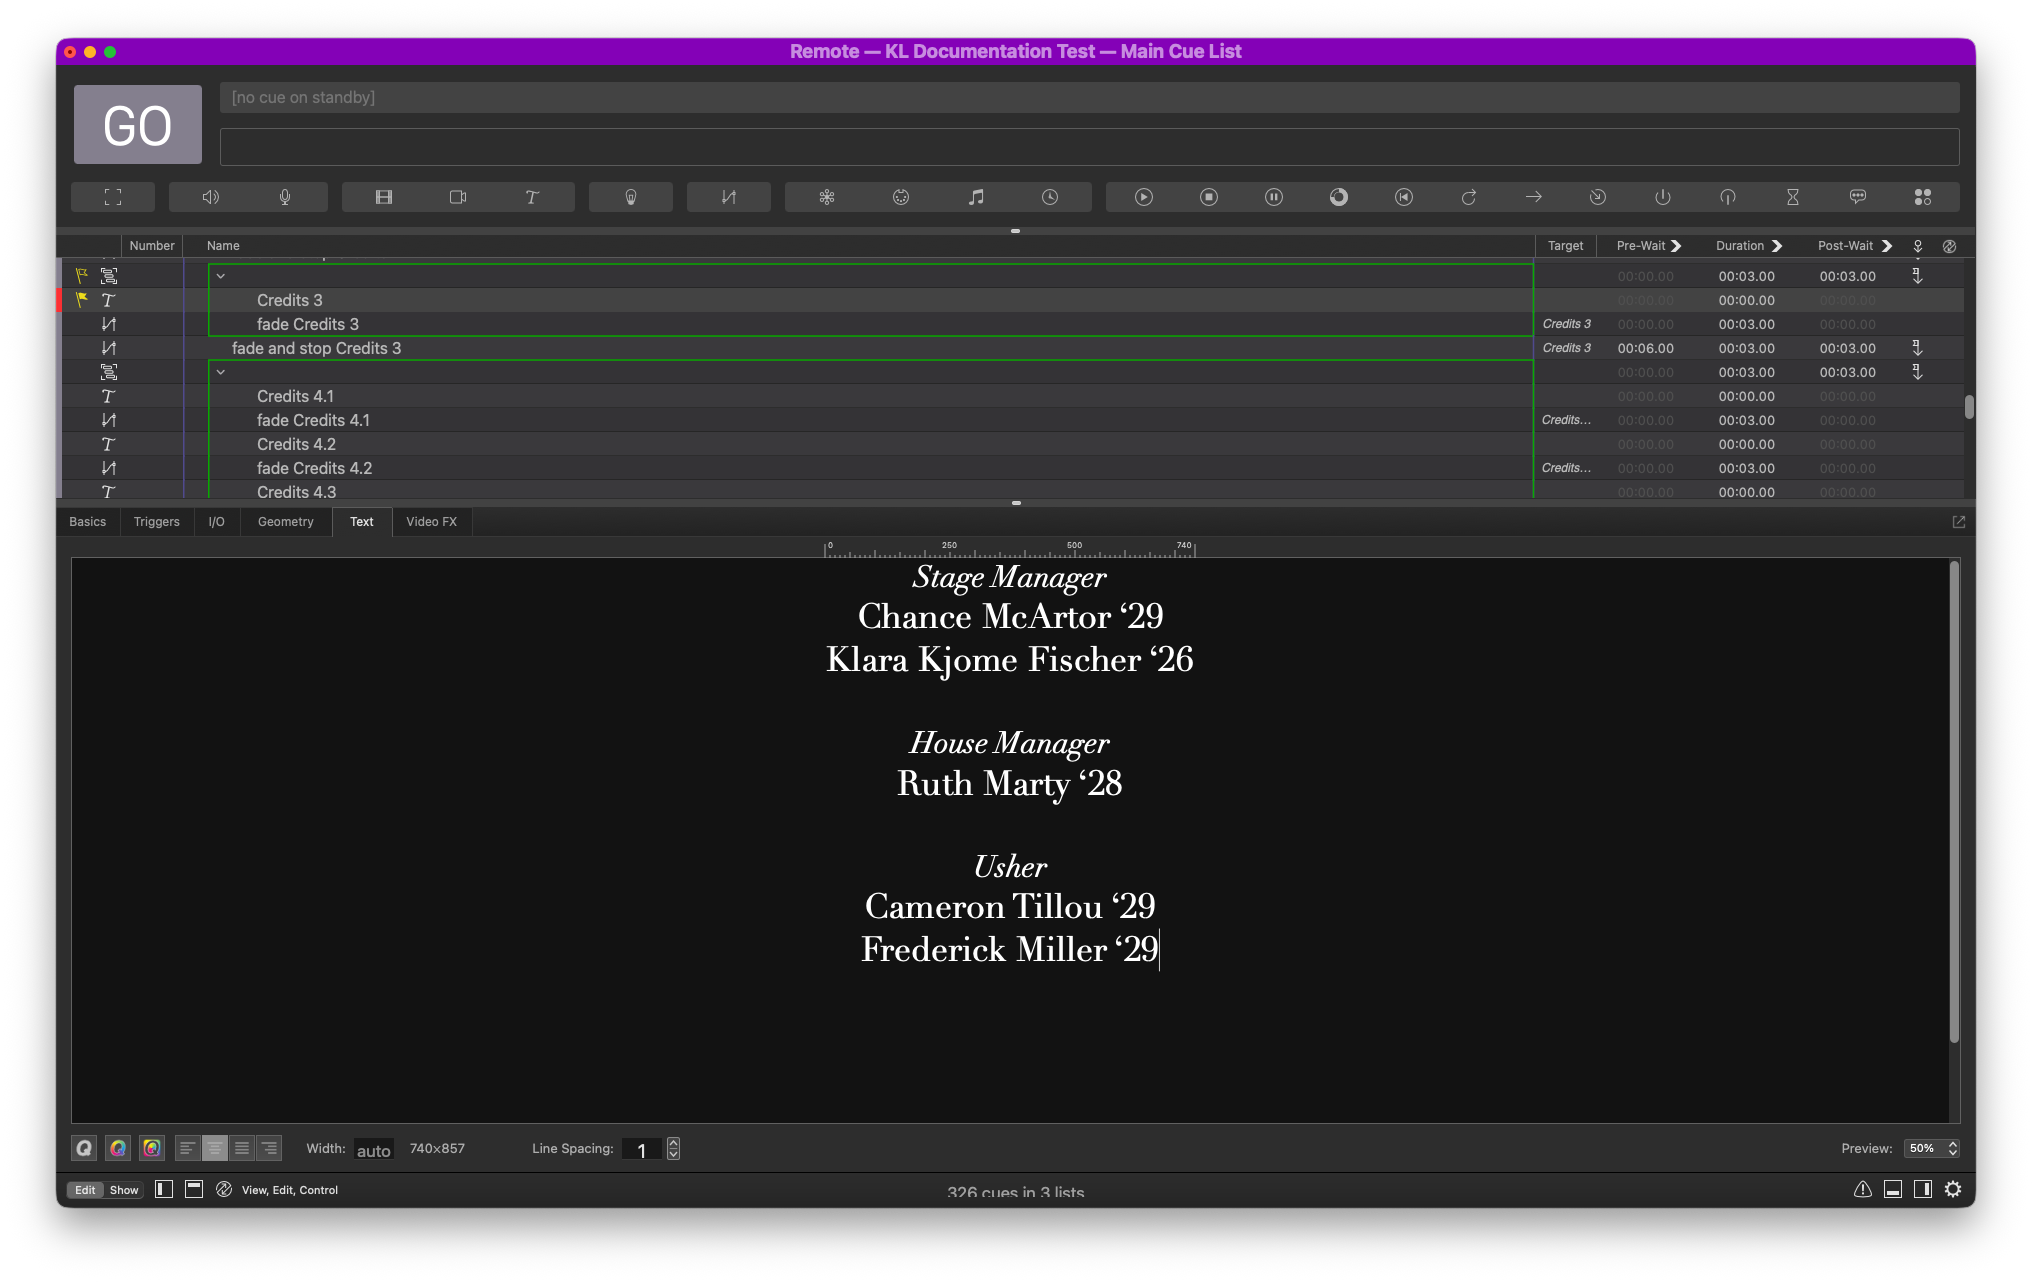
Credits 3 contains the rest of the crew, including stage managers and house managers. If there’s not a position, i.e., Door Access, put them under Usher.
To play the post show credits, simply go to the top of this group (named Post - RUN THIS CUE ONLY), and hit space for go. The scripts will take care of everything.