We use the Yamaha QL1 as our broadcast audio mixer.
Patching
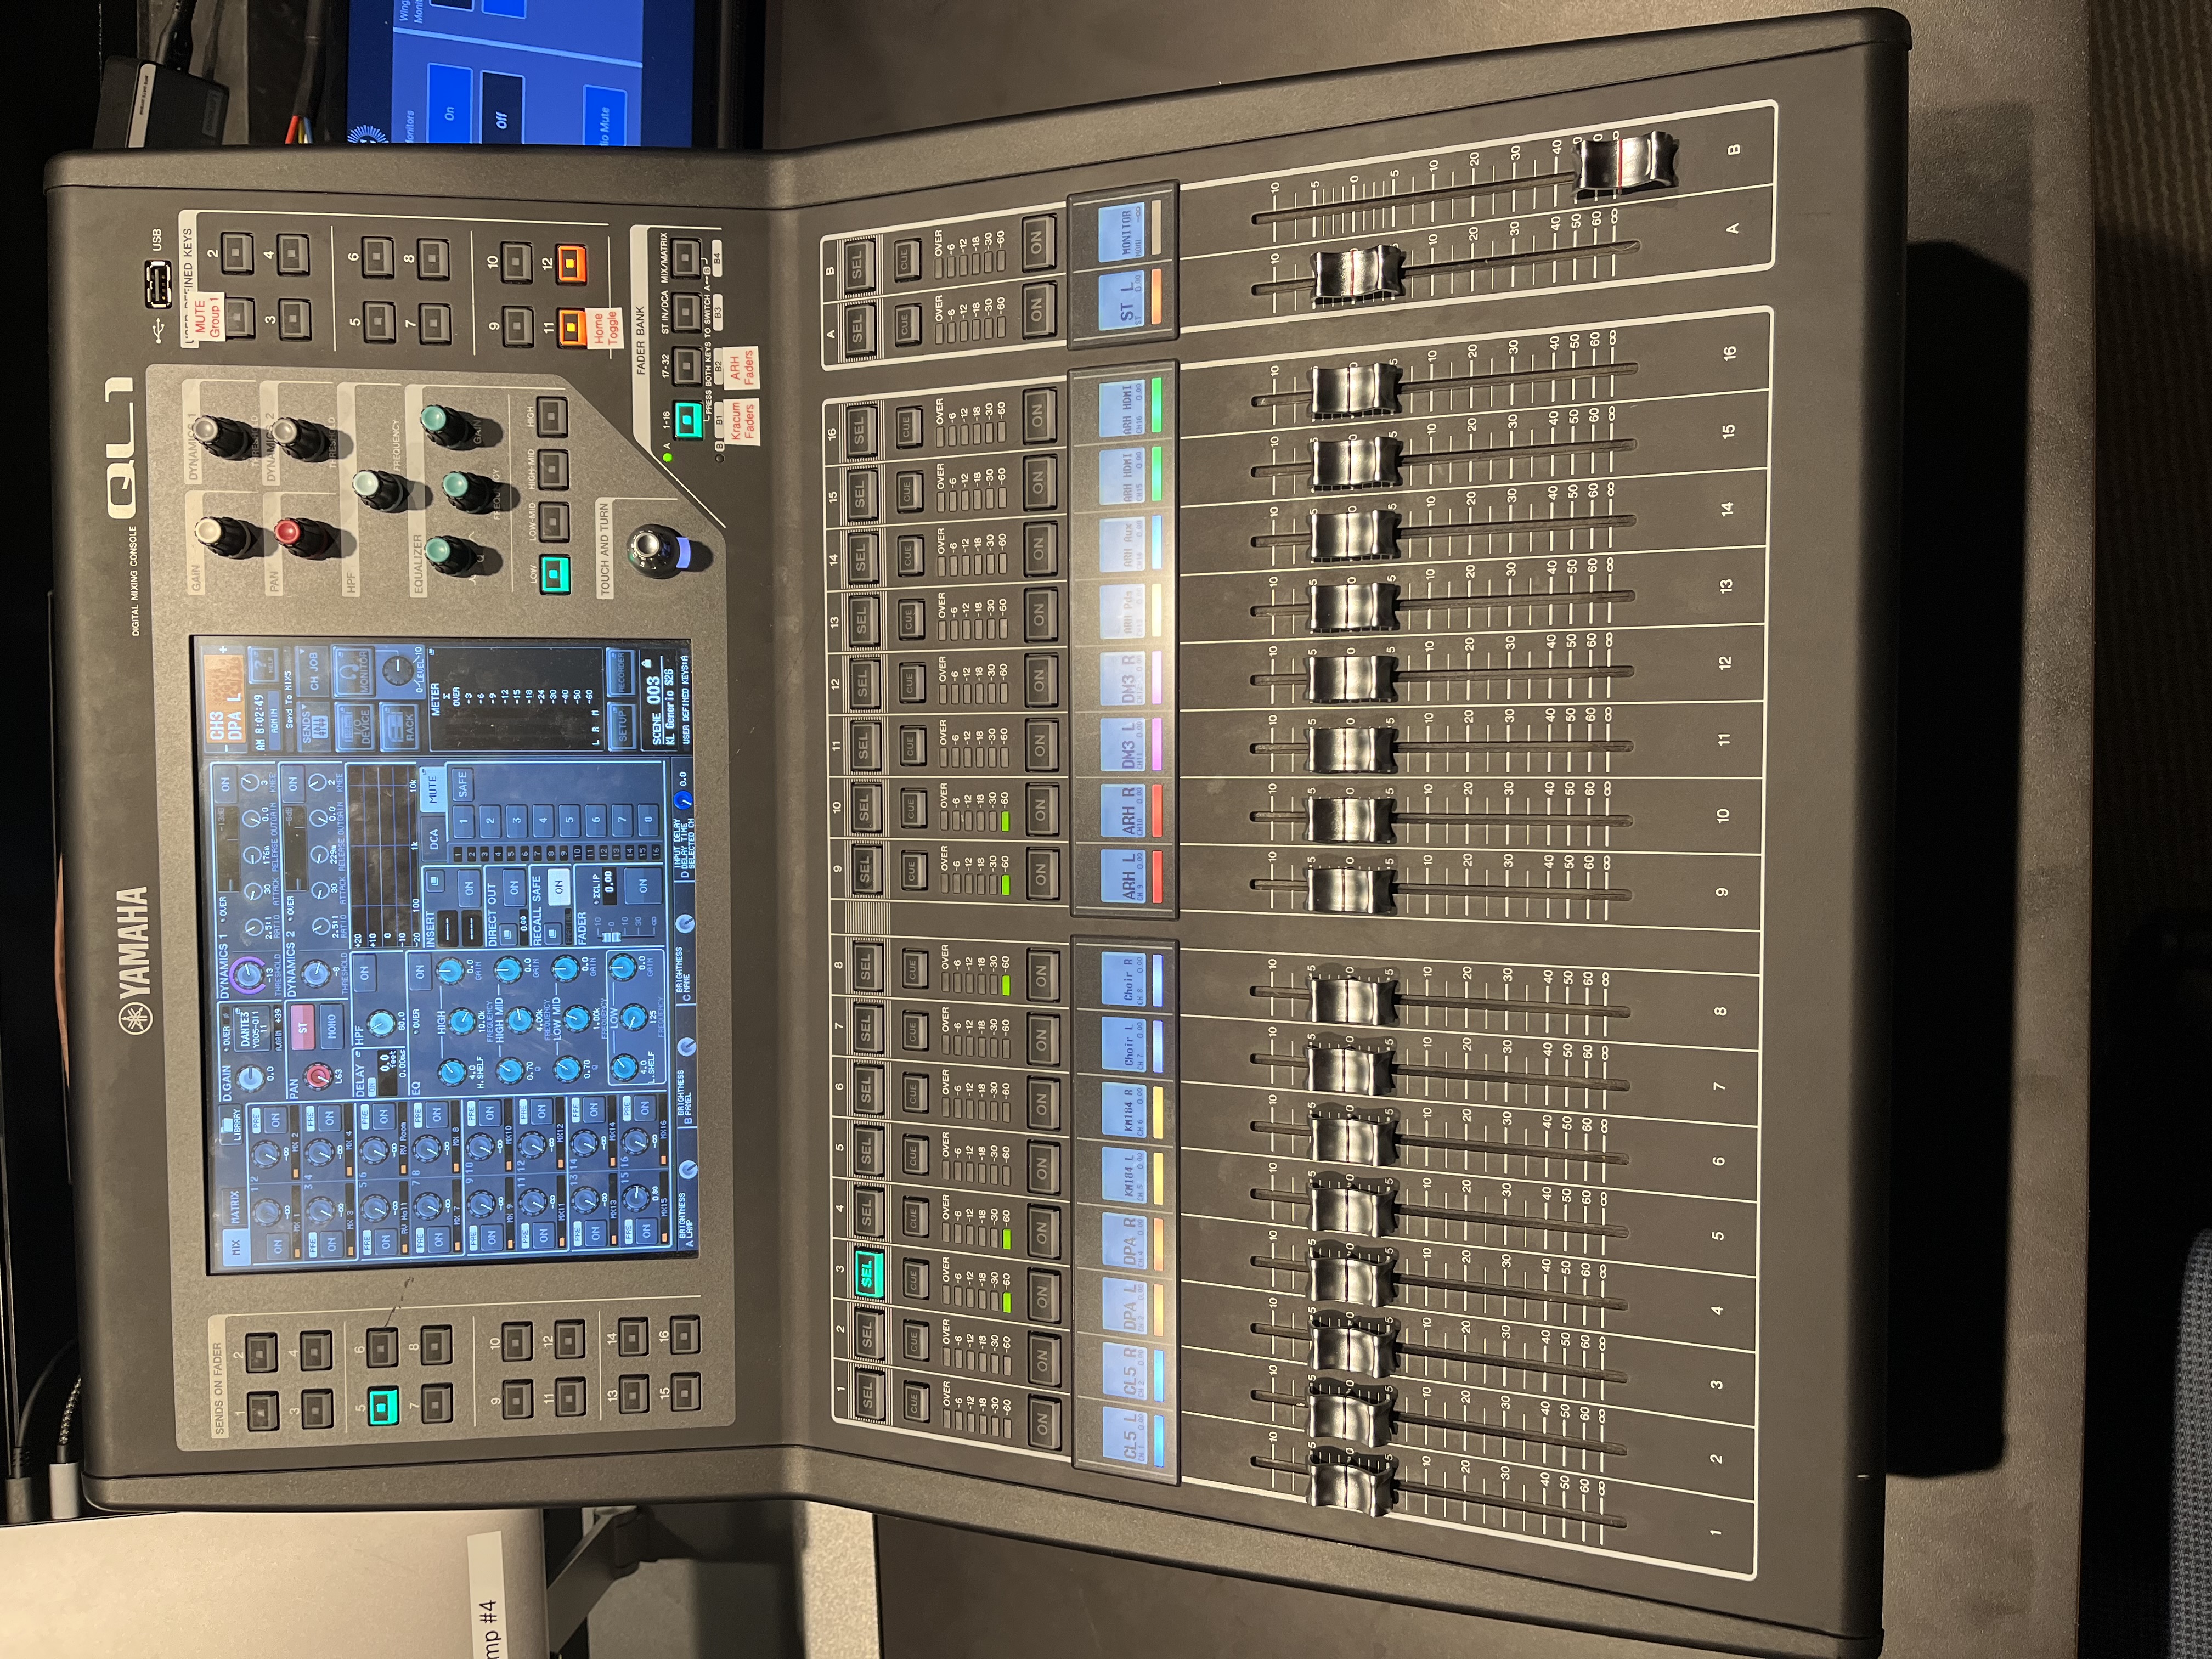
The QL1 receives (and can transmit) audio signal via Dante, as it is with all audio devices in our space. By default, it has the following patches:
Inputs
| Input 1 | Input 2 | Input 3 | Input 4 | Input 5 | Input 6 | Input 7 | Input 8 |
|---|---|---|---|---|---|---|---|
| CL 5L | CL 5R | DPA L | DPA R | KM 184 L | KM 184 R | Choir L | Choir R |
Inputs 1-8 are inputs for Kracum.
- Inputs 1-2 are coming from a stereo mix from the CL 5 at Front of House (FoH).
- Inputs 3-4 are the omnidirectional mics hanging close to the stage.
- Inputs 5-6 are room mics hanging from the balcony.
- Inputs 7-8 are room mics placed upstage, behind the towers.
| Input 9 | Input 10 | Input 11 | Input 12 | Input 13 | Input 14 | Input 15 | Input 16 |
|---|---|---|---|---|---|---|---|
| ARH L | ARH R | DM3 L | DM3 R | ARH Pdm | ARH Aux | ARH HDMI | ARH HDMI |
Inputs 9-16 are inputs for Applebaum, though they can be used for other purposes.
- Inputs 1-2 are the room mics in Applebaum.
- Inputs 3-4 are the stereo mix coming from the DM 3 from the FoH in Applebaum.
- Input 5 is the Applebaum podium mic.
- Input 6 is the 3.5 mm Aux connection from the Applebaum podium.
- Inputs 7-8 are the HDMI audio going to the Applebaum projector.
Outputs
- All inputs send to the STEREO bus, which goes to our ATEM switcher and feeds our recorder.
- The MONITOR outputs to a pair of stereo speakers (Mackie MR5 MK 2) in the broadcast booth; it receives the stereo feeds from the STEREO bus.
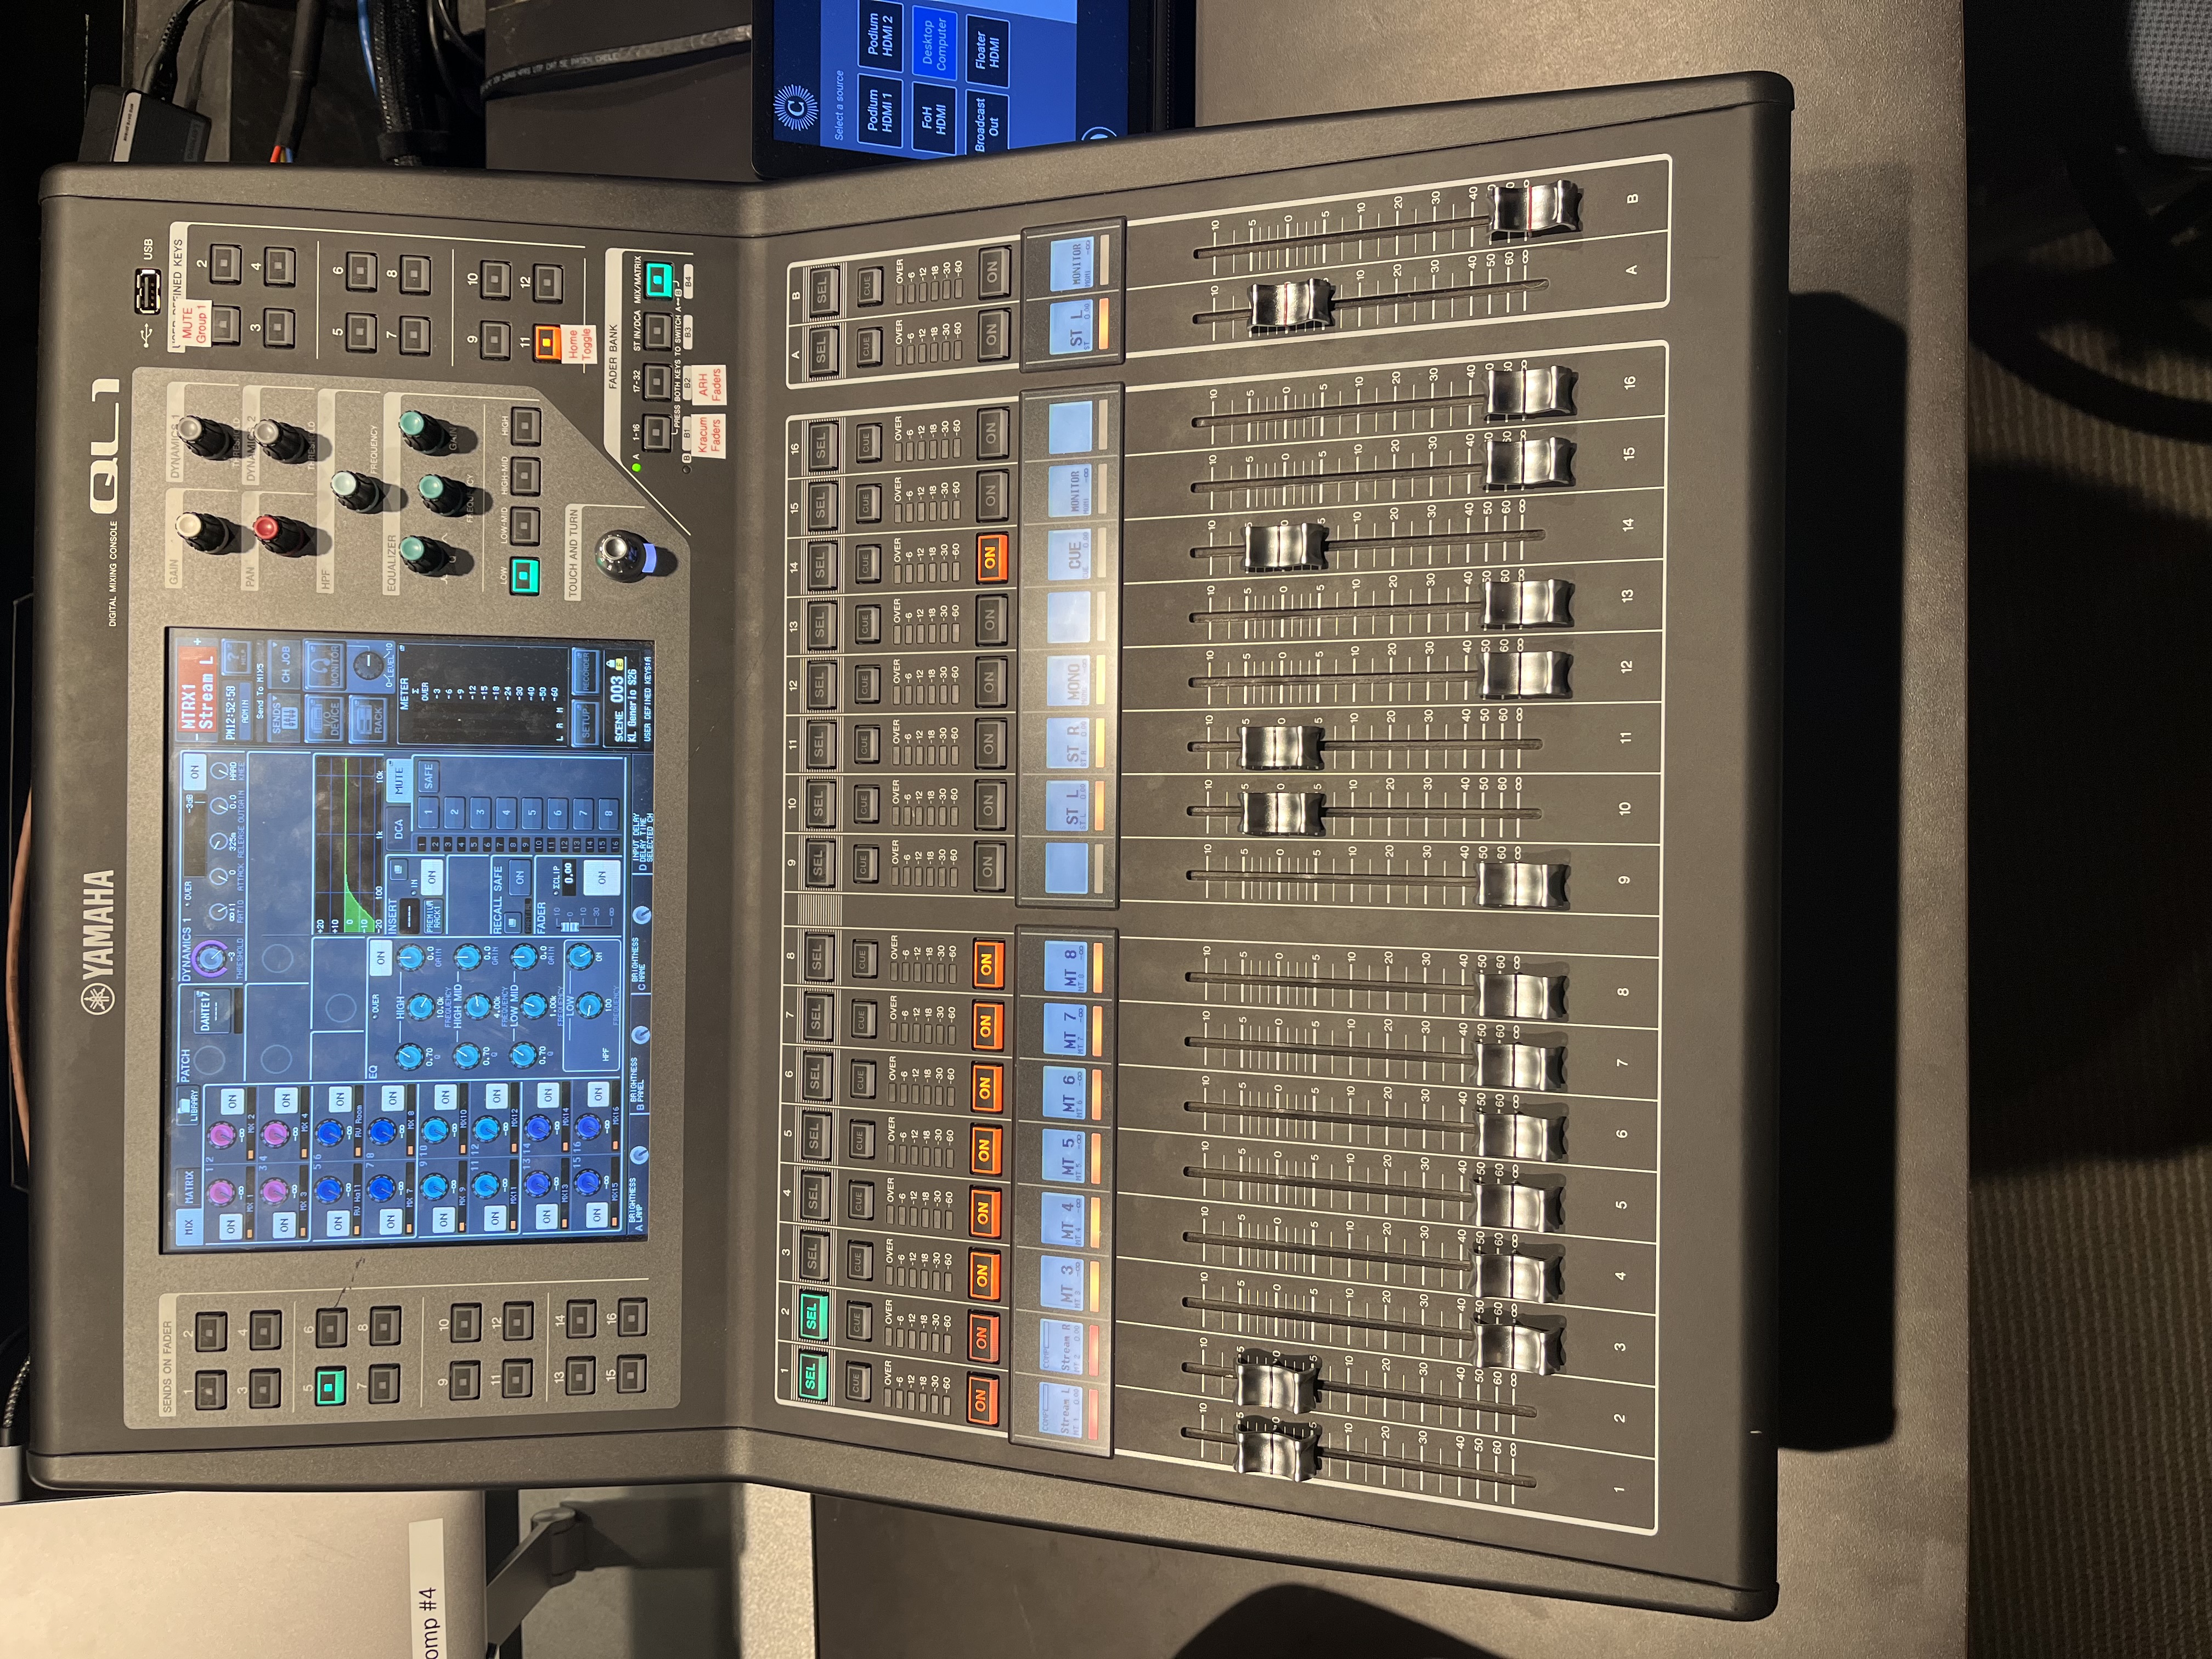
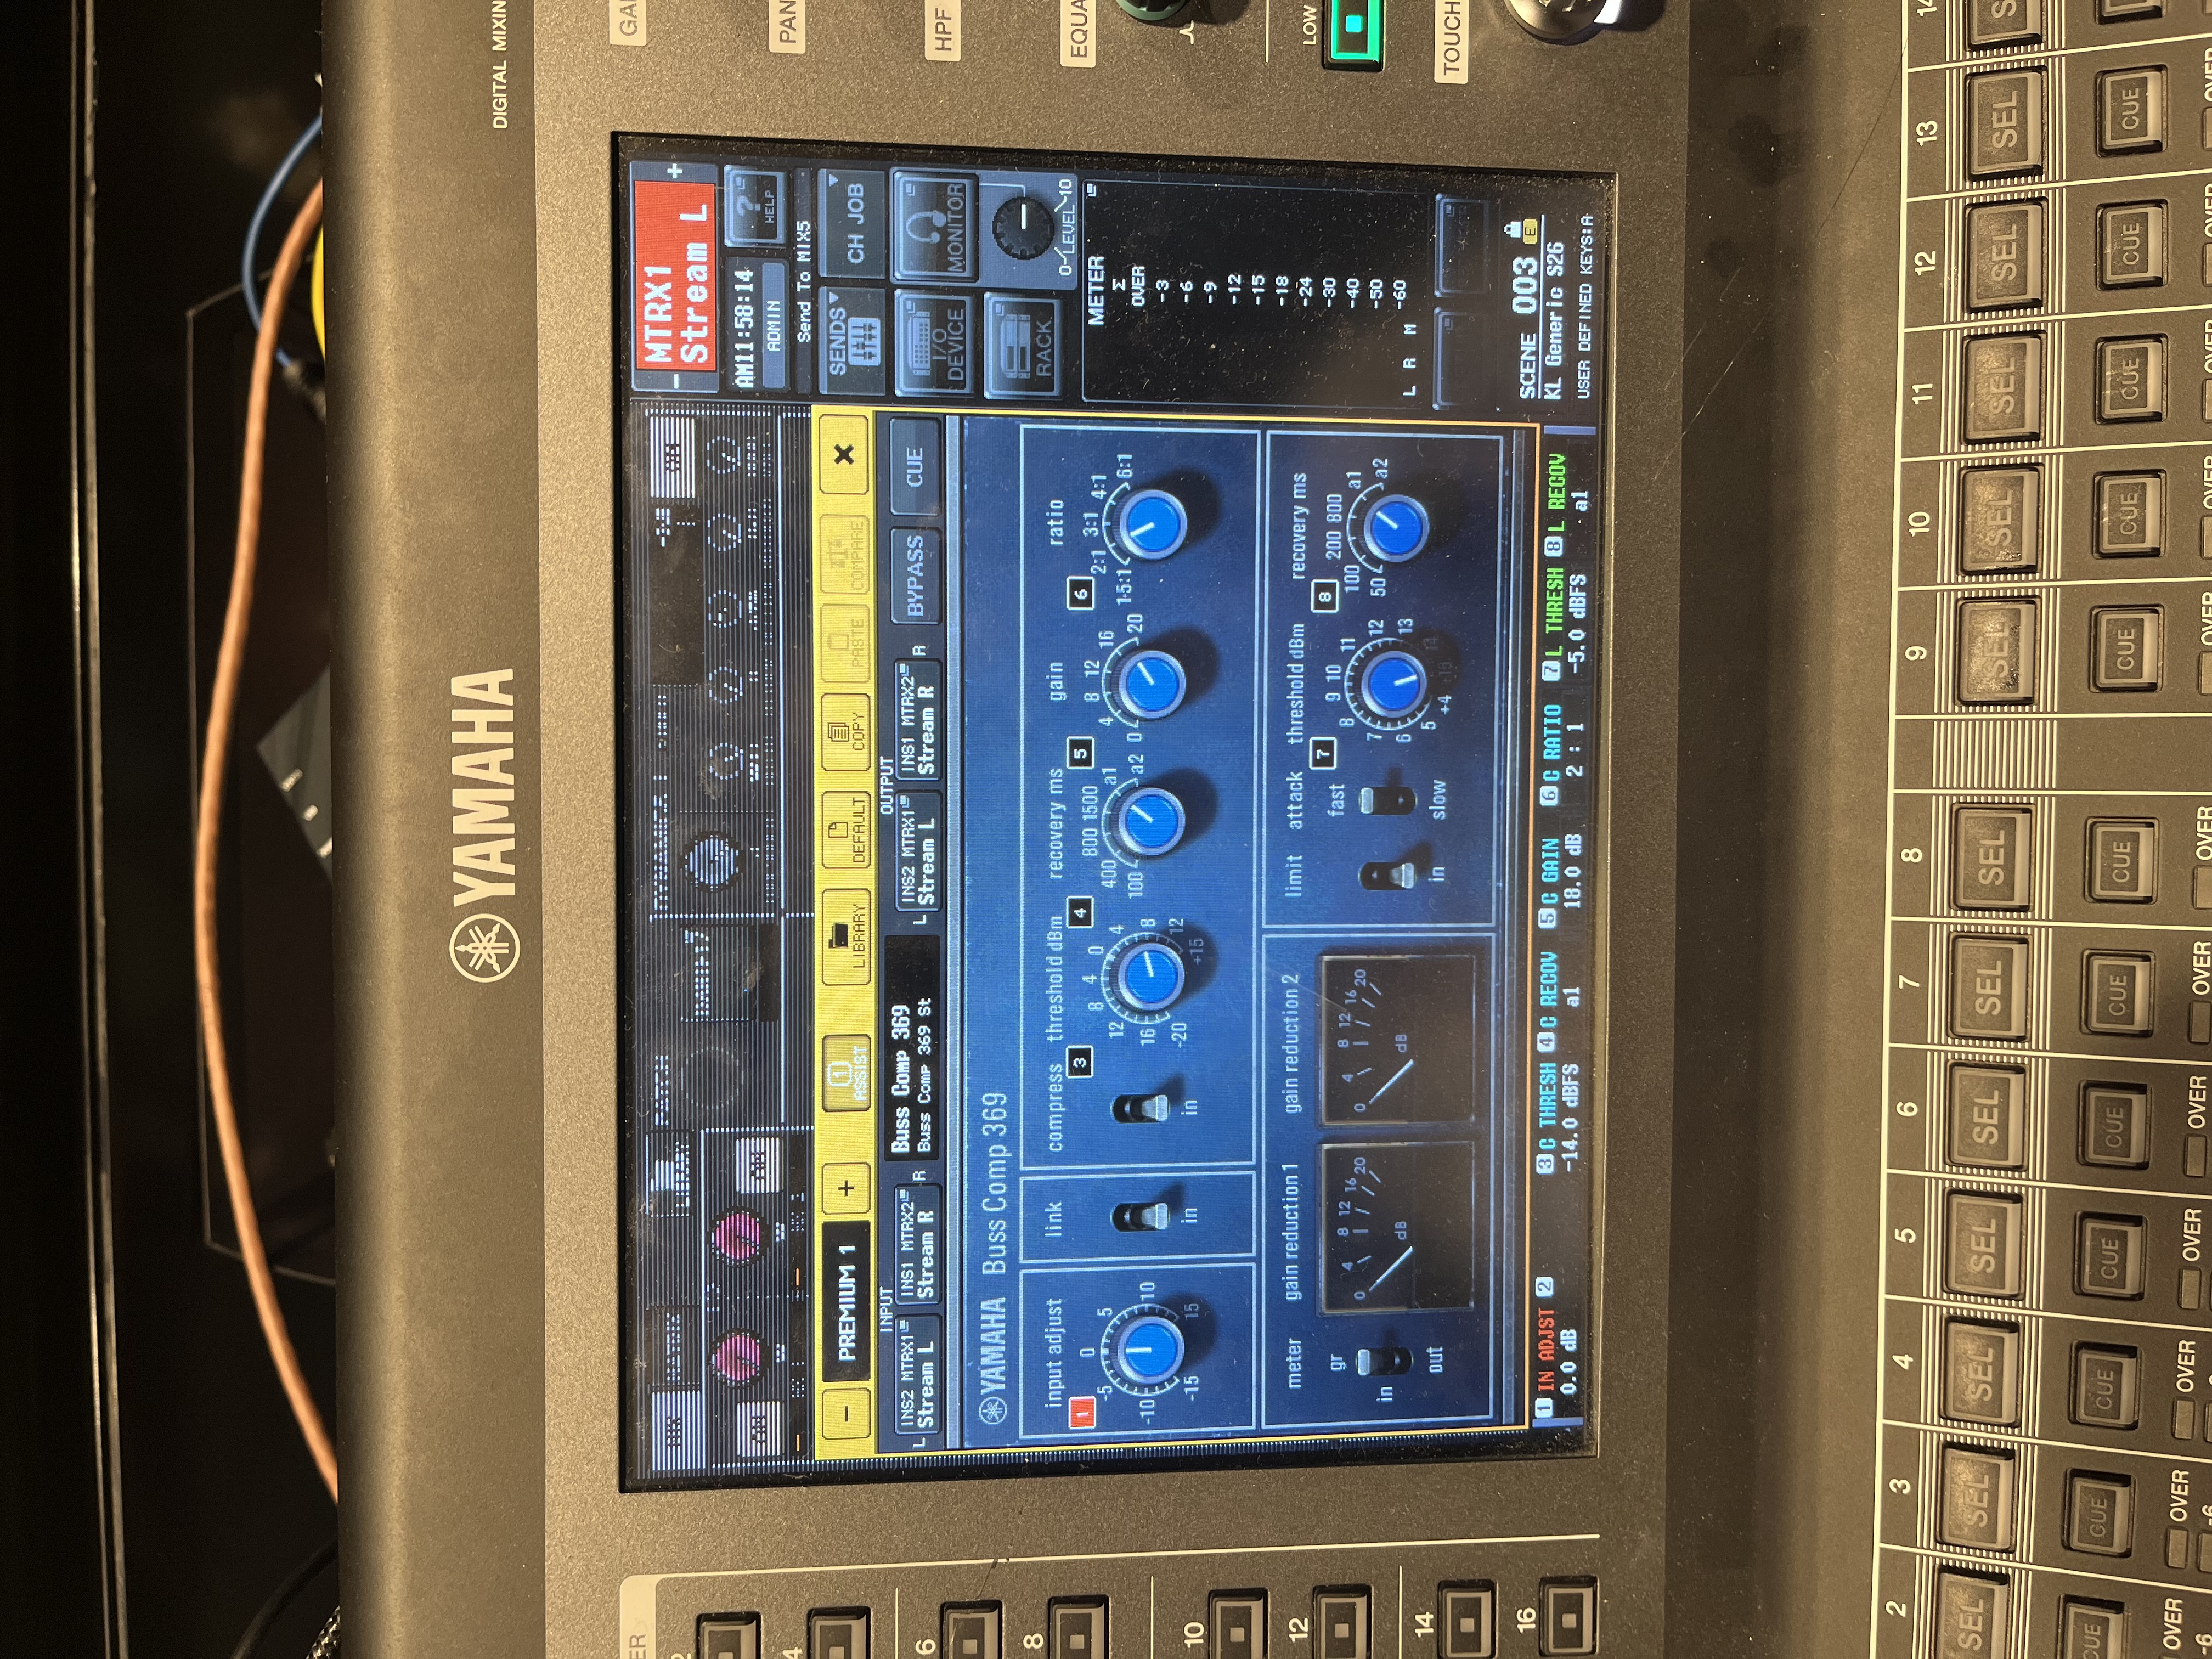
- In addition, MATRIX 1 and MATRIX 2 are the stereo feed going into our streamer. This feed is heavily compressed; we will talk about this in a later section.
QL MTRX 1 & 2
MTRX Inserts
If you have more questions about the broadcast audio topology, contact Matthew Zimmerman.
Adjusting the Analog Gain
You want to set the levels before you start any recording. This is done during rehearsals.
- Press the SEL key for the channel that you want to adjust in the Channel Strip section.
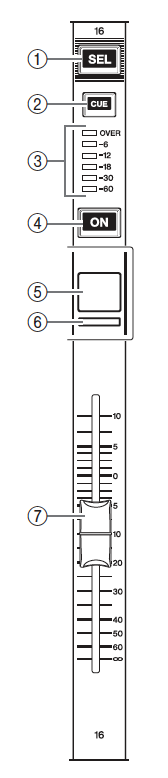
- Click the GAIN knob once to bring up the gain menu. While checking the sound level through the meters, adjust the channel GAIN knob of the Selected Channel section. Click Analog Gain, and use the TOUCH AND TURN knob to bring up/down the gain.
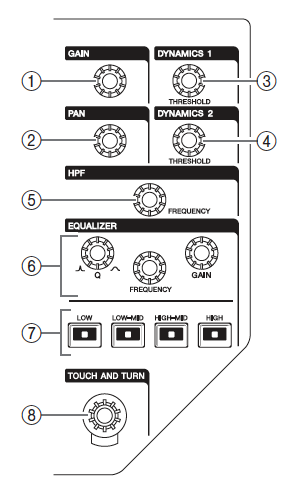
- Adjust the gain level for other channels in the same way, by pressing their SEL keys, and then rotating the GAIN knobs.
Sending an input channel signal to the STEREO bus
-
Press the SEL key of the input channel you want to control.
-
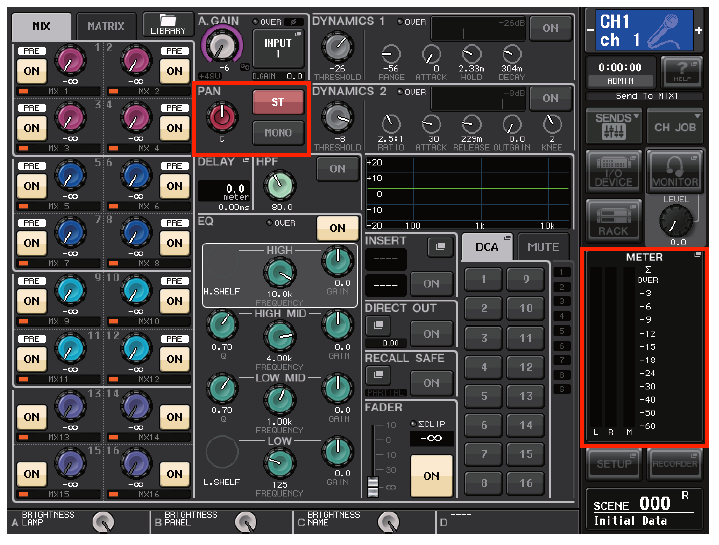
Press one of the knobs in the Selected Channel section, to return to the SELECTED CHANNEL VIEW screen.
-
In the TO ST PAN/BALANCE field, make sure the ST button is on (lights in pink).
-
In the top panel, press the ON key of the corresponding input channel to turn it on.
-
In the Master section, turn on the ON key of the STEREO channel, and raise the STEREO channel fader to 0dB.
-
Raise the fader of the currently selected input channel to an appropriate volume. Ideally, the stereo levels should be in the -10dB to -20dB range. Turn down the gain if the mic starts clipping, i.e., meter level is OVER.
-
Turn on the ON key of the MONITOR channel, and raise the MONITOR fader to an appropriate volume.
Check here if sound isn’t working.
Monitor and Cue functions
The Monitor function lets you monitor various outputs through your nearfield monitors. By default, the monitor source is the STEREO channel. You can adjust this to your needs. Above the meters, click MONITOR.
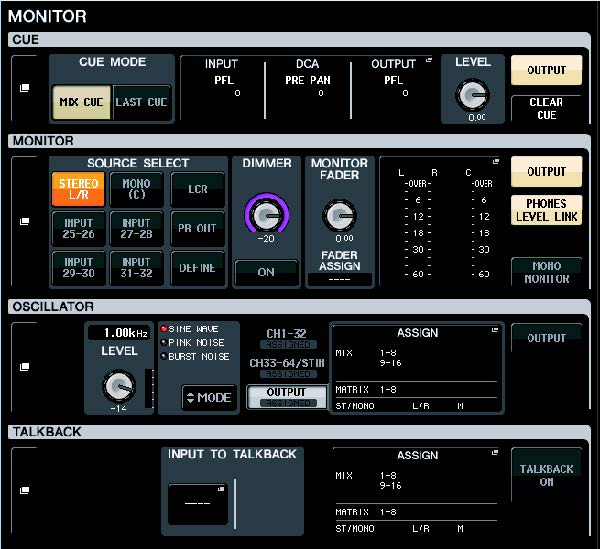
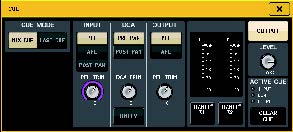
The Cue function enables you to check an individual channel or DCA group by temporarily monitoring it via MONITOR OUT. You can press the CUE key for any channel/group to turn cue on. This console has CUE set to post fader, so you’ll hear all the processing/panning that goes into the STEREO feed. You can change this in the CUE window. Note that PFL means pre-fader and AFL means post-fader. When something is being cued, the meter field will indicate the output level of the cue out.
Dynamics
There are different ways to adjust the dynamics parameters.