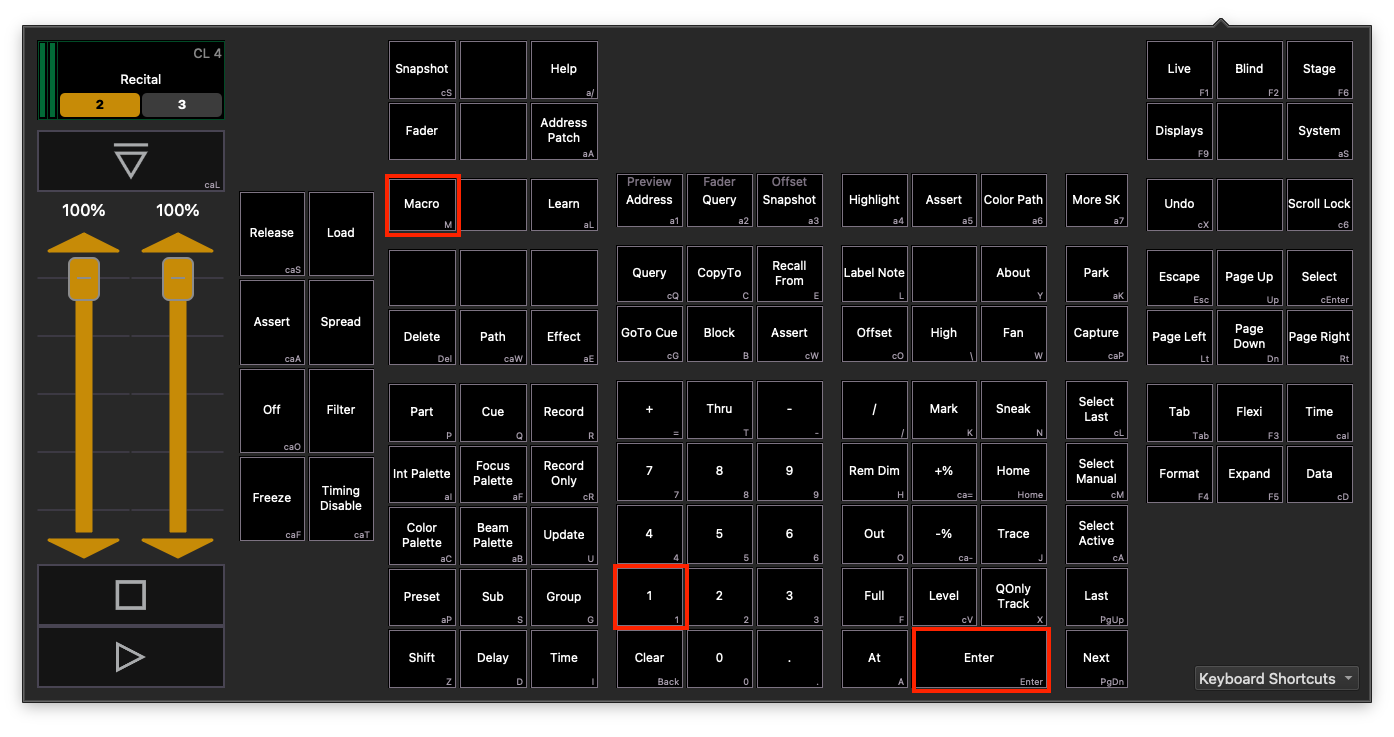
Before things get crazy, it’s always a good idea to know how to get back to a known stage. Macro 1 is the startup macro that restores every tab to their default location. If you’re ever lost in the tabs and want to get back to a familiar place, press:
- [Macro] [1] [Enter]
The content below assumes you have some basic understanding of EOS programming. If you’re unsure of how to get started, consult Alexi Carlson or Tony Stoeri. Check here for a video tutorial of this section.
Effects
Broadly speaking, effects are when parameters vary with time. This gives us four basic effects:
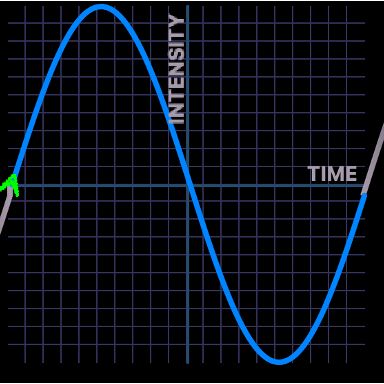
Sine Effect
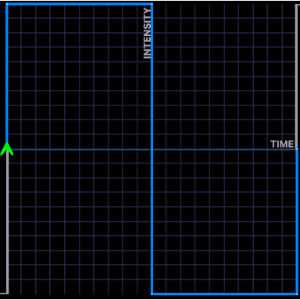
Step Effect
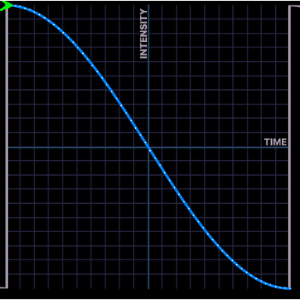
Burst Effect
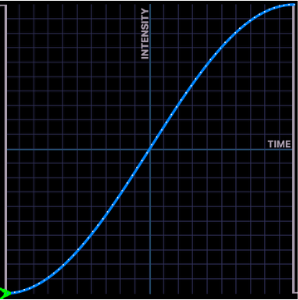
Ramp Effect
- Sine effect: parameters fades in, and then fades out.
- Step effect: parameters snaps in, and then snaps out.
- Burst effect: parameters snaps in, and then fades out.
- Ramp effect: parameters fades in, and then snaps out.
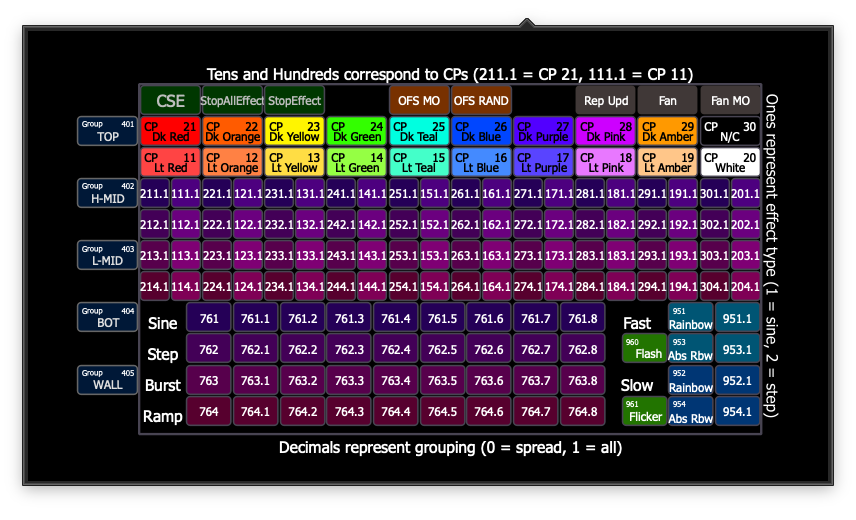
Numbering Convention
The parameters can be intensity or non-intensity parameters (such as color). Our effects pop-up magic sheet is organized such that
- The unit digit represents the type of basic effect: sine, step, burst, ramp.
- The hundreds and the tens represent the color of that effect, if applicable, i.e., the color will vary between the base color, and the color associated with that color palette.
- The decimals represent the grouping of that effect, i.e., whether the effect applies to all channels one after another (grouping of 0, or spread), all channels at once (grouping of 1), every other channel (grouping of 2), etc.
For intensity effects, I programmed grouping up to 8; for color effects, grouping is up to 4. For instance, if my wall is on Color Palette 28 (Dark Pink), and I apply Effect 163.2, I would type:
- [Group] [405] [Full] [Full]
- [Group] [405] {Color Palette} [28] [Enter]
- [Group] [405] [Effect] [163.2] [Enter]
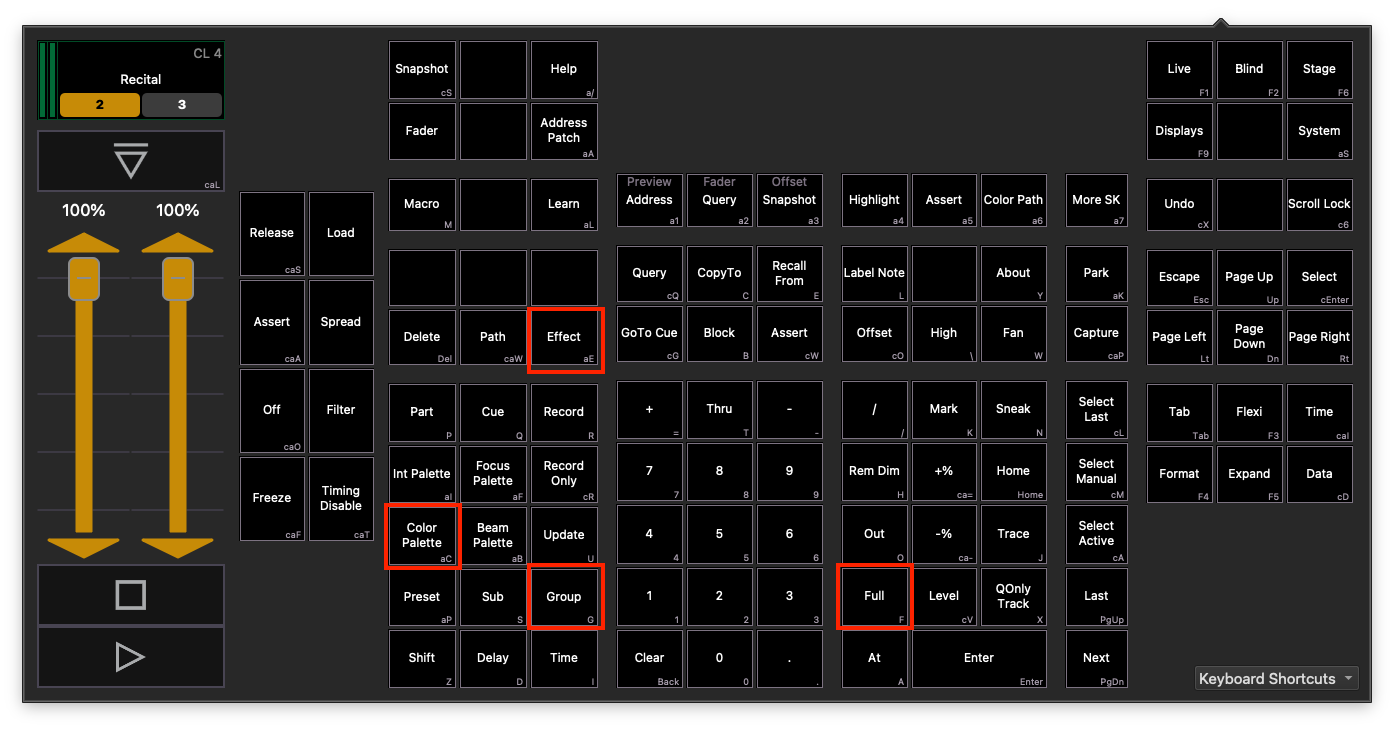
I would see a two color burst effect being applied as groups of 2: every other channel will snap into light blue from dark pink, and then fades back gradually into dark pink again. If you clear the command line with [Shift] [Clear], and press [Effect]:
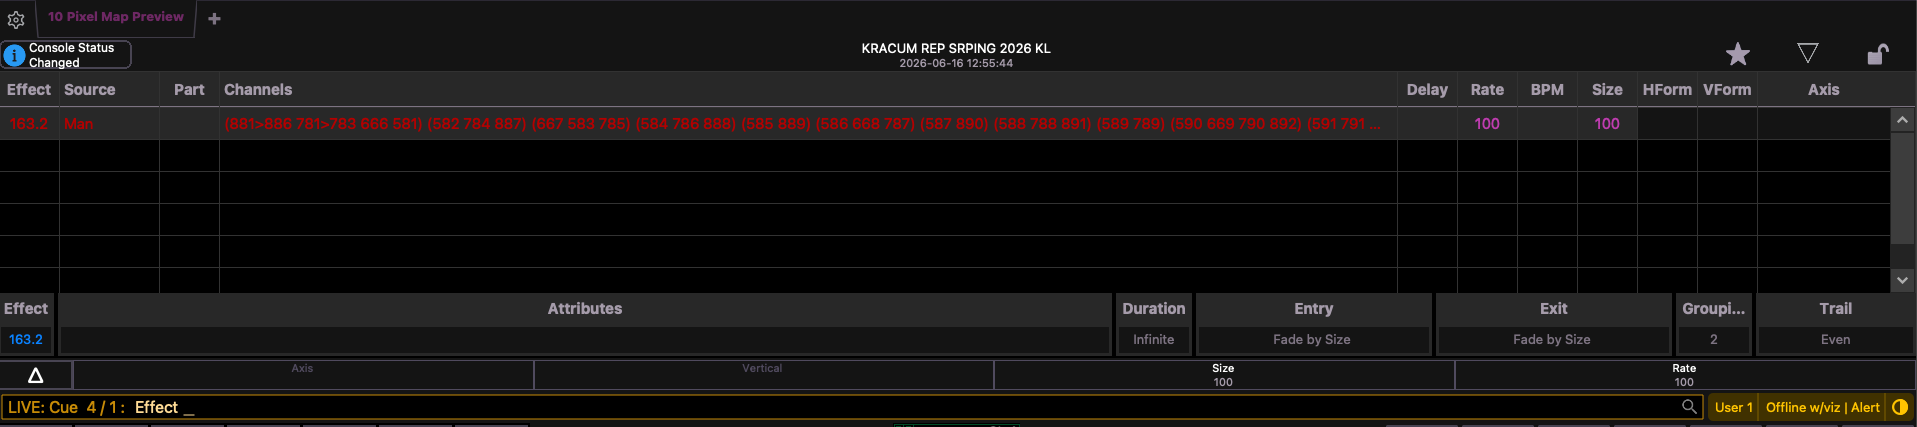
You can adjust the rate and the size, and the BPM, if you know it. If you don’t know what the BPM is, you can learn it by selecting the effect you wish to adjust and press:
- [Effect] [163.2] [Enter]
- [Learn] [Time]
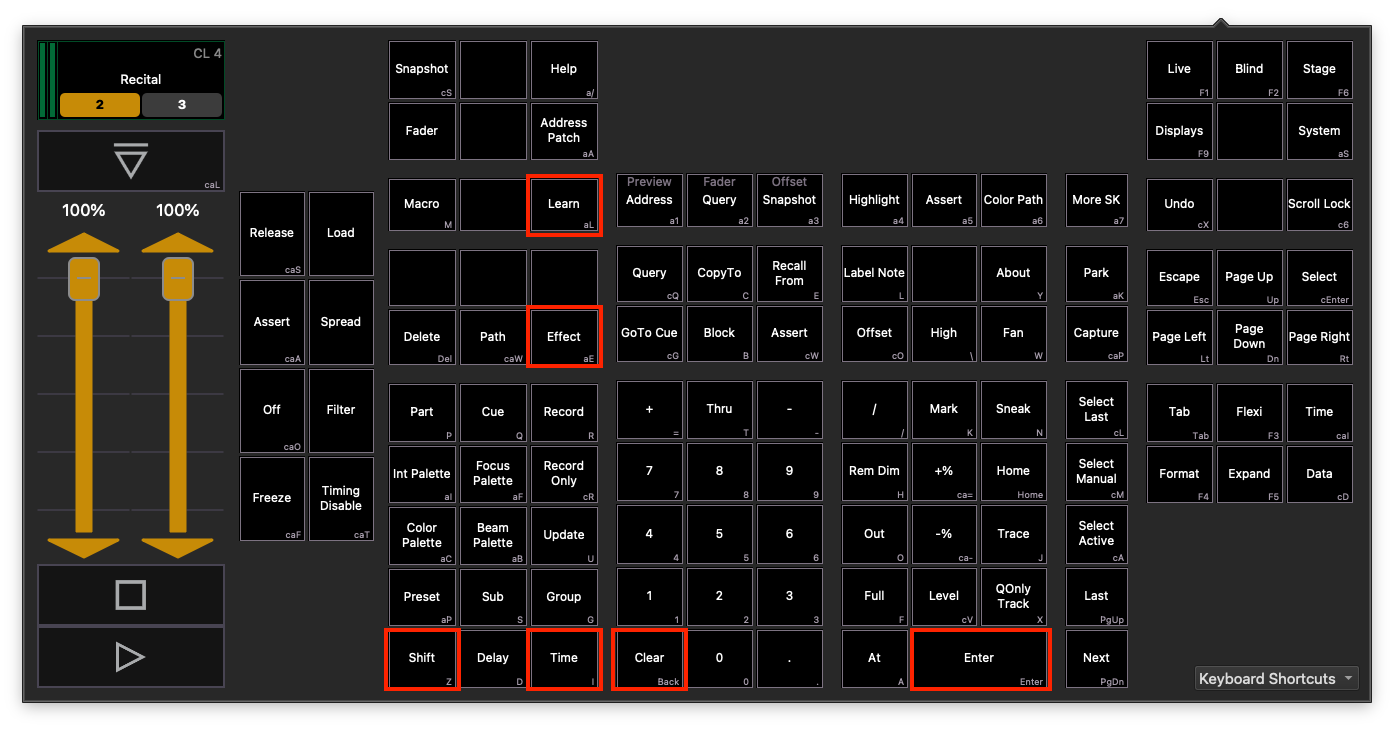
You can now use the [Enter] key to tap to tempo. When done, press [Learn] again to finalize it. You can now save this into a cue.
Offset vs. Fan
Offset
{Offset} applies at the channel level. If you want to alter the order of the channel selection, you should use {Offset}.
By default, [Group] [405] has our wall selected from left to right. If you apply:
- [Group] [405] [Effect] [761] [Enter]
You will see a sine wave going from left to right. If you want the sine wave to start from the center instead, you would apply:
- [Group] [405] {Offset} {Mirror Out} [Effect] [761] [Enter]
Now the sine wave would start from the center instead. There are many other orderings. If you want the wall to split between the left half and the right half, you can use
- [Group] [405] {Offset} {Num Groups} [2] [Effect] [761] [Enter]
If you want the ordering to be random, you can use
- [Group] [405] {Offset} {Random Channels} [Effect] [761] [Enter]
Note that this ordering applies horizontally, since the original [Group] [405] is organized horizontally. If you want vertical orderings instead, you should use [Group 406].
You can combine {Offset} with {Color Palette}s to make things more interesting. For instance,
- [Group] [405] {Offset} {Random Channels} {Color Palette} [11] [+] [16] [+] [28] [Enter]
will randomly place Light Red, Light Blue, and Dark Pink onto the wall. If you only select 2 color palettes, this will be equivalent to fanning between the two palettes, introduced below.
Fan
{Fan} applies at the parameter level. You can use {Fan} to have the wall fade between two colors:
- [Group] [405] {Fan} {Color Palette} [11] [+] [16] [Enter] will fade the wall from
Light Red(left) toLight Blue(Right). - [Group] [405] {Fan} {Color Palette} {Mirror Out} [11] [+] [16] [Enter] will fade the wall from
Light Red(stage center) toLight Blue(house).
Discrete Timing
You can apply discrete timing at the channel or parameter level. You can combine discrete timing with Offset/Fan to make interesting things.
Time
Let’s say you have two cues, Cue 1 and Cue 2. Cue 1 has the wall in Dark Blue and Cue 2 has the wall in Dark Red. Instead of fading everything together, you want the wall to change color from left to right. In that case, while in Cue 2, you can do:
- [Group] [405] [Time] [5] [Thru] [20] [Enter]
- [Update] [Cue Only] [Enter]
Now the first channel of that group (leftmost) will take 5 seconds to fade, while the last channel (rightmost) will take 20 seconds to fade. This creates the illusion that the color changes from left to right. Once you’ve updated the cue, you will see a small + on the top right of cue times to indicate that you’ve applied discrete timing. To get rid of discrete timing: press
- [Group] [405] [Time] [Enter]
- [Update] [Cue Only] [Enter]
Delay
Alternatively, you can use delay and offset to make things more dramatic. You can also specify you just want discrete timing on specific parameters such as intensity or color:
- [Group] [405] {Offset} {Mirror Out} [Delay] [0] [Thru] [10] [Enter]
- [Update] [Cue Only] [Enter]
To get rid of discrete delays: press
- [Group] [405] [Delay] [Enter]
- [Update] [Cue Only] [Enter]
Delay vs Time
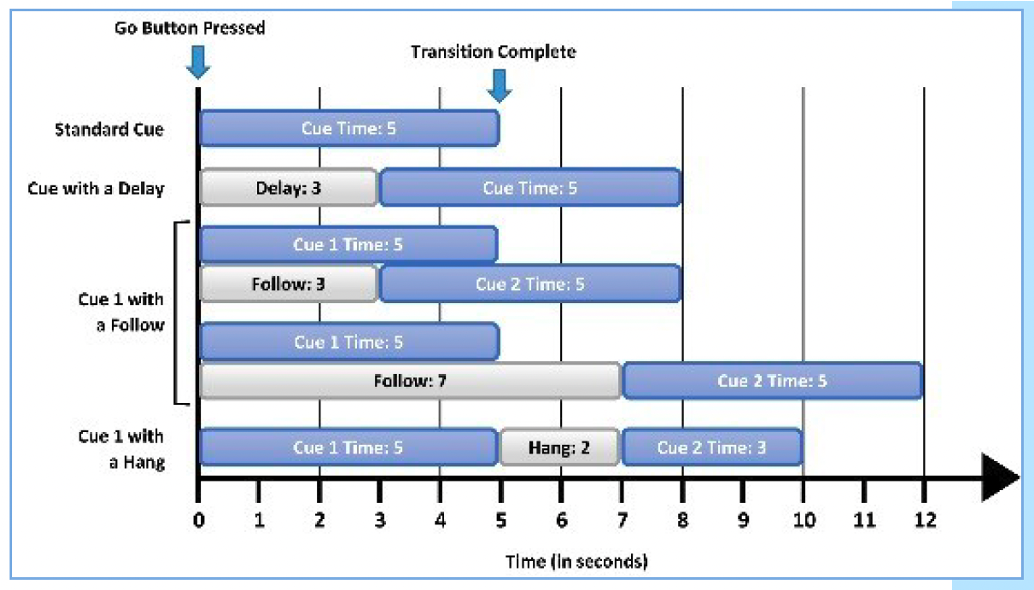
Using Discrete Time
Using Discrete Delay
Macros
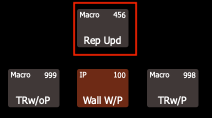
You might come across a time when you have to do repeated updates for multiple cues in the cue list, and there might be auto-blocks preventing you from tracking through (or that you just want to apply changes to some but not all cues afterwards). You can use Macros to easily achieve this. Go to the first cue where you want to apply the changes:
- [Learn] [456] [Enter]
- [Enter] again to confirm you want to overwrite. Now apply the changes
- [Group] [405] {Int Palette} [100] [Enter] …
- [Update] [Cue Only] [Enter]
- [Learn] to save.
Now use [Shift] [GO] to advance. Once you’re in the cue you want the changes to apply, single-click Macro 456 to apply the changes. Repeat this step for all cues you want to change.
Pixel Mapping
There’s a pixel map already configured for this hall. It represents a 1-1 map of the LED Wall Panels. To make our lives easier, you can use Macro 2 to view and edit those channels. Your monitors will instead look like this.
- [Macro] [2] [Enter]
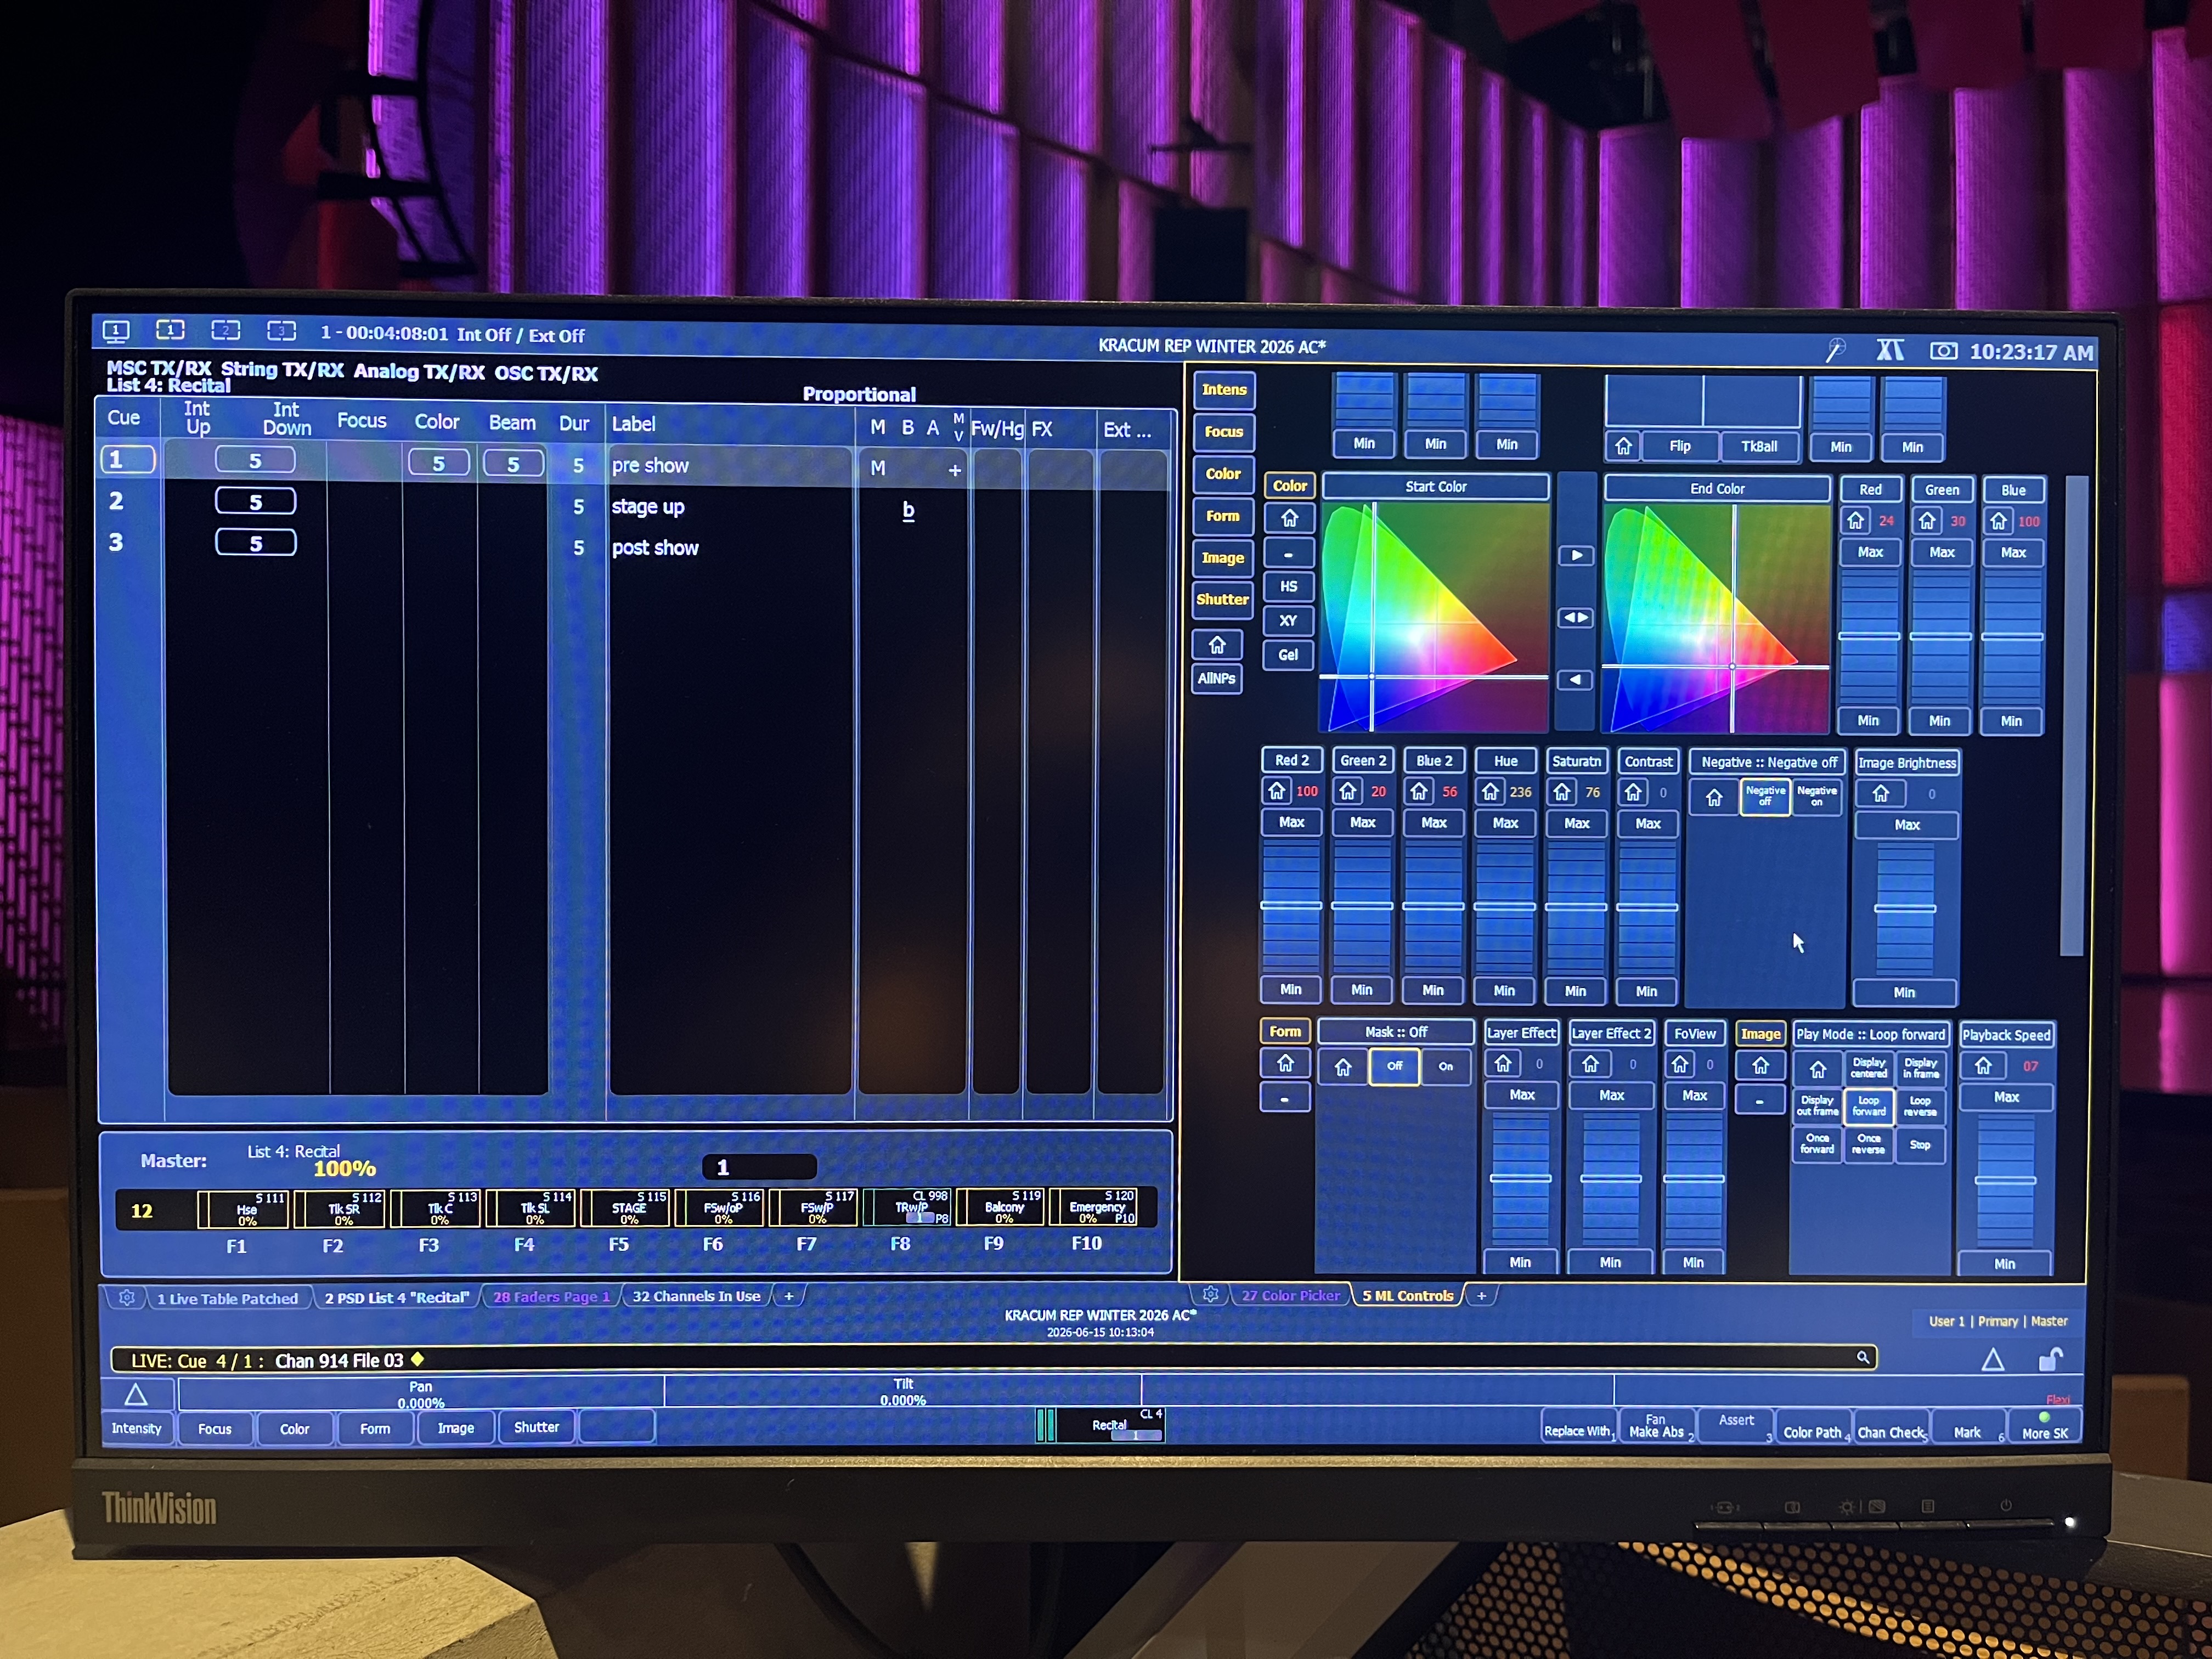
ION Screen 1
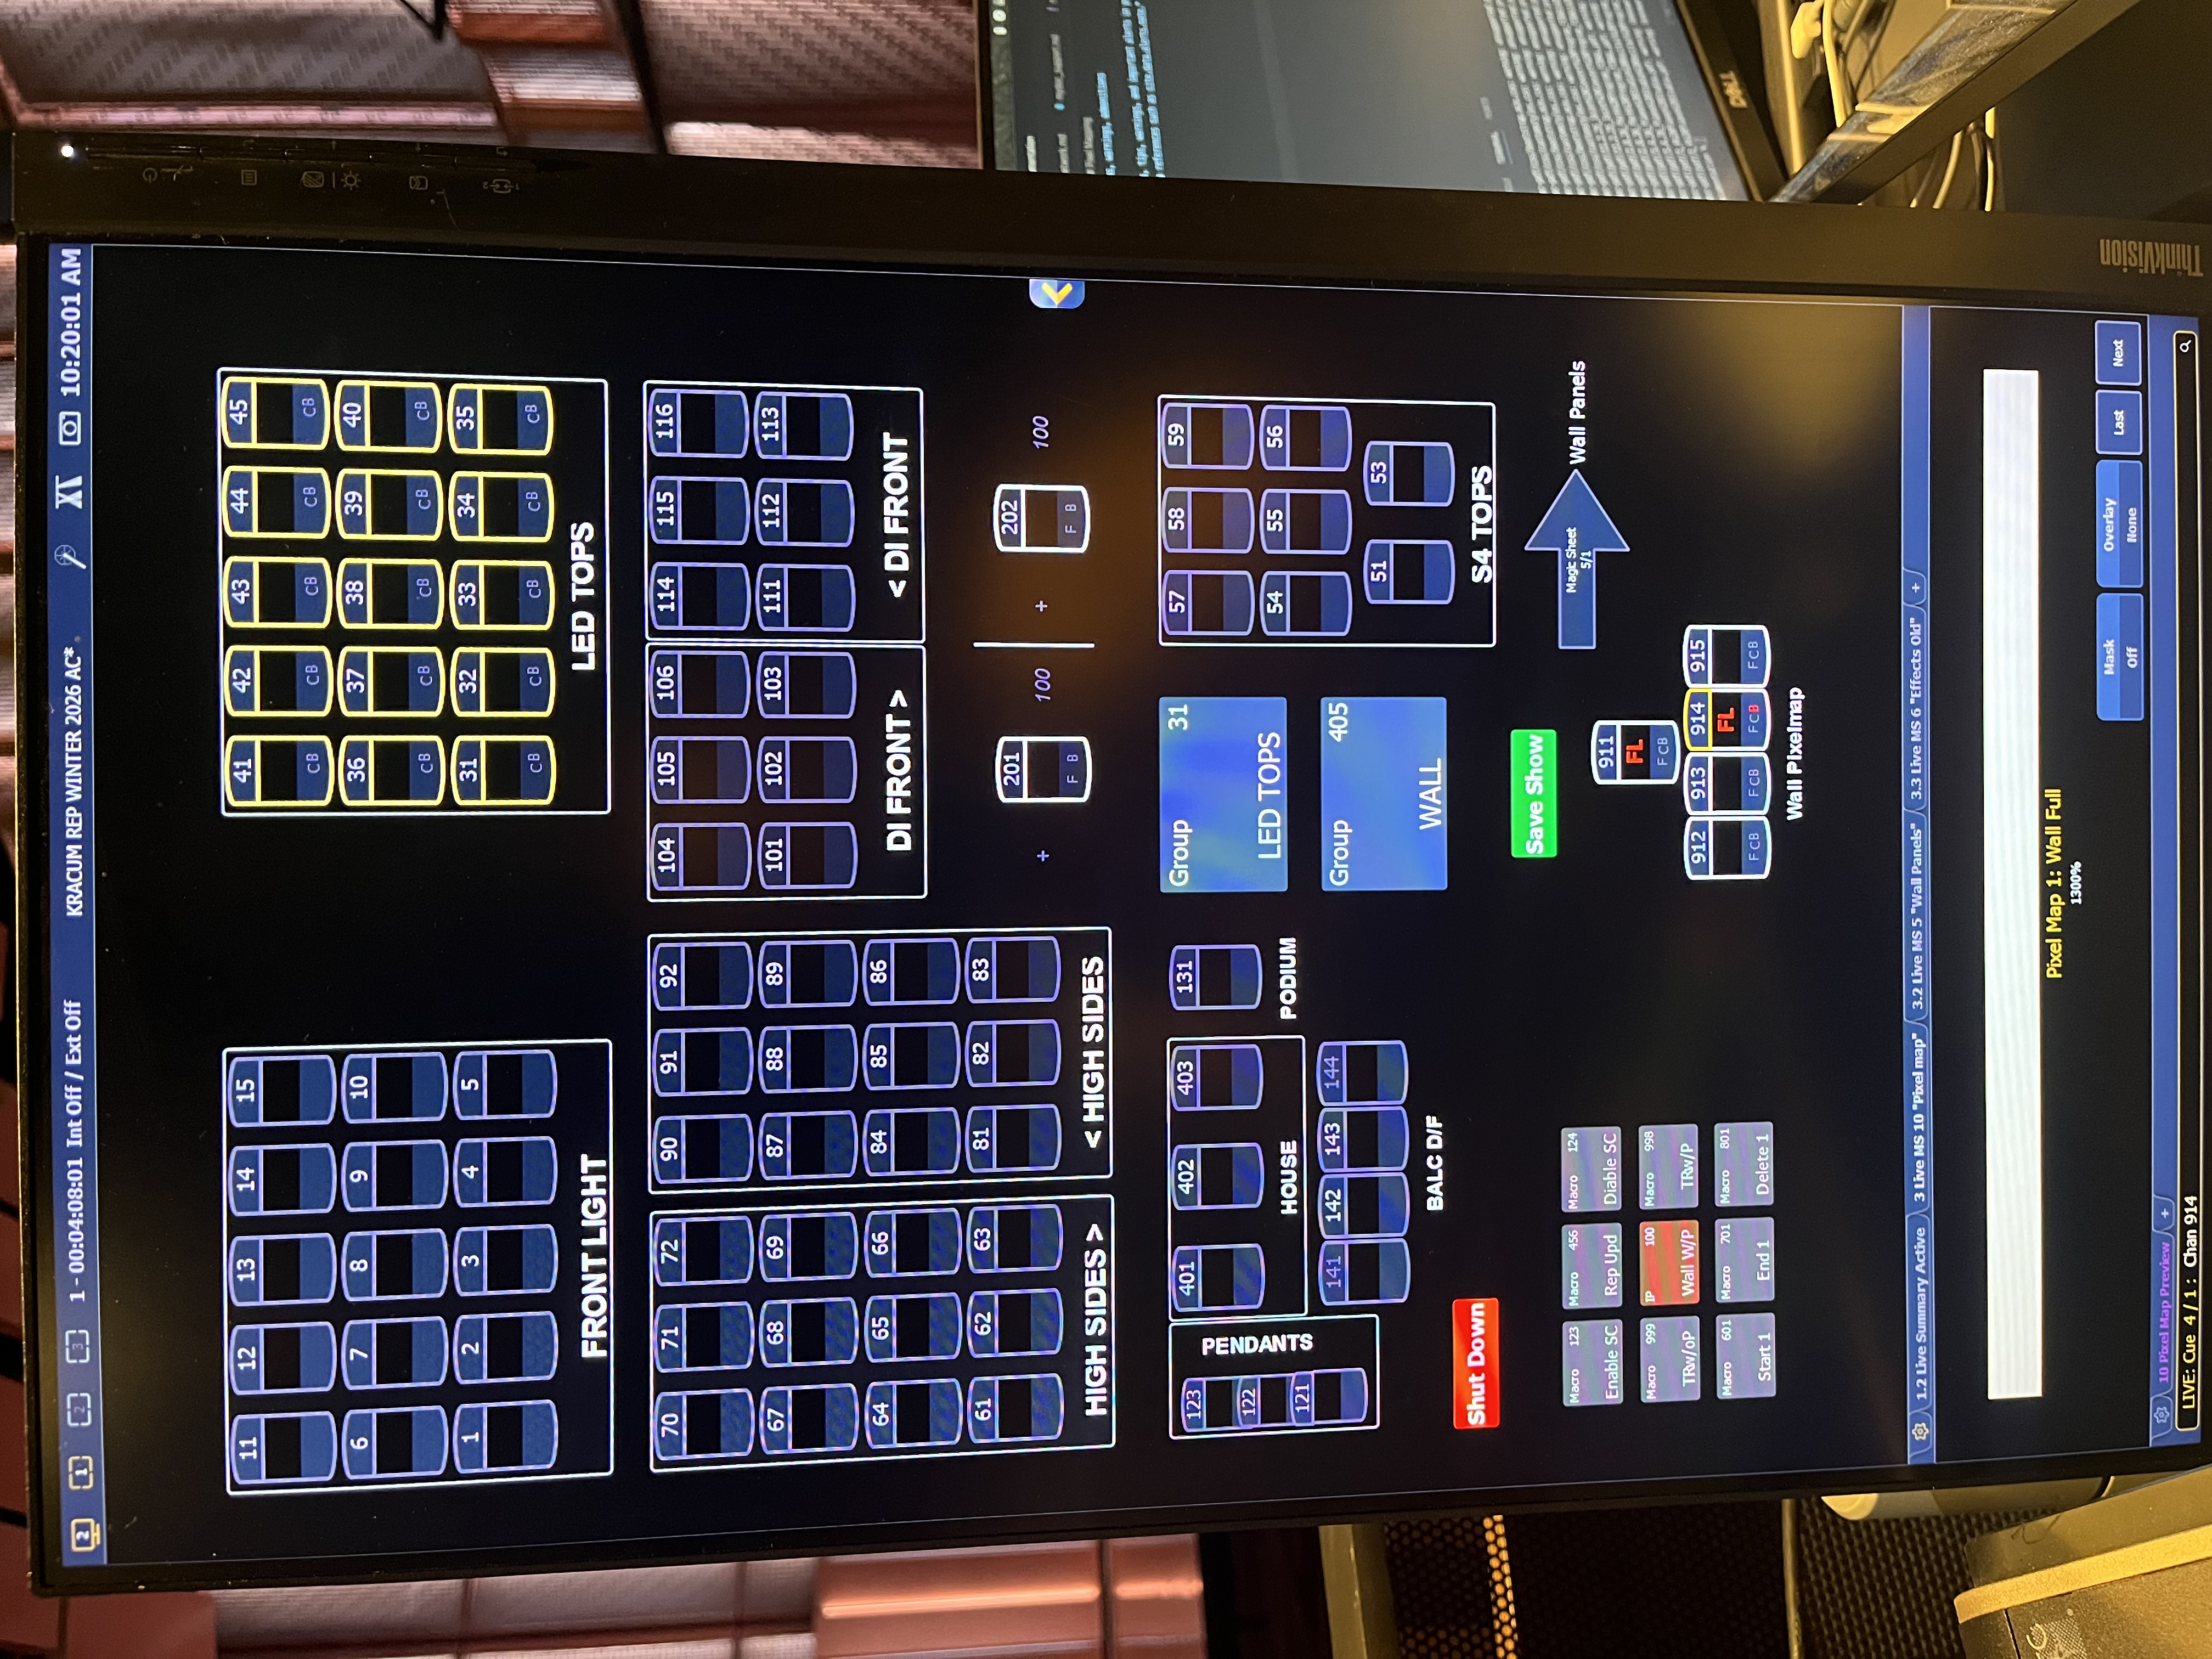
ION Screen 2
Virtual Channels
You will notice immediately five hidden channels: [911] [Thru] [915]. These are virtual channels corresponding to the physical channels of the wall. We use these virtual channels to create layouts of fixtures, known as pixel maps, which then applies media content (images, movies, text, and procedurally generated effects) by way of virtual media layers to the pixel map. A pixel map is a layout of fixtures onto a grid, which determines order of playback and how the data will be interpreted and outputted to create the desired image or effect. A virtual media layer contains one piece of media content.
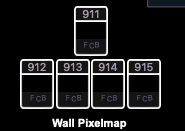
Magic Sheet Pixel Map Channels
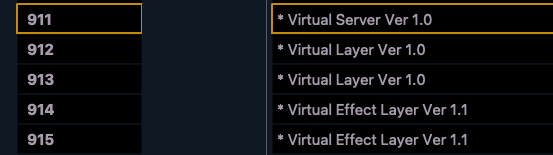
Patch Pixel Map Channels
From the patch above, you can see that
- Chan [911] is a virtual server; think of this as the master layer.
- Chan [912 + 913] are media layers; these channels are where you load images or videos.
- Chan [914 + 915] are effect layers; these channels have some built-in stock effects.
Our wall is a 74 (width) x 4 (height) grid, so it doesn’t have high enough resolution for media layers to appear properly. So for our purposes, we will be mostly using the effect layers.
Effect Layer
To apply a pixel map effect, you need both the virtual server (911) and an effect layer (i.e. 914) to be on. Press:
- [911] [Full] [Full] to turn Channel 911 to full.
Use Moving Light (ML) Controls ([Tab] [5]) on your left screen to turn Crossfade to -100 (by pressing Min). This will ensure the virtual channels takes control over the physical channel. If Crossfade is set to 100, then the physical channels will take over the virtual channels.
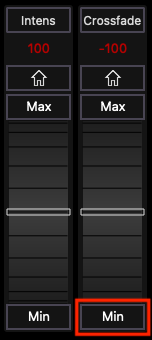
Then turn the one of the effect layers on:
- [914] [Full] [Full]
In ML Controls, set:
- [914] [Width] [74] [Enter]
- [914] [Height] [04] [Enter]
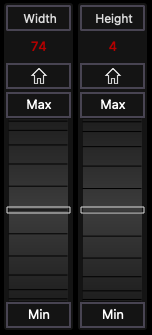
You will need to enter the leading 0 before 4. EOS omits trailing zeros, so if you just enter 4, EOS will interpret it as 40. Now we can start setting the effects. There are three main effect types:
- Two color gradients - adjustable gradients with start and end colors
- Rainbow gradients - fixed gradient, full hue spectrum
- Perlin noise - good for animating random color effects, adjustable gradients
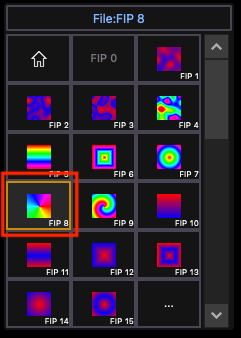
The effects are stored in file 1. File 1:0 is a home position of no effect. 1 through 3 are perlin noise effects, 4 is a perlin noise/ rainbow gradient, 5 through 9 are rainbow gradients, and 10 through 19 are two color gradients. We will demonstrate two types:
Rainbow Gradients
For instance, if we select File 8 in ML Controls, you will see the following rainbow effect radiating from the center.
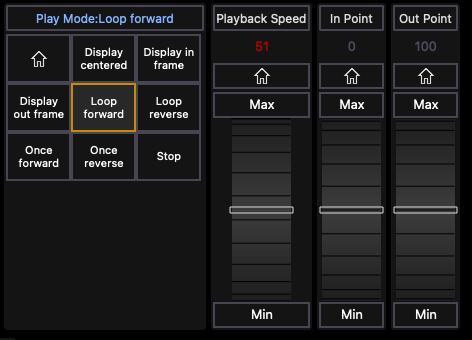
You may adjust any non-intensity parameter from the ML Controls tab, including playback speed.
Two Color Perlin Noise
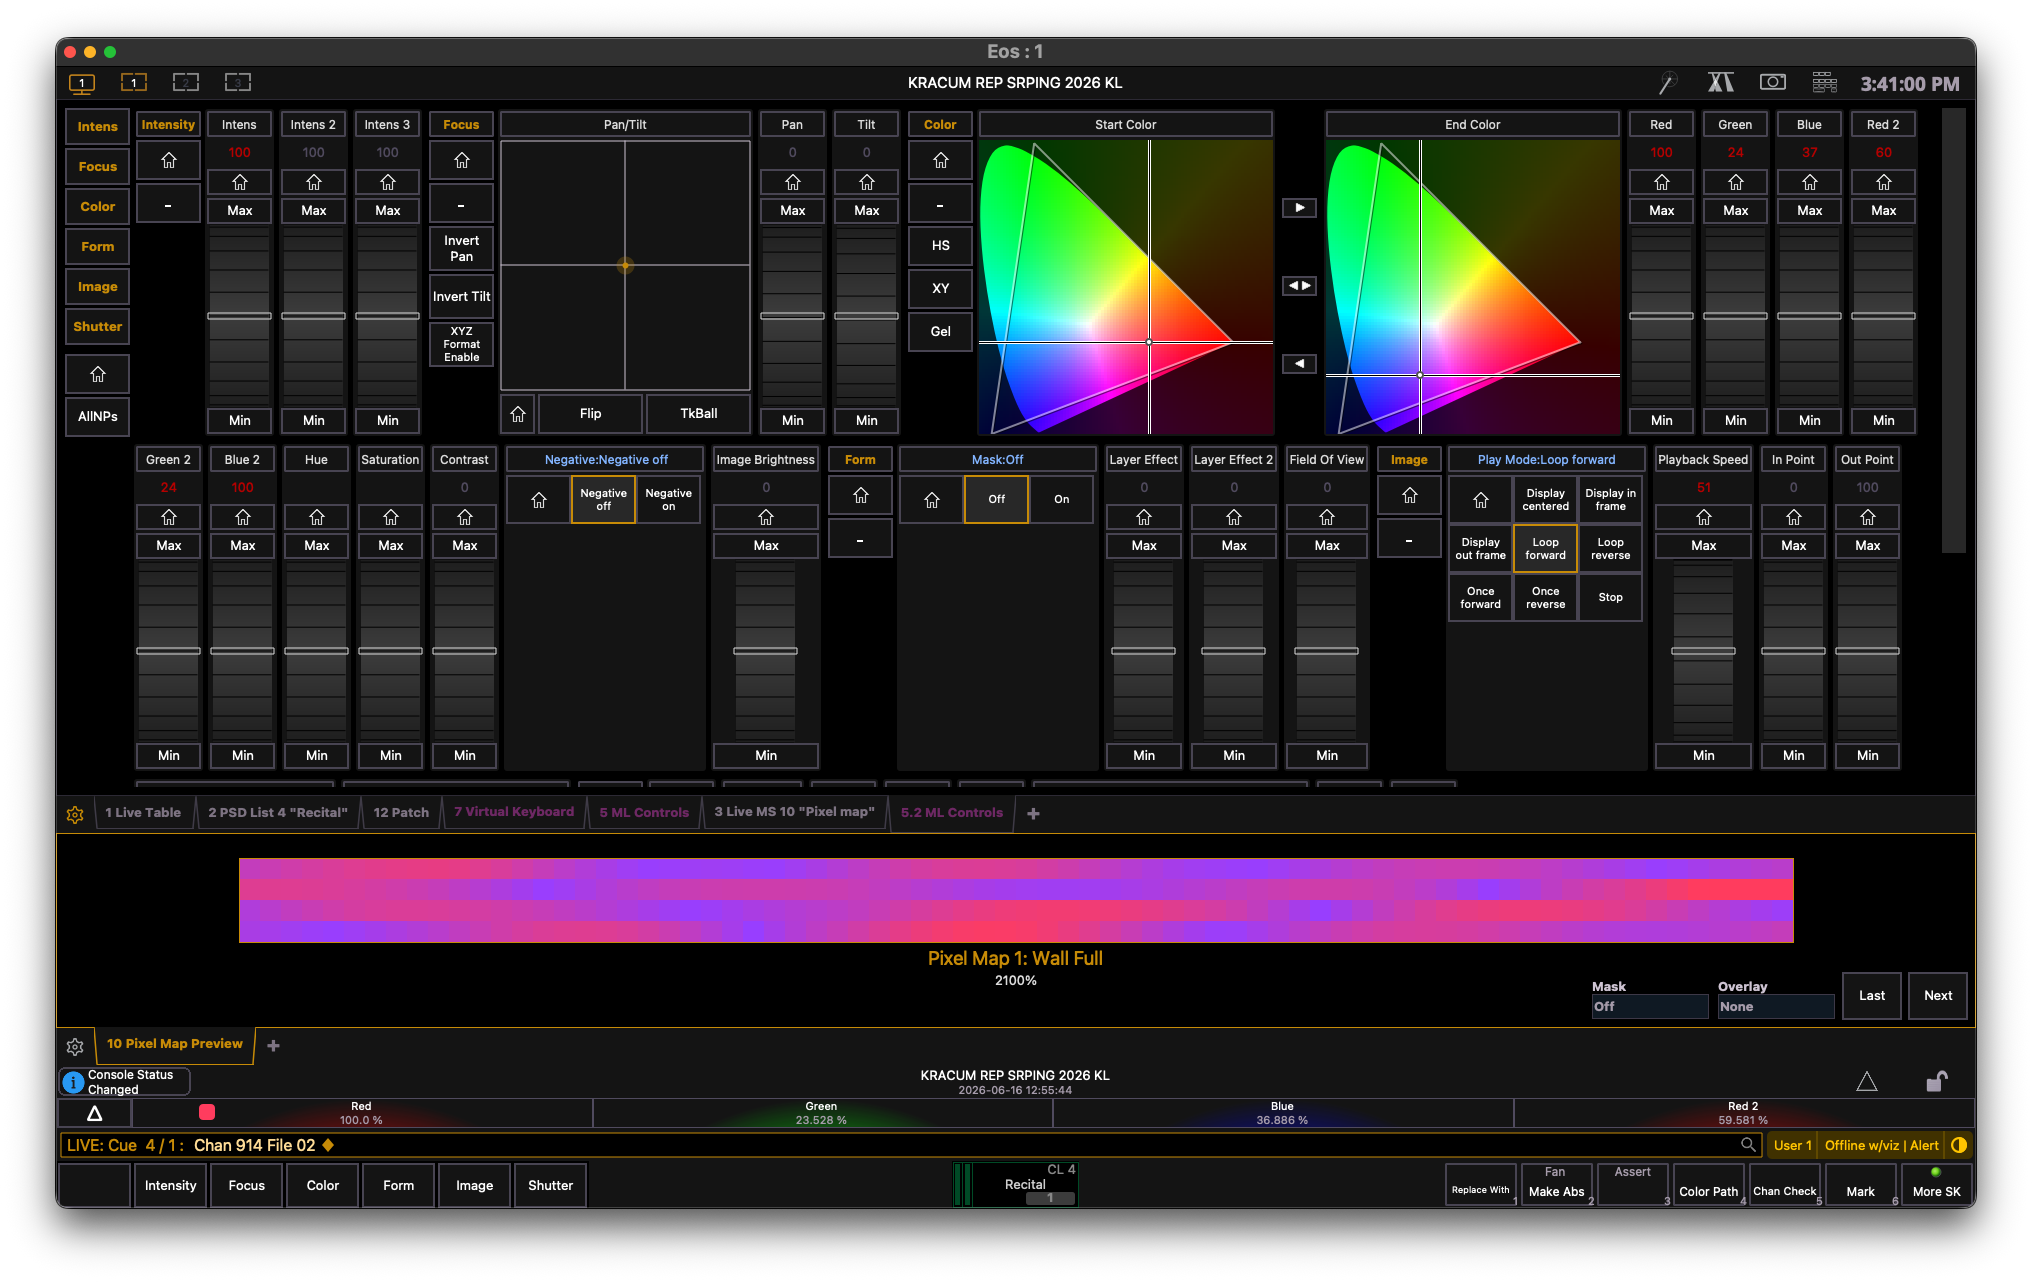
Any file with only red and blue icons are two-color effects, where you can set a start and an end color. For instance, File 2 is a two color Perlin noise effect. This is what it looks like:
You can save these channels just like you would with other channels. Check here if you’re unsure how to record them into cues.
Busking Page
Typically, theatrical lighting assumes linear playback. You design all cues in advance, and go through each cue when the time comes. This requires the designer to be familiar with the piece being performed, and that there is some rehearsal time for that design process to happen.
More often than not, you’ll find yourself in situations where you don’t know what’s going to happen. Linear playback becomes less feasible. Most concert lighting, in contrast, typically assumes non-linear playback. For convenience, I’ve set up the board and the fader wing to do that. Macro 3 takes you to the busking setup. When you run [Macro] [3], you will notice that the board and the fader shifts to the following:
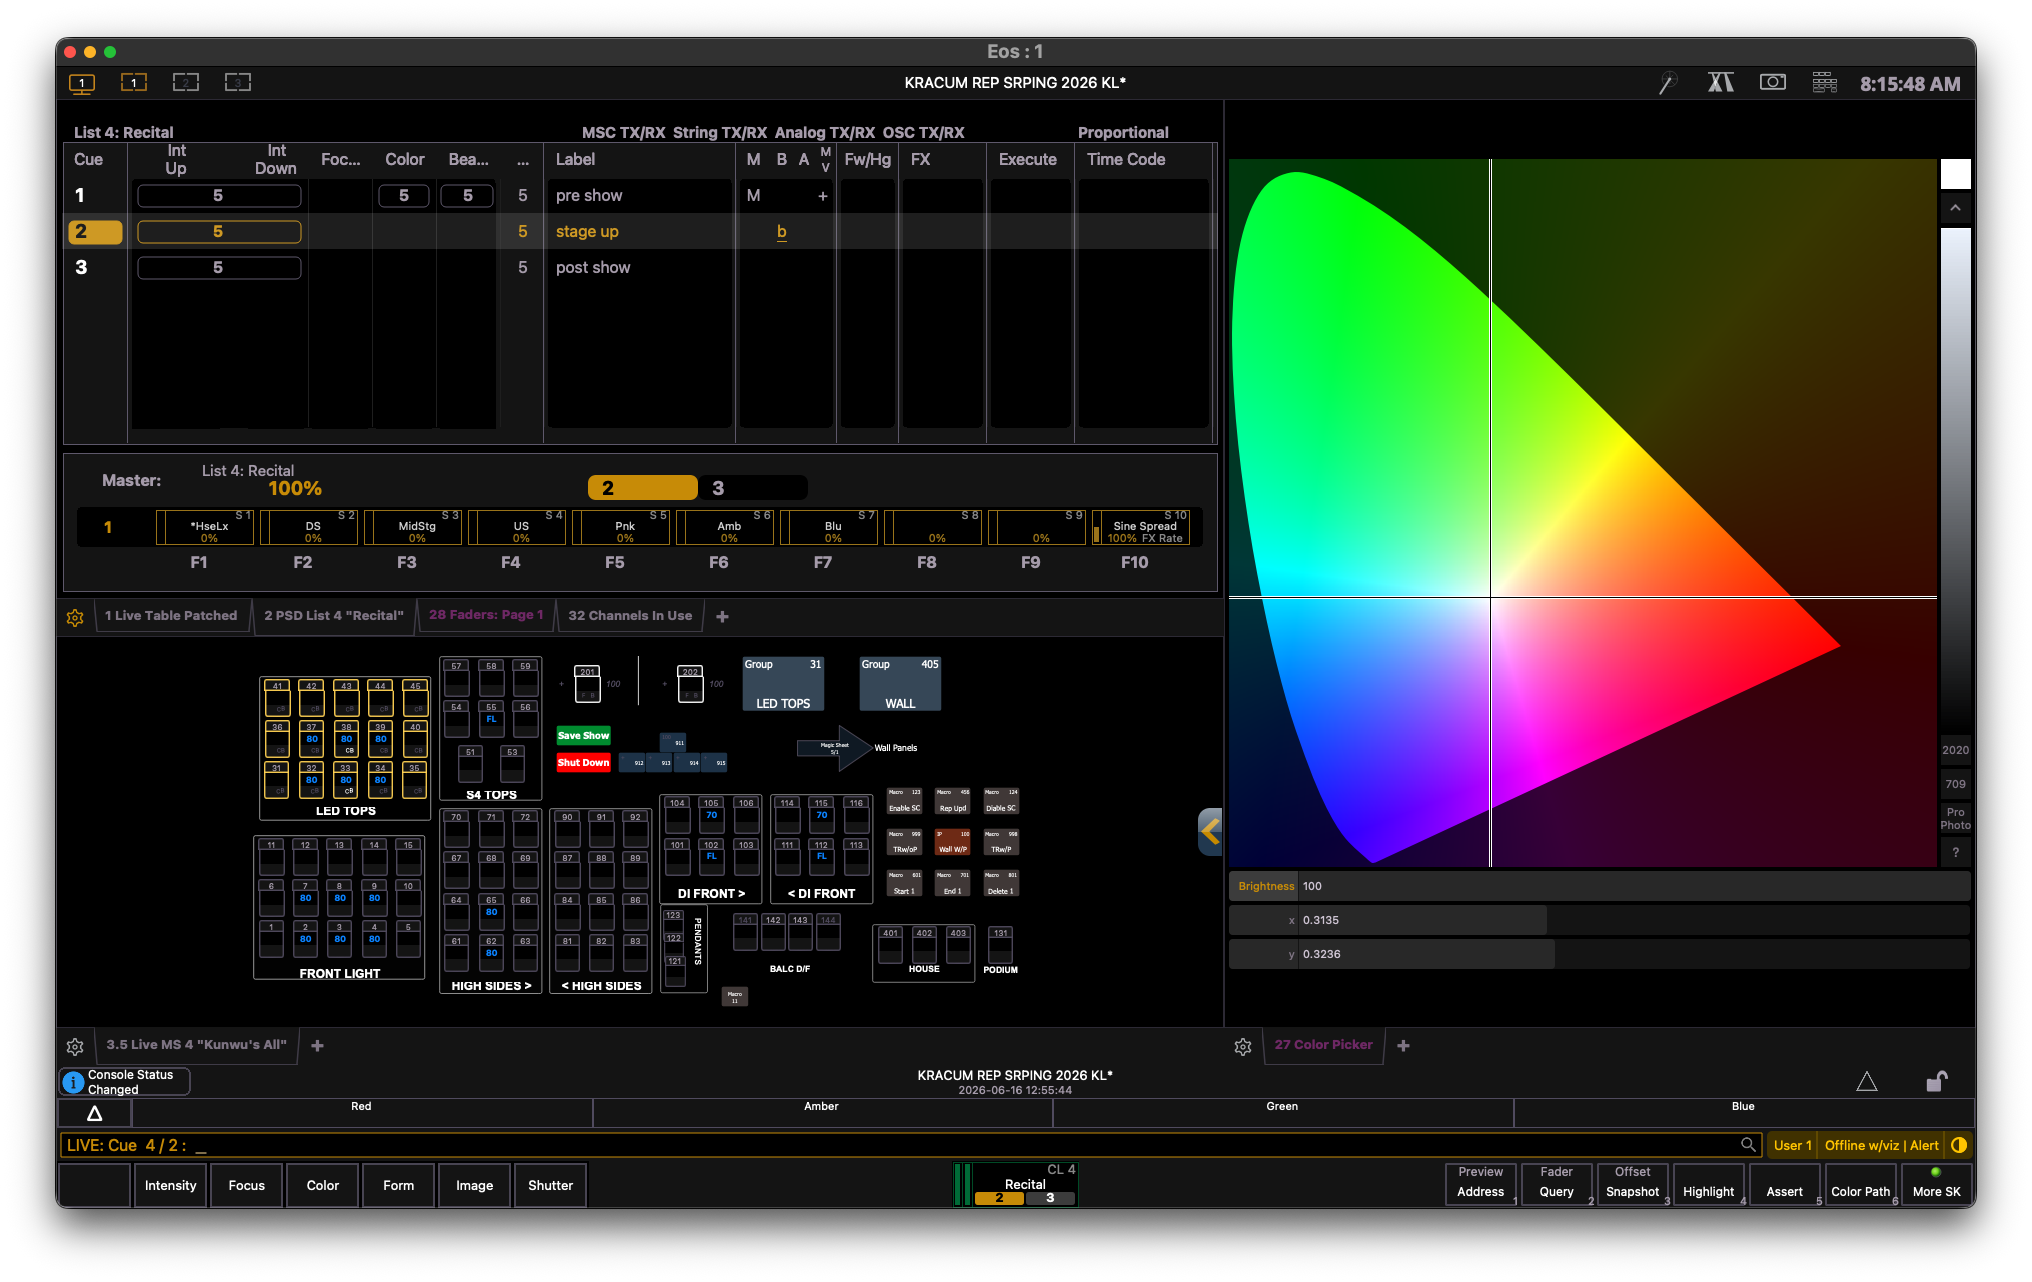
ION Busking Screen 1
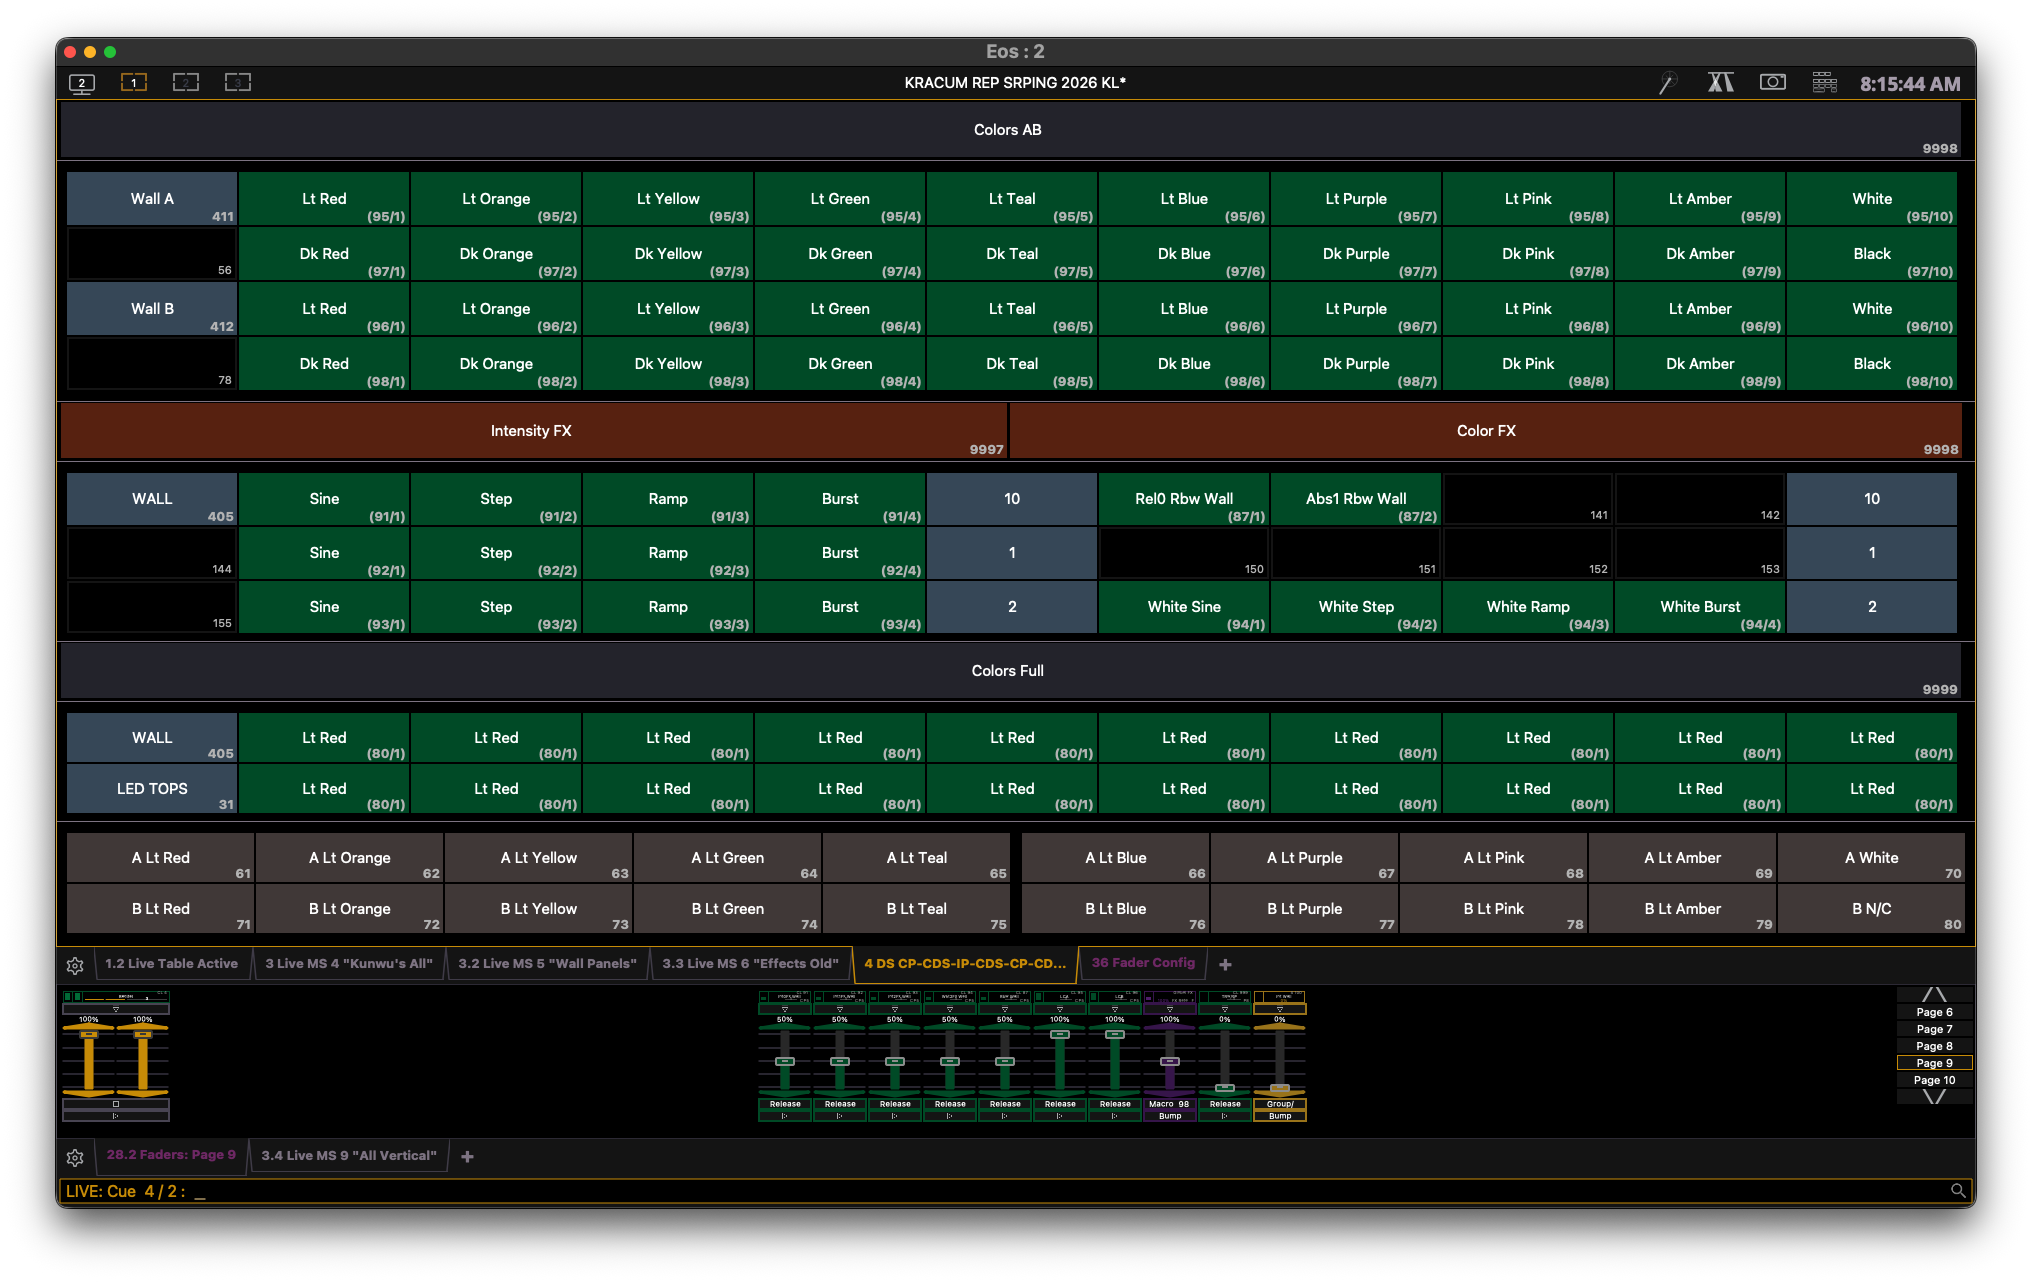
ION Busking Screen 2
Meanwhile, the fader wing is displaying Page 9-10. These are direct selects where you can quickly play according to the music. The faders have cue lists and effects where you can advance and adjust the effect rates according to the music.
A/B Color
These are Scenes where the wall colors are split into two groups. You can double-click to quickly change half of the wall to a different color.

Effects
These are Scenes containing basic intesity effects, the white color effects, and rainbow special effects. They have groupings up to 2. Typically, one uses White as an accent color. You can combine it with different base colors, whether it be A/B colors or whatever color it is in the current cue.

Colors Full
These are Scenes where the entire group of fixtures uses just one color (grouping of 1).

A/B Color
These are color macros that apply color palettes to Cue 997/1 Thru 2. Instead of being applied immediately, they only apply when you advance into those cues, so you can use the [GO] button to tap it to tempo.

Fader Config
The fader wing contains some similar functionalities with more tactile control. For instance, they allow you to advance hidden cue lists more easily, adjust the effect size and rate live, and run macros.
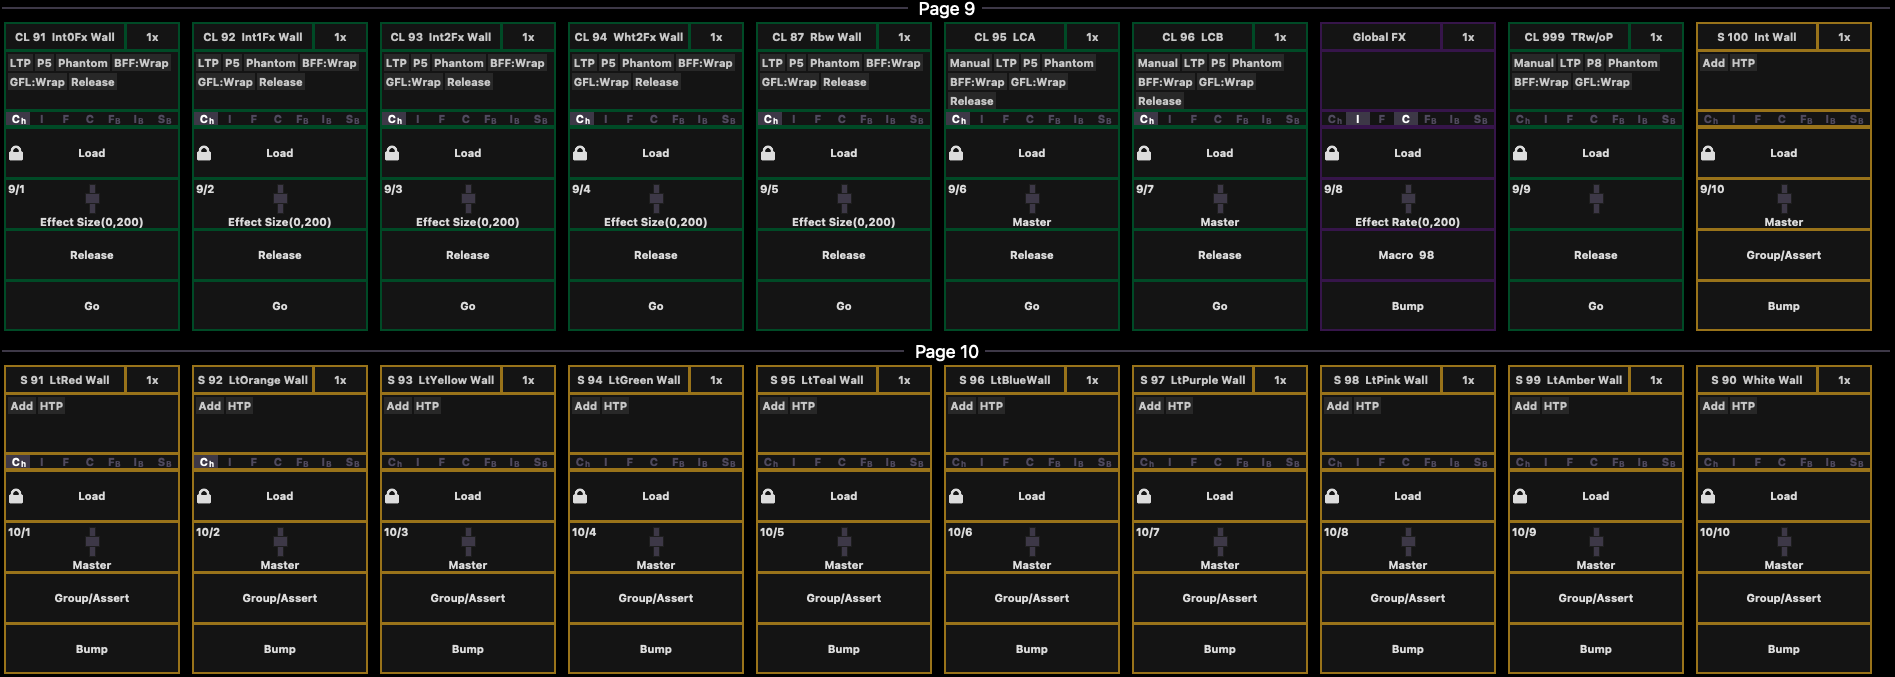
Transition Cues
In particular, Cue 999/1 is a default transition cue (that you use when there’s no projection). It stops any running effect and renders the stage into a blue-out. This is mapped to the usual fader pages 11-12 (Fader 12/8) as well.
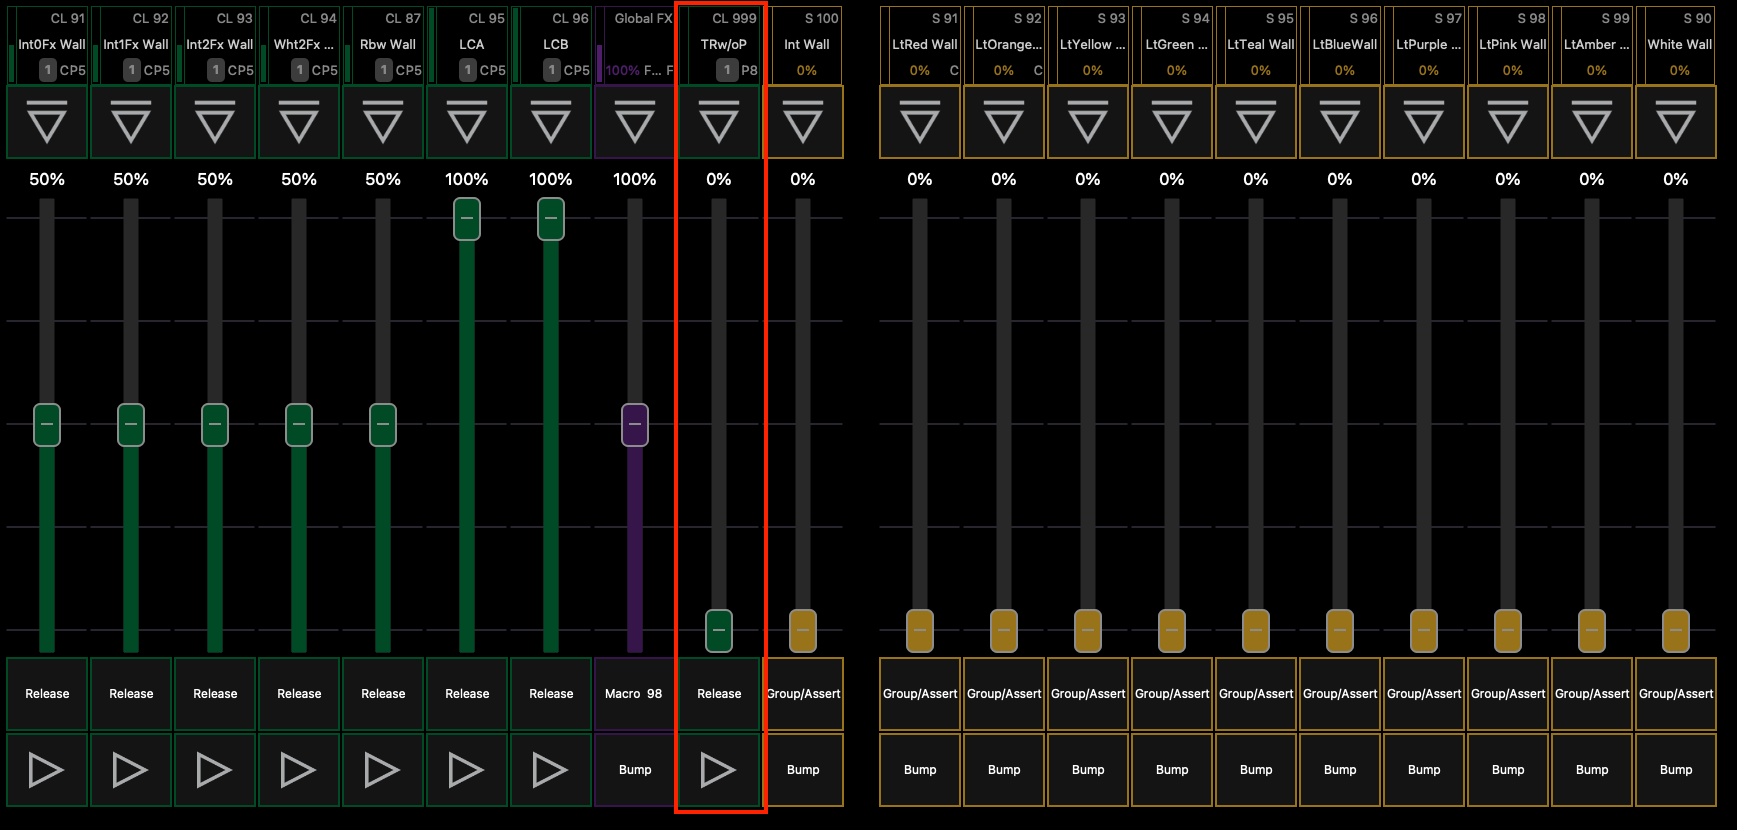
Pressing the bottom button takes you into the default transition cue, and pressing the top releases that cue. You can advance cues while in the transition cue and release it when you’re in the new cue.
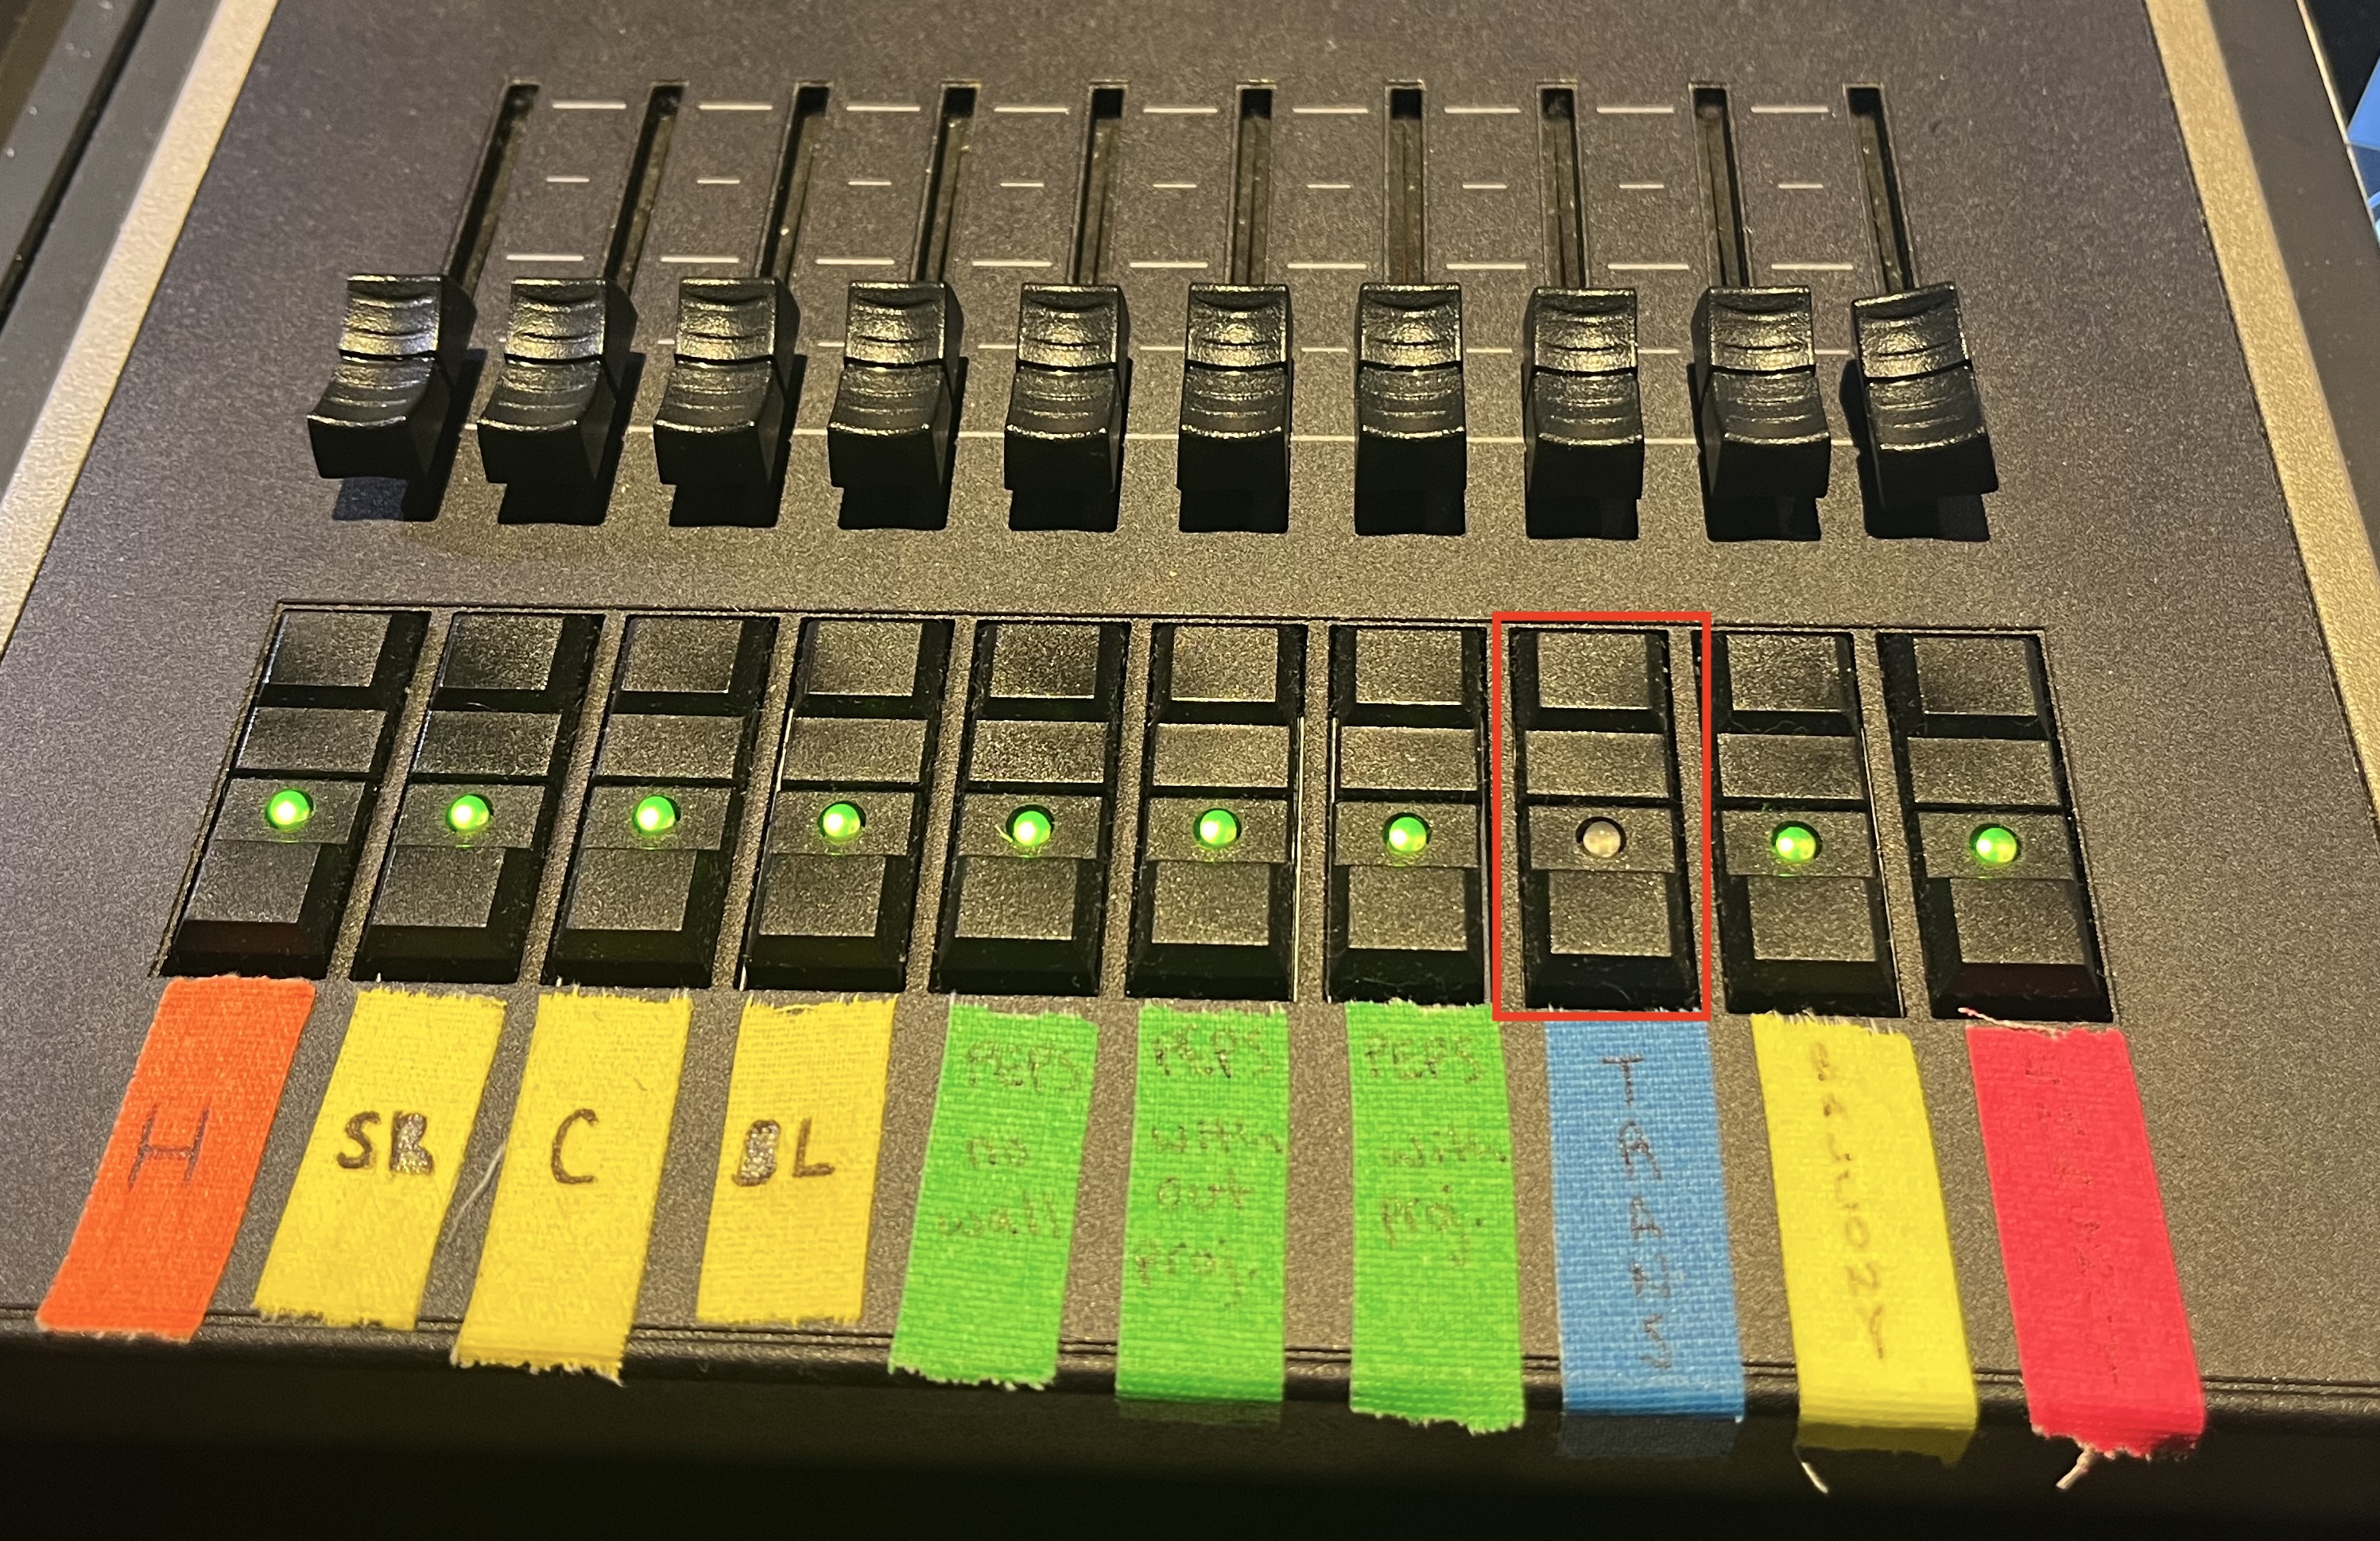
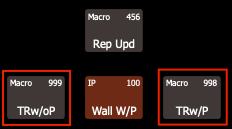
When you’re using projection, you can click Macro 998 to map Cue 998/1 instead to this fader. This simply applies Int Palette 100 to the wall, making the center of the stage dimmer around the projector screen.