Switching Basics
We use ATEM Software Control to control the Blackmagic switchers in our spaces. We’ll use the main switcher, ATEM 1 M/E Constellation HD, as our example.
When you sit down at the broadcast booth, you will likely see the multiview on the monitor, and the ATEM software on the ATEM laptop.
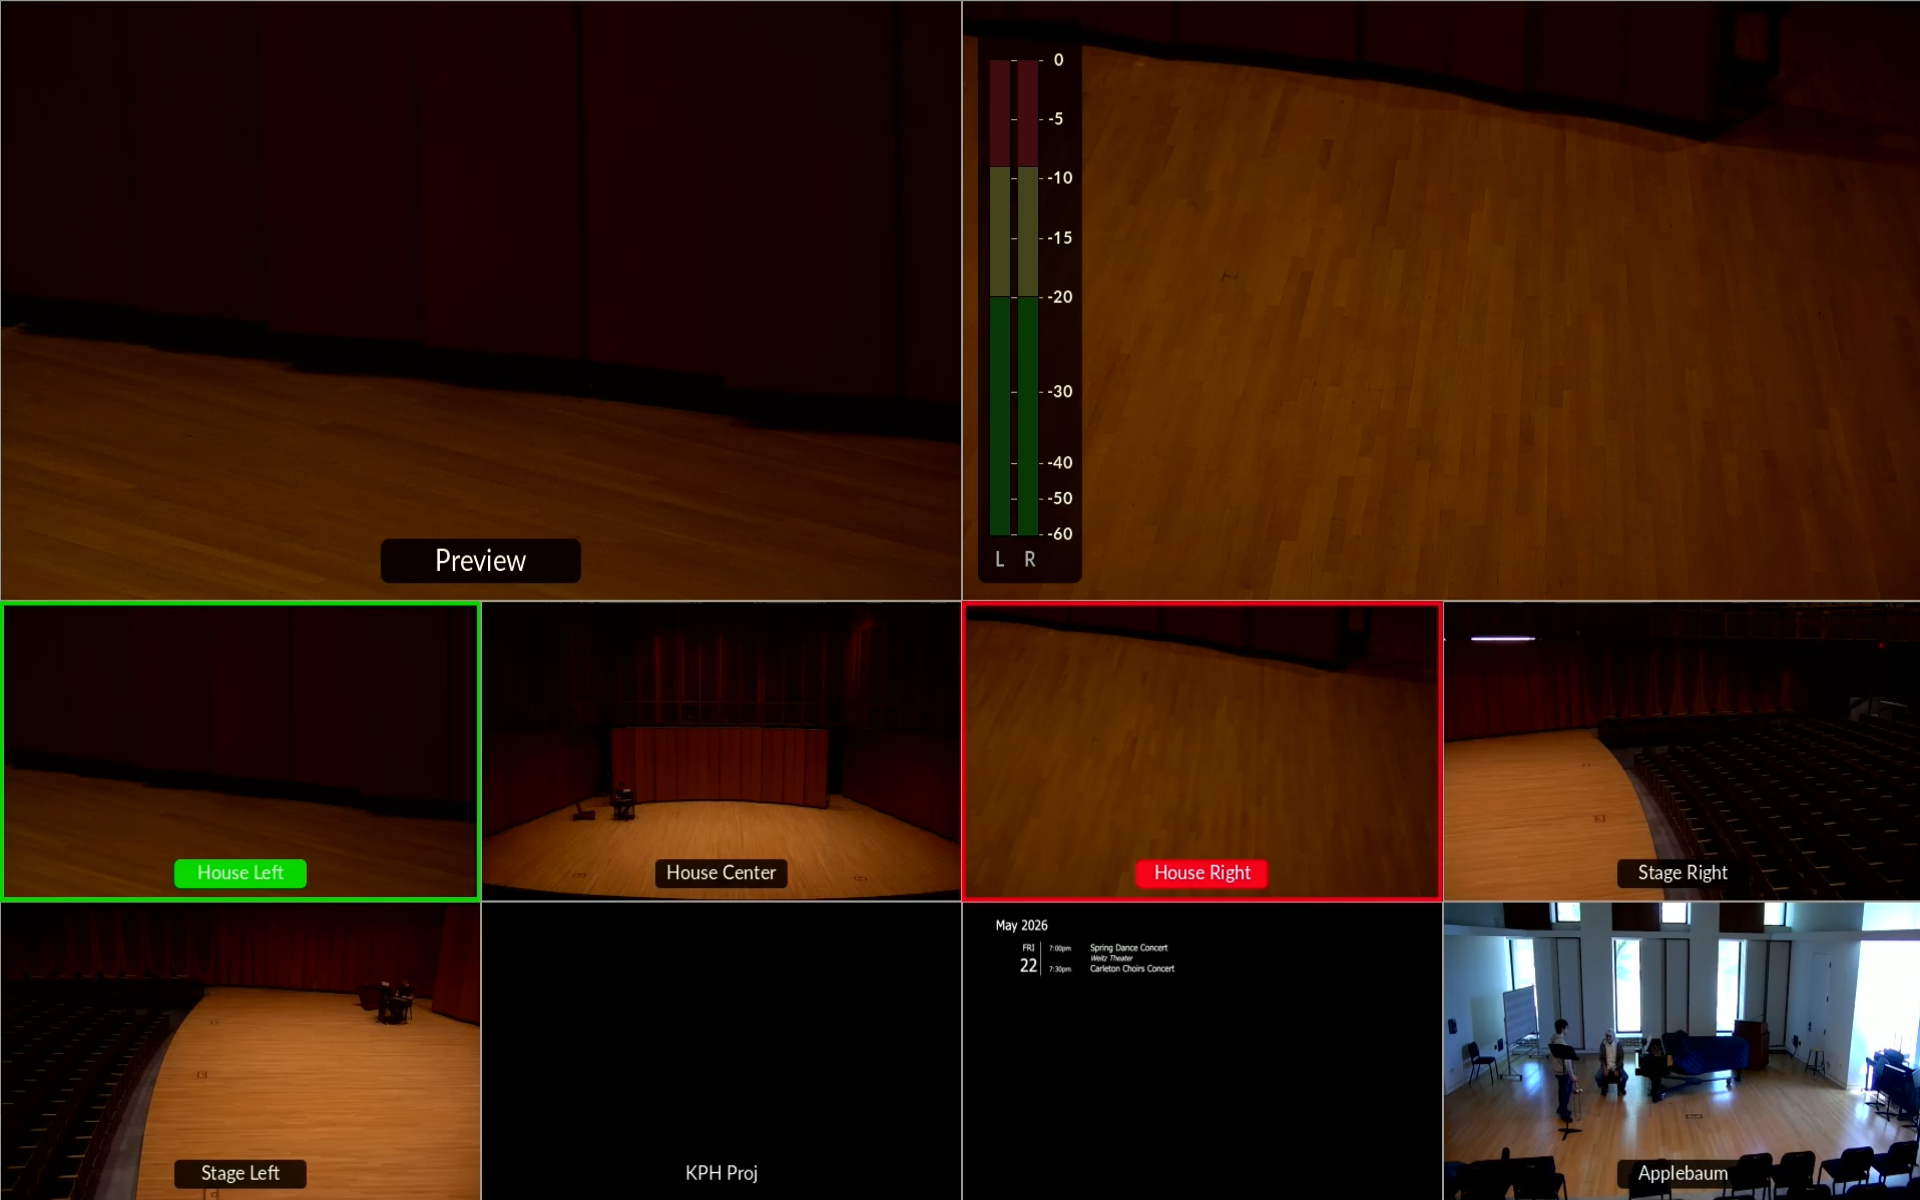
ATEM Multiview
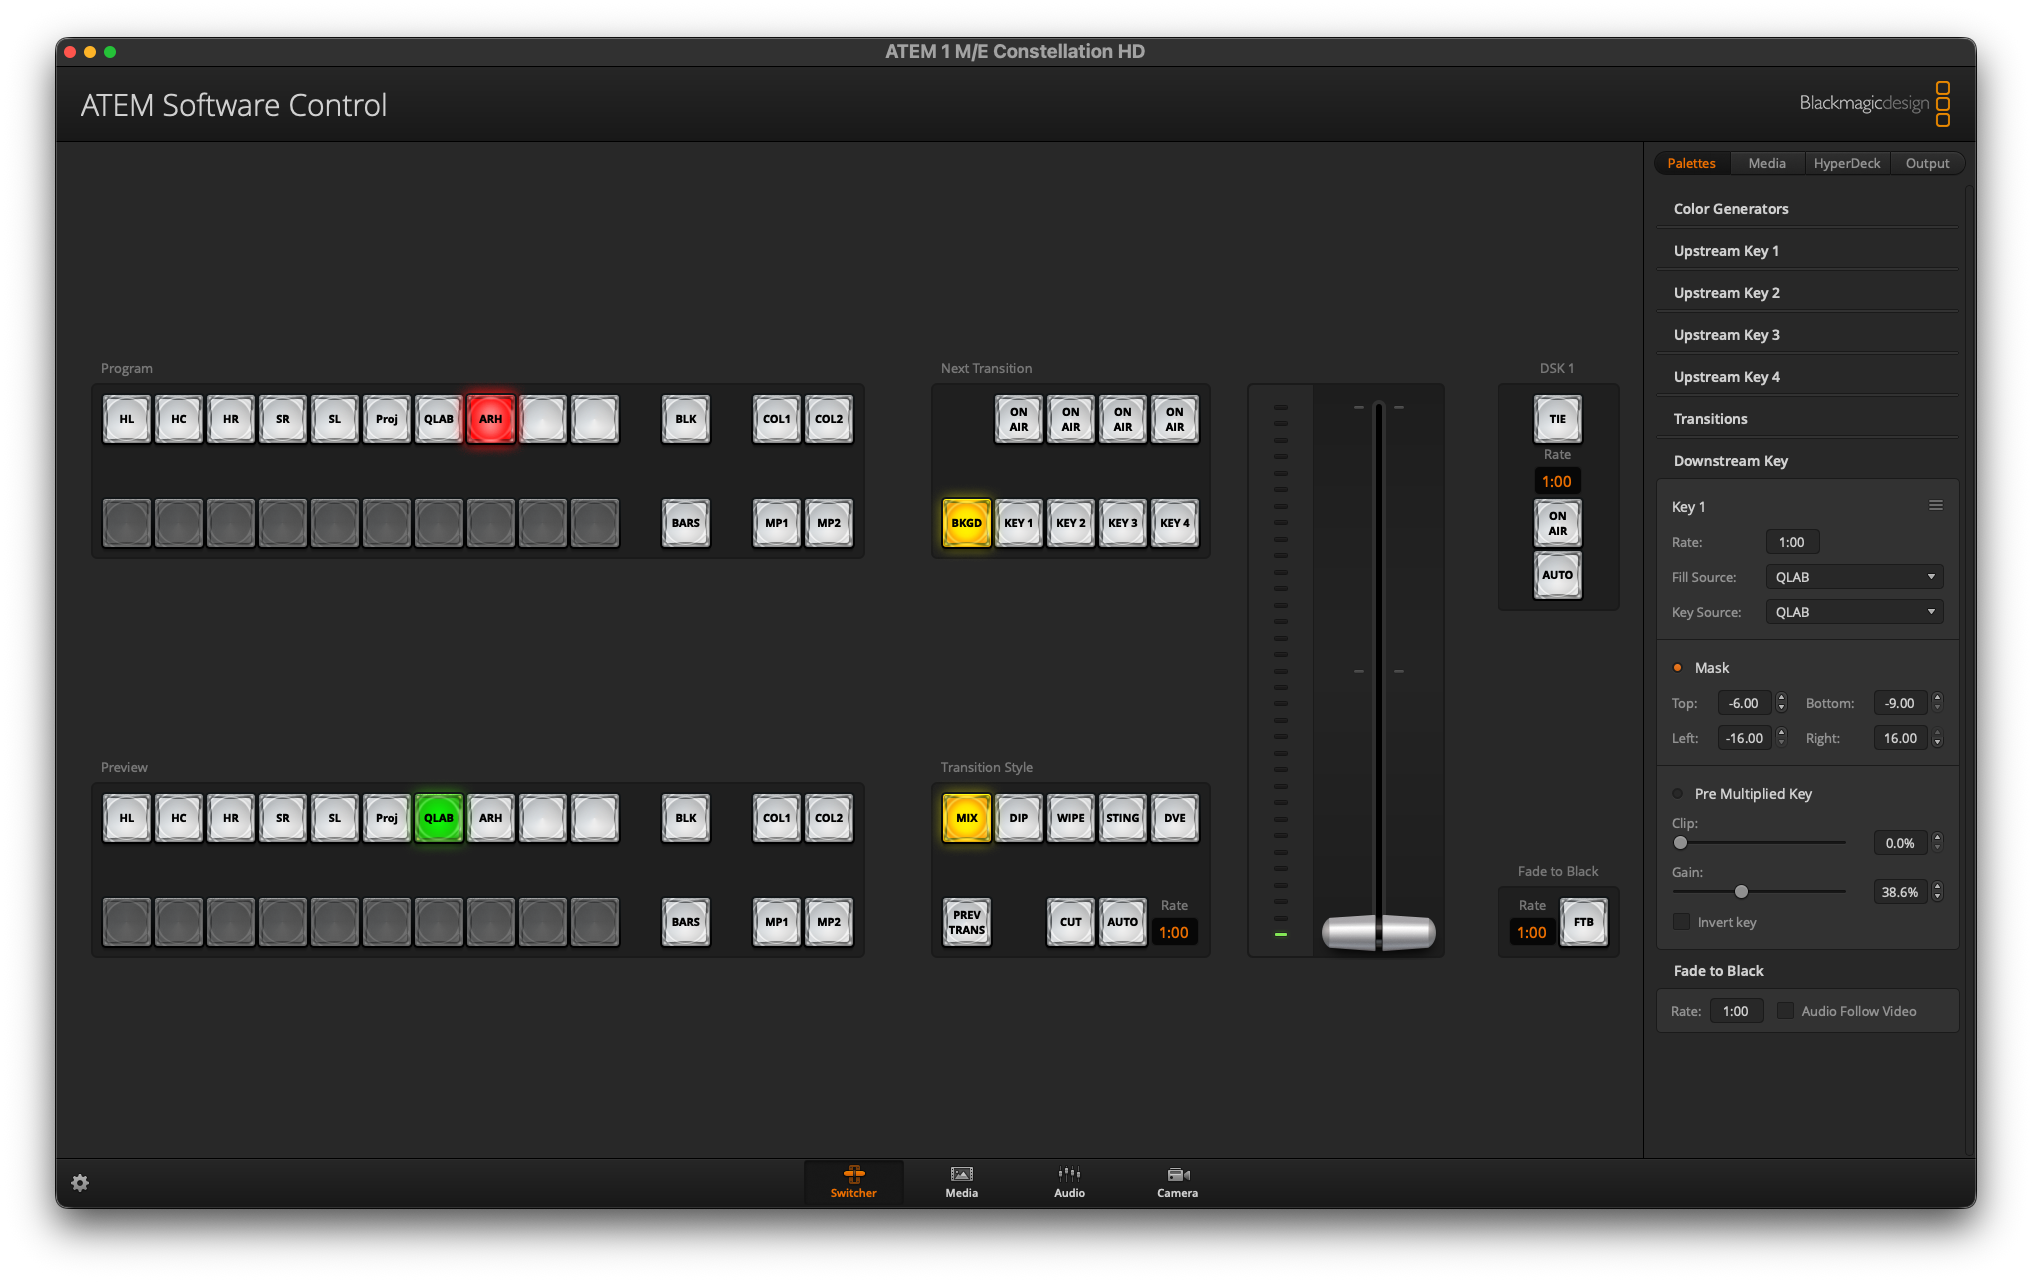
ATEM Software
Inputs
On the multiview, you will see a selection of Inputs, along with Preview and Program. Think of program as the end result, i.e., what shows up on the recording/livestream, and preview as the ‘‘scene’’ before program. We are using 8 out of 10 inputs on the switcher. They’re:
| Input 1 | Input 2 | Input 3 | Input 4 | Input 5 | Input 6 | Input 7 | Input 8 |
|---|---|---|---|---|---|---|---|
| House Left | House Center | House Right | Stage Right | Stage Left | Projector | QLab | Applebaum |
Input 1-5 corresponds to the 5 PTZ cameras in Kracum, and Input 8 corresponds to the PTZ camera in Applebaum. Input 7 mirrors the Kracum projector output, if applicable, and Input 7 is the graphics output from QLab.
Transitions
To control the switcher:
- Press any key from
1through8to bring up a particular input toPreview. This allows you to make any adjustments to the image before you sends it to program. - Press
spaceto cutPreviewtoProgram; this immediately switchesPreviewandProgram.
- Press
returnto dissolvePreviewtoProgram; this fades betweenPreviewandProgramat the rate specified below. The default rate is 1 second.
Switcher Parameters
Outputs
| Output 1 | Output 2 | Output 3 | Output 4 | Output 5 | Output 6 |
|---|---|---|---|---|---|
| Crestron DA | Hyperdeck Record | Preview | Output 4 | Output 5 | Output 6 |
The switcher has 6 routable outputs. We’re using at least 3.
- Output 1 goes to a
Crestronencoder that distributes broadcast video to the Lobby, Backstage, and Greenroom monitors.- During rehearsals, this is set to
QLab, which only displays theTitleof the event, so the video engineers can set camera presets. - About 30 to 15 minutes before show starts, this is set to
Program, so the monitors can follow whatever the recording gets. - After the show ends, this will be automatically set to
QLabagain, displaying the calendar program for upcoming events.
- During rehearsals, this is set to
-
Output 2 goes to our Hyperdeck Recorder. This will always be set to
Program. - Output 3 goes to a confidence monitor in the broadcast booth. This will follow whatever output 1 gets, so the technicians have an idea of what the audience is seeing.
The rest of the outputs are defaulted to program. We sometimes use it for extra recording, a dedicated streaming feed into our Pearl Nano streamer, etc.
Keys
Downstream Key set to the following parameters. * You may adjust the
Clip and the Gain to your liking, but these just affect the transparency of the lower thirds. * The
Rate for DSK 1 controls the amount of time it takes to fade in/out the key; I recommend leaving this at 1 second. * The
Rate under Transition style controls the fade time for Dissolve.
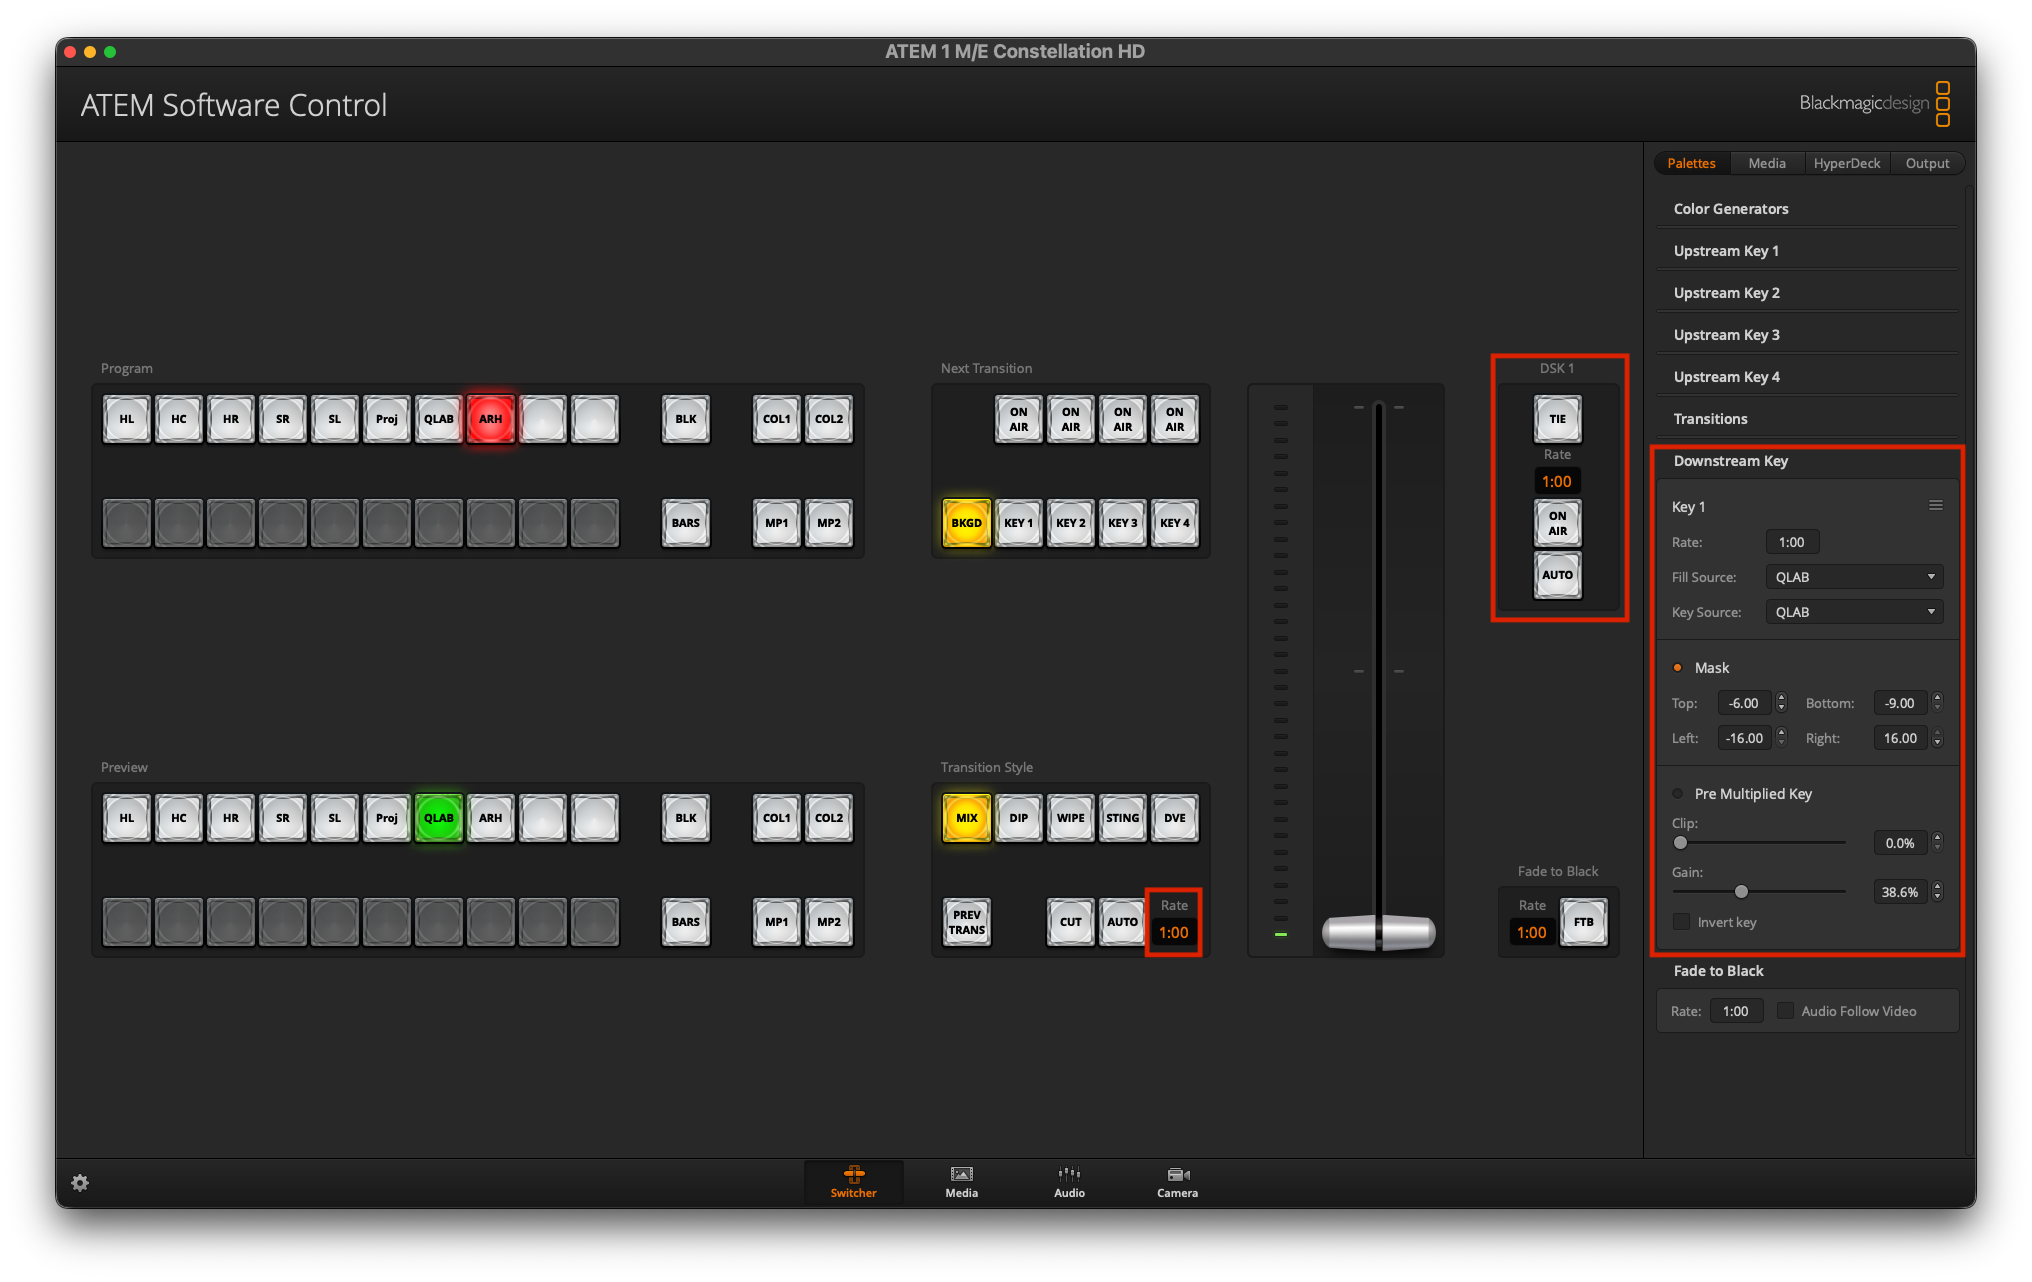
If you somehow messed up the parameters, check the Document folder for backup. Otherwise, download a copy here.
Recording and Streaming
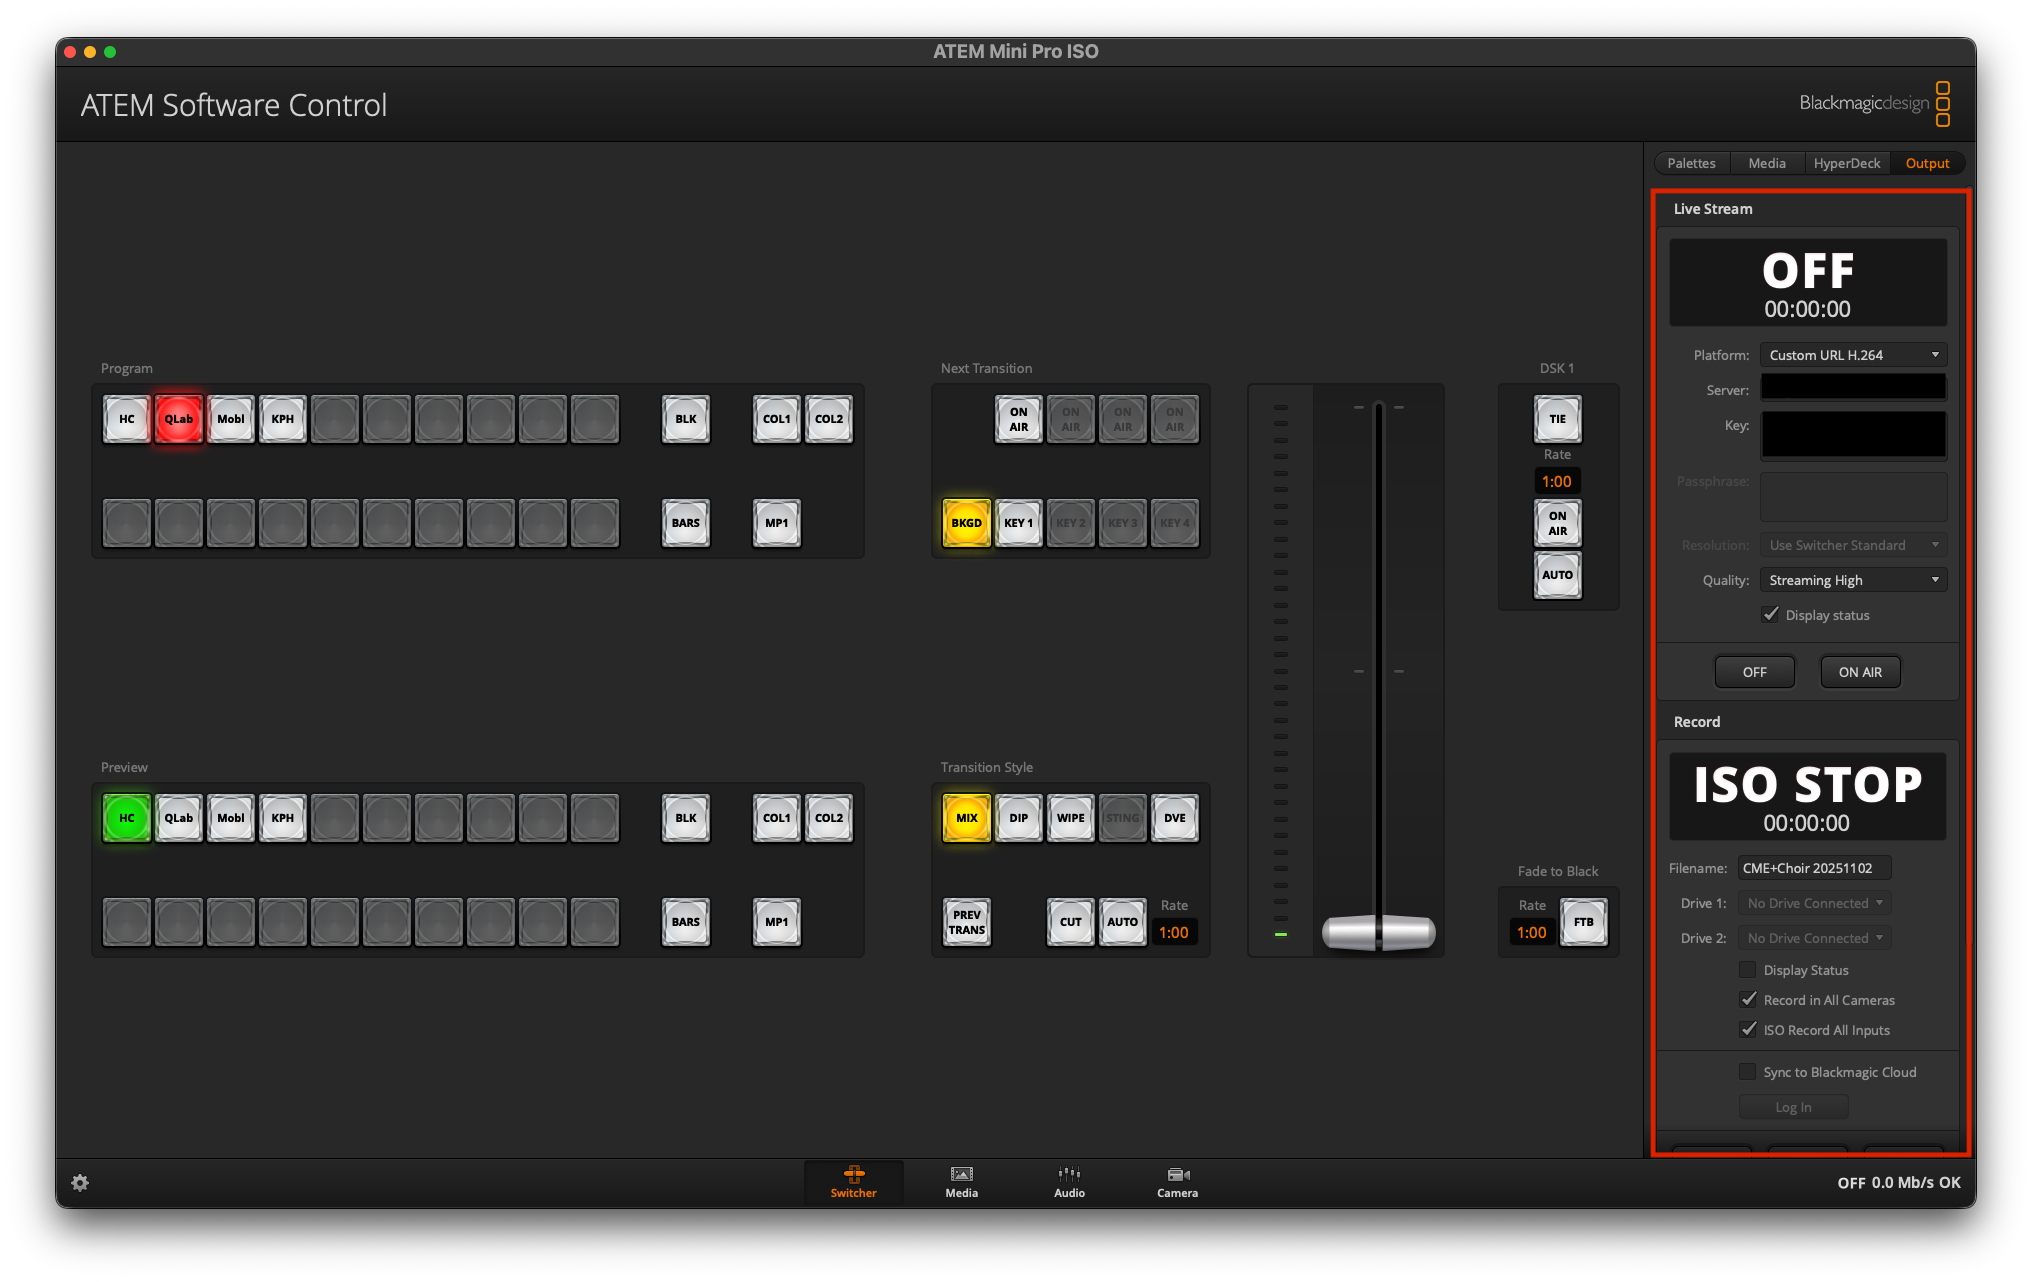
This part only applies to the ATEM Mini in Applebaum. You can ISO recording all inputs and outputs to an external drive through the USB-C port at the back of the ATEM. The Record button will show up on the right under output once the drive is plugged in. You may also stream to Carleton’s IBM RTMP server. Refer to the Stream Keys document for details about the server and the key. We don’t recommend streaming via any Blackmagic devices, because of this issue here. Instead, see this section on how to set up recording and streaming.