We use Sony’s RM-IP500 to control the 6 Sony PTZ Cameras we have in our space.
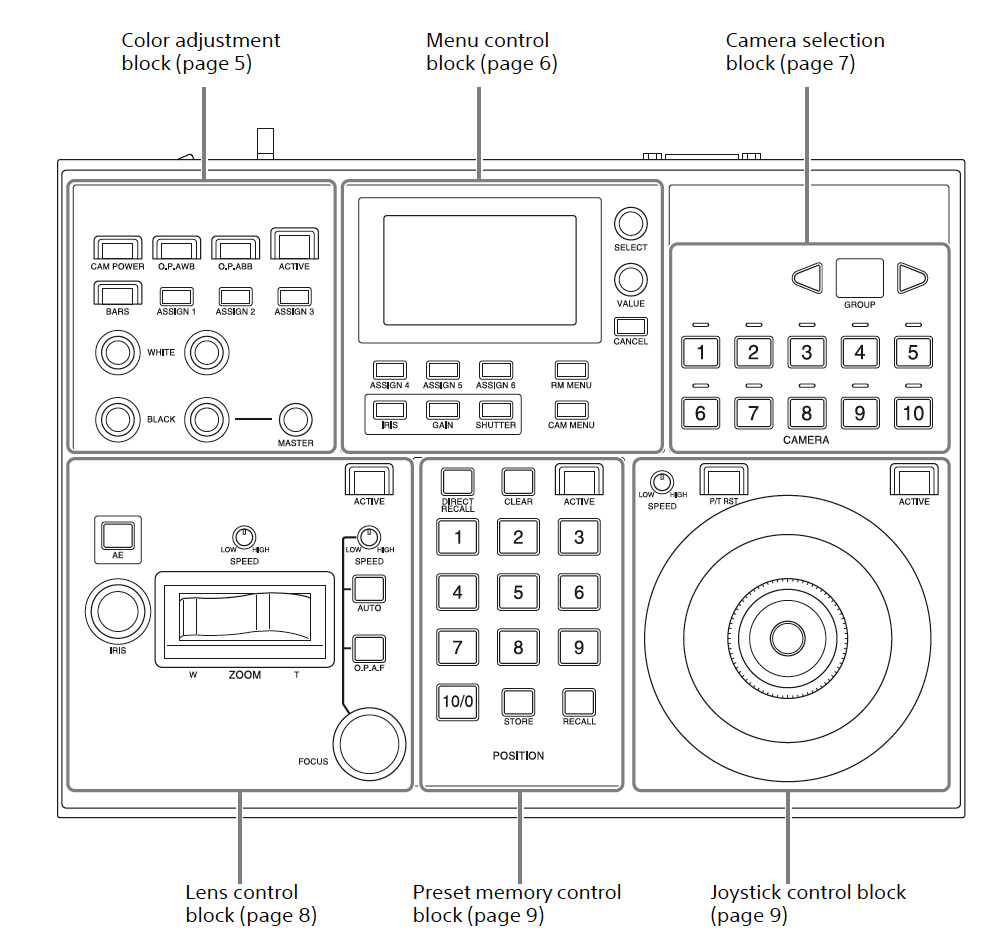
Preview, you have to first select the correct Input on the ATEM computer AND select the correct Camera on the PTZ control. PTZ control and ATEM are separated. Selecting a camera
You can select the camera you want to control using the Camera Selection Block. Camera 1-5 corresponds to Input 1-5 on the ATEM, and Camera 6 is the Applebaum camera (Input 8). If the network is set up correctly, the buttons for camera 1-6 should light in blue. Press the number of the CAMERA button to select. The selected button will light in yellow.
Operating a camera
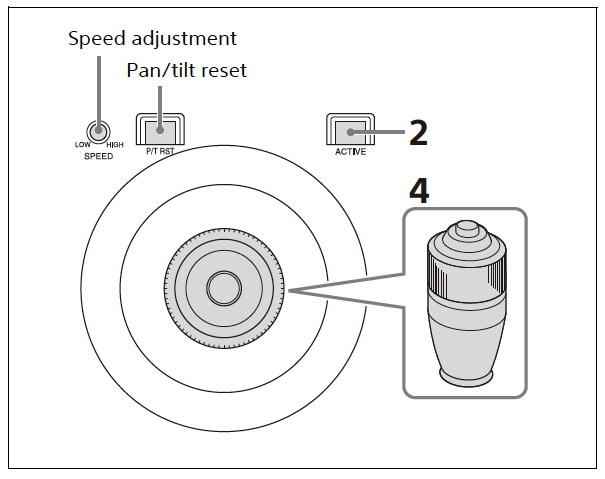
Pan and tilt control
- Select the target camera to control.
- Make sure the ACTIVE button is lit on the joystick control block.
- Adjust the PAN-TILT SPEED. Turning the PAN-TILT SPEED knob clockwise increases the speed, and turning counterclockwise decreases the speed.
- Incline to the right/left to pan camera to the right/left. Push the joystick down to move the camera down, and pull the joystick up to move the camera up.
Zoom control
- Select the target camera to control.
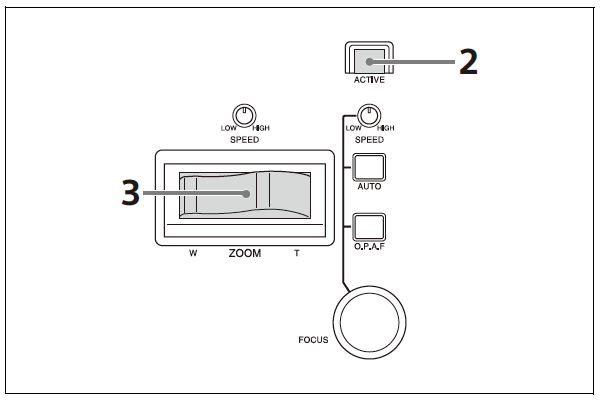
- Make sure the ACTIVE button is lit on the lens control block.
- Move the ZOOM lever left/right to make the subject appear smaller/larger.
- Adjust the ZOOM SPEED as needed. Turning the ZOOM SPEED knob clockwise increases the zoom speed, and turning counterclockwise decreases the zoom speed.
Adjusting the focus
- Select the target camera to control.
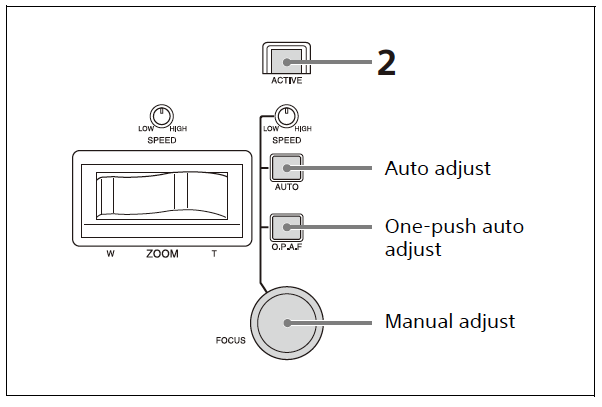
- Make sure the ACTIVE button is lit on the lens control block.
- Leave the mode on AUTO FOCUS, making sure the button is lit yellow.
Adjusting the brightness
We don’t recommend the auto-exposure (AE) function. It simply looks bad.
- Make sure the AE button is off (button is not lit).
- Turn the IRIS knob counterclockwise until the iris is all the way up (F=1.6, lower is better).
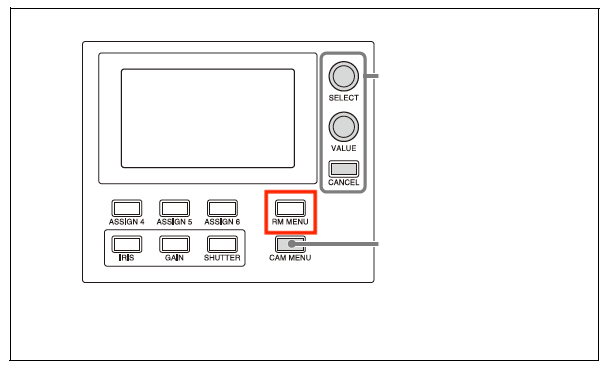
- Press the GAIN button in the menu control block to highlight the corresponding value on the camera image and turn the VALUE knob to adjust the value.
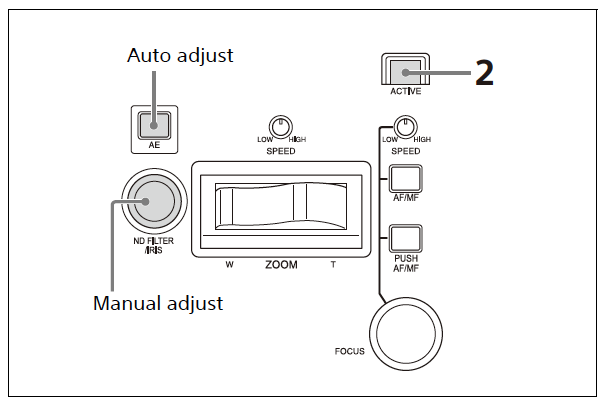
By opening up the iris to its max setting, we’re letting as much light into the camera as possible. This reduces the level of noise in our video.
Adjusting the white balance
We don’t recommend the auto-adjust white balance function. It simply looks bad.
- Select the target camera to control.
- Go to
RM MENU > OPERATION > WHITE. SetWB MODEtoMANUAL. - Adjust the white balance using the
R-WHITEknob and theB-WHITEknob.
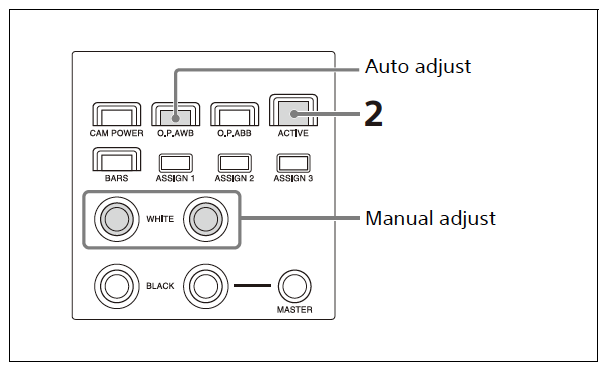
We find that you achieve best results when R.WHITE = +60 and B.WHITE = +70.
Storing the Camera Presets
All camera parameters we just mentioned can be stored as presets to recall during the show.
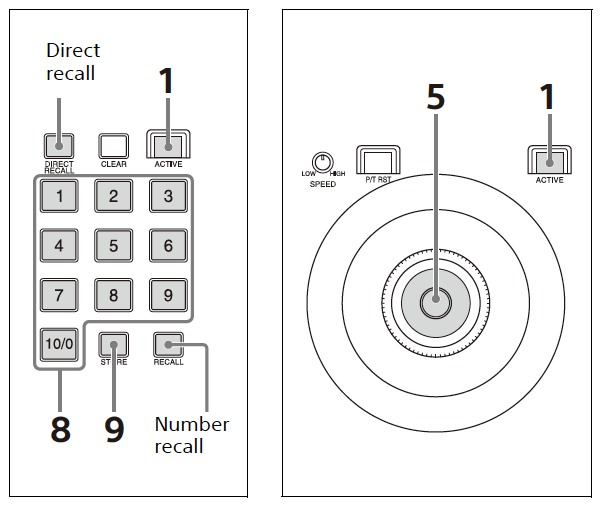
- Make sure the ACTIVE button is on (button is lit) on the joystick control block and preset memory control block.
- Select the camera whose status you want to store.
- Operate the joystick to pan/tilt the orientation of the camera.
- Perform zoom, focus, backlight compensation, flicker compensation, and white/black balance adjustments, as required.
- Check that the DIRECT RECALL button is off.
- Enter the preset number you want to store. Use the PRESET 10/0 button to enter a “0” digit. You can store up to 100 presets per camera.
- Press and hold the STORE button. The preset number at the bottom right of the LCD panel is displayed highlighted, and storing is completed when the display disappears.
Recalling presets
There are two methods for recalling stored status: direct recall and number recall.
- Direct recall
- Make sure the DIRECT RECALL button is on (button is lit yellow).
- Press the PRESET 1 to PRESET 10/0 buttons to recall preset numbers 1 to 10. Only preset numbers 1 to 10 can be recalled using direct recall.
We recommend this because it saves you a lot of time during the show. For this reason, we suggest you limit and store your presets to 1-10.
- Number recall
- Make sure the DIRECT RECALL button is off (button is NOT lit yellow).
- Enter the preset number using the PRESET 1 to PRESET 10/0 buttons, in the same way as when storing a preset.
- Press the RECALL button. Preset numbers 1 to 100 can be recalled using number recall.