Recording and Streaming
We use an Blackmagic Hyperdeck Studio Mini as our recorder. It takes SDI input from output 2 of the Constellation switcher, which is always set to Program.
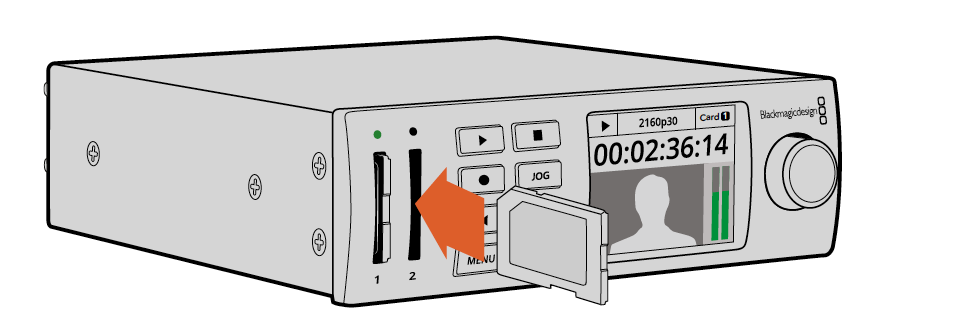
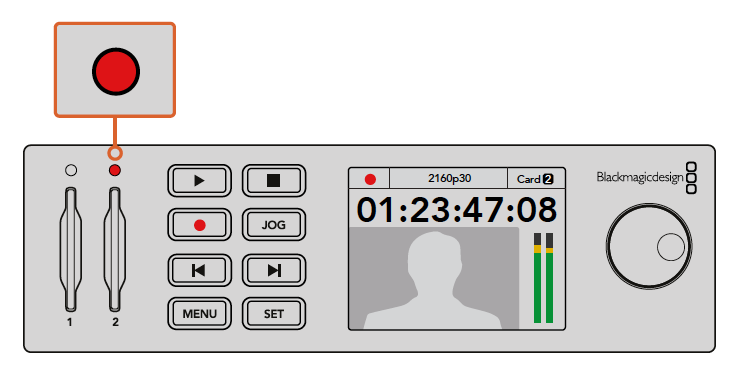
You should format an SD Card via its front LCD-based menu settings. To plug in an SD card:
- Hold the SD card with the gold connectors facing your HyperDeck’s LCD and align it with the media slot. Now gently push the card into the slot until you feel it lock firmly into place.
- Your HyperDeck will verify the SD card. This is shown by an illuminated green indicator above the SD card slot. When the indicator turns off and the stop button on the control panel is illuminated, your HyperDeck is ready to record.
Formatting SD cards
Media used by HyperDeck must be formatted as either HFS+ or exFAT. HFS+ is also known as Mac OS Extended and is the recommended format for HyperDeck as it supports journaling. Data on a journaled disk is more quickly recovered in the rare event it becomes corrupted, and less likely to be corrupted in the first place. HFS+ is natively supported by Mac OS. To format using your HyperDeck:
- Insert the media you want to format into either of the SD card or SSD slots.
- Press the “menu” button on your HyperDeck’s control panel.
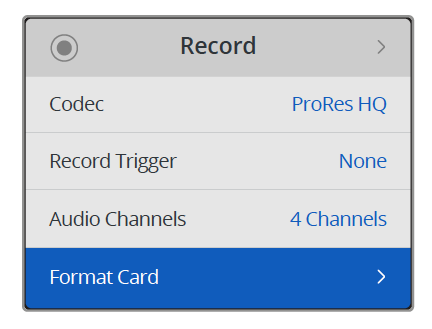
- On HyperDeck Studio Mini, turn the jog/shuttle wheel and use the set button to enter the “record” menu on the LCD and select format card.
- Select the SD card or SSD you want to format on the LCD using the jog/shuttle wheel. Remember to press the ‘set’ button to confirm your selection.
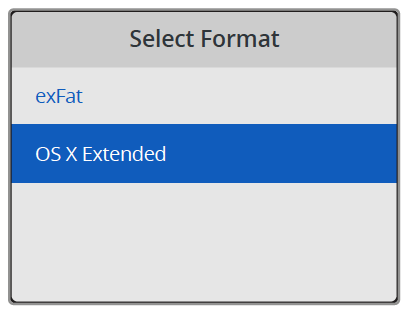
- Now set your desired format from the ‘HFS+’ or ‘exFAT’ options.
- A warning message will appear on the LCD asking you to confirm the format. Make sure you have backed up any important data before you confirm as this action cannot be undone. Confirm the format by selecting ‘format’ for SD cards using the jog/shuttle wheel and pressing the ‘set’ button.
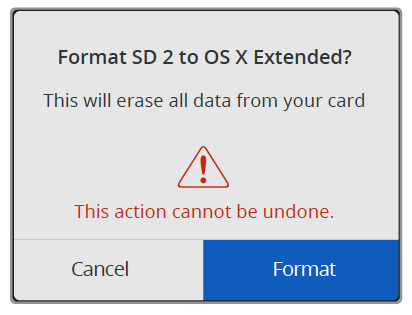
A progress bar will show you the formatting progress. When your HyperDeck has finished formatting, ‘formatting complete’ will display on the LCD. Press the ‘set’ button again to return to the menu.
Recording Video
To record video:
- Insert your formatted SD card into either of the SD card slots. The indicator above the slot will illuminate green as your HyperDeck reads the card. When the indicator turns off, HyperDeck Studio Mini is ready to record.
- HyperDeck Studio Mini automatically detects when SDI video is connected and displays the image on the control panel LCD. If you want to change the codec, you can choose from a variety of codecs using the control panel LCD menu or the Blackmagic HyperDeck Setup utility software. We use H.264 Low, which records at 22 Mbps, or about 9.9 GB per hour of recording.
- Press the ‘record’ button and the indicator above the slot will illuminate red. As your HyperDeck is recording, the slot indicator on the control panel LCD will alternate between displaying the active slot, and record time remaining on the card.
- Press the ‘stop’ button to finish recording.
Streaming
We use an Epiphan Pearl Nano to stream to Carleton’s IBM server at https://go.carleton.edu/carletonlive.
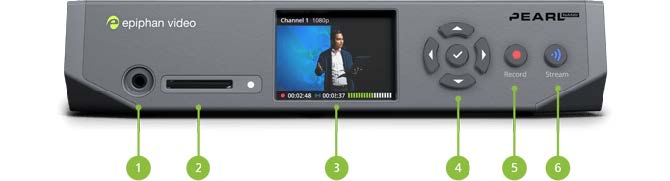
To start/stop streaming:
- Press the Streaming control key (6). The button glows blue when the device is streaming. Flashing means that user action is required and streaming has either stopped or won’t start. Color is white when the system is powered on and not streaming.
The Nano can also record to its internal SD/SSD. To start/stop recording:
- Press the Recording control key (5). The button glows red when the device is recording. Flashing means that user action is required and recording has either stopped or won’t start. Color is white when the system is powered on and not recording.
Configuring the Nano
The Nano has an HTML interface where you can configure its settings. Open a browser, and go to http://kracum-stream.south.carleton.edu/. You can configure various settings here once you log in. I note a few features here.
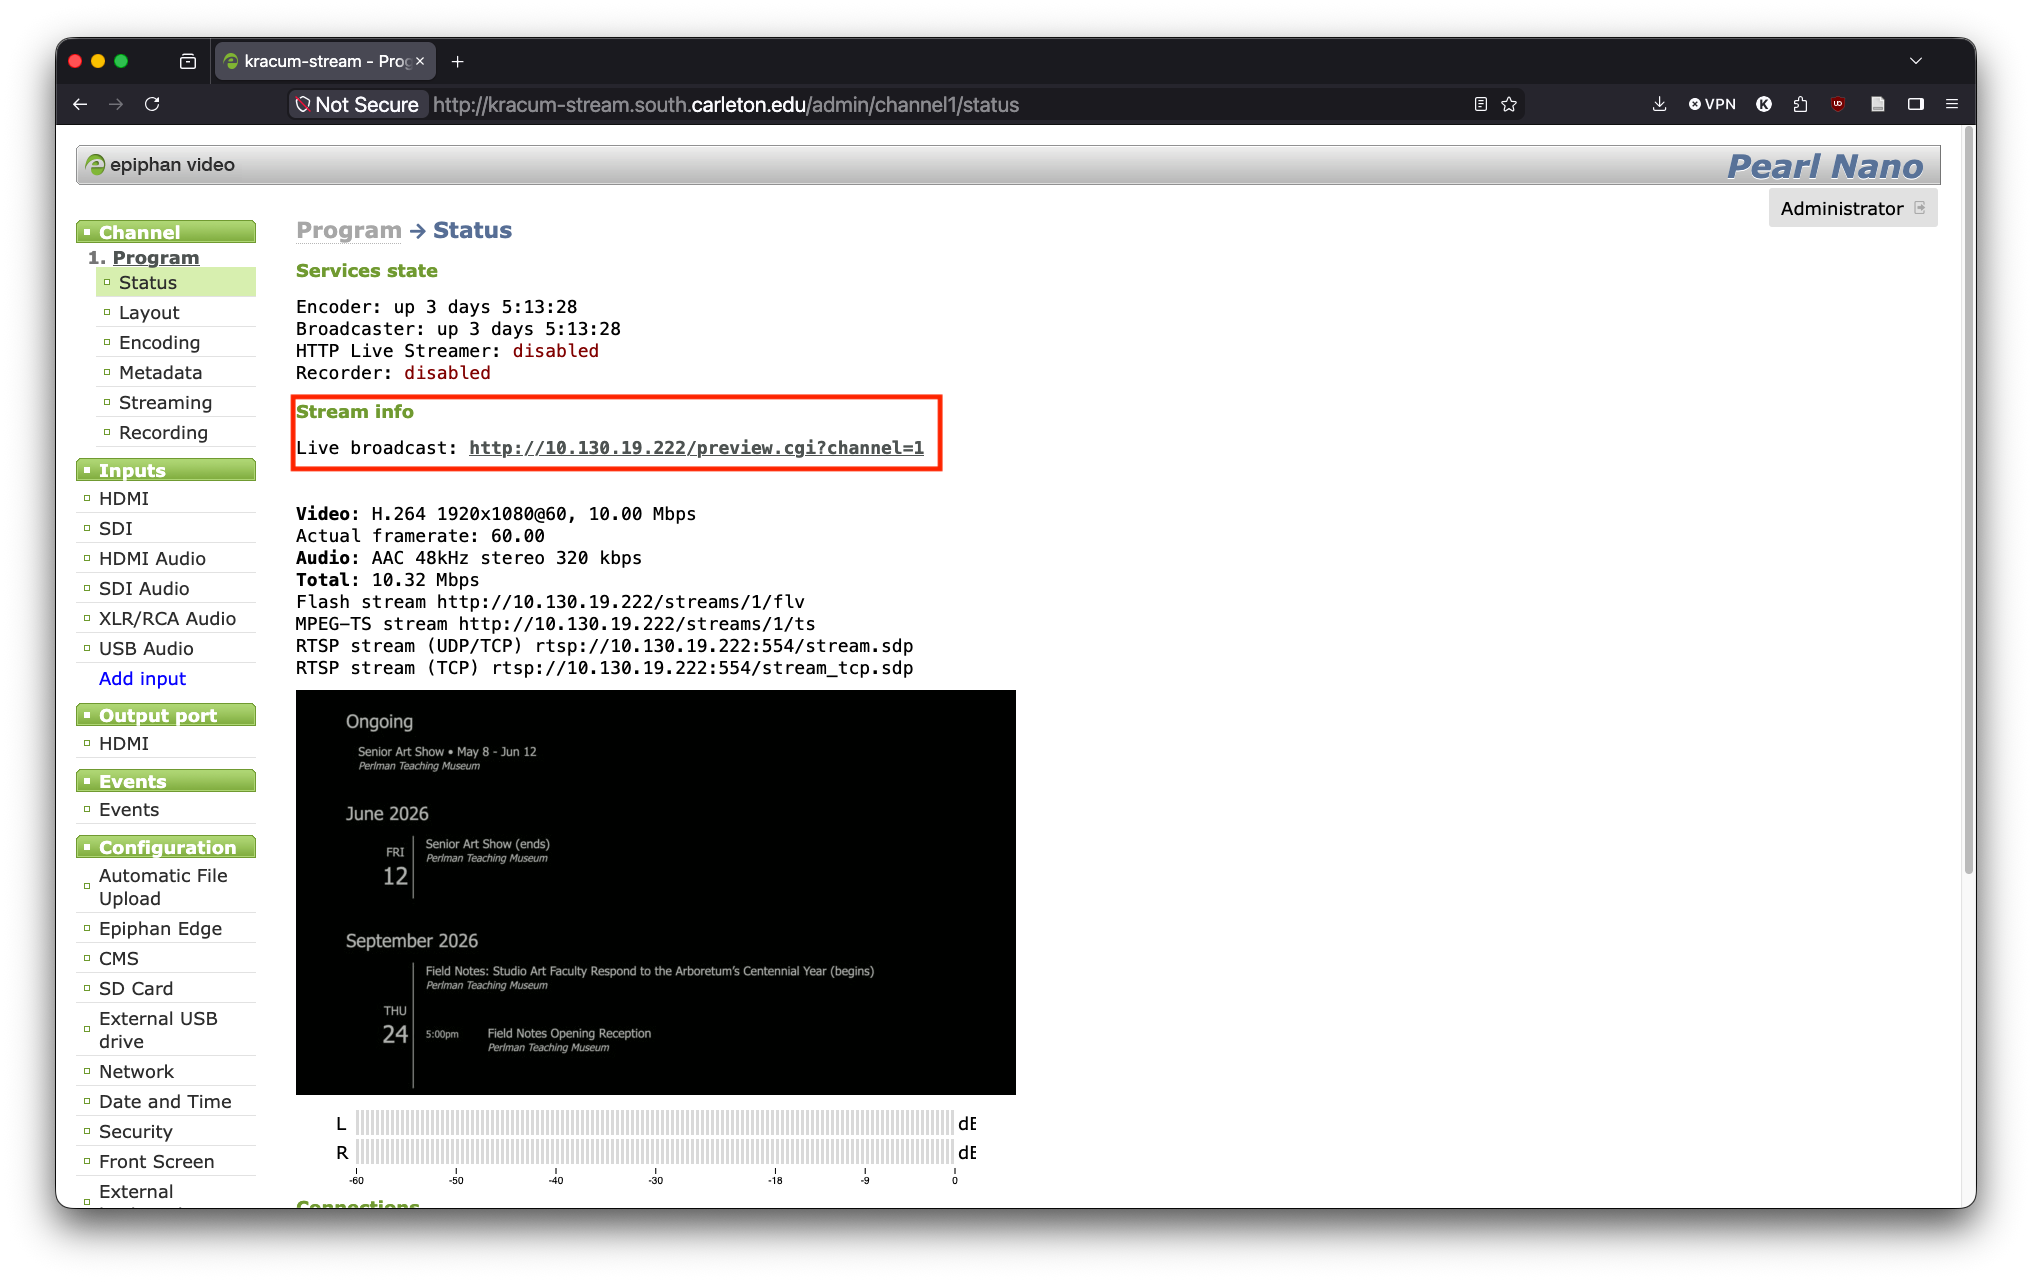
- You can preview the livestream/recording at URL below. You’ll need to log in.
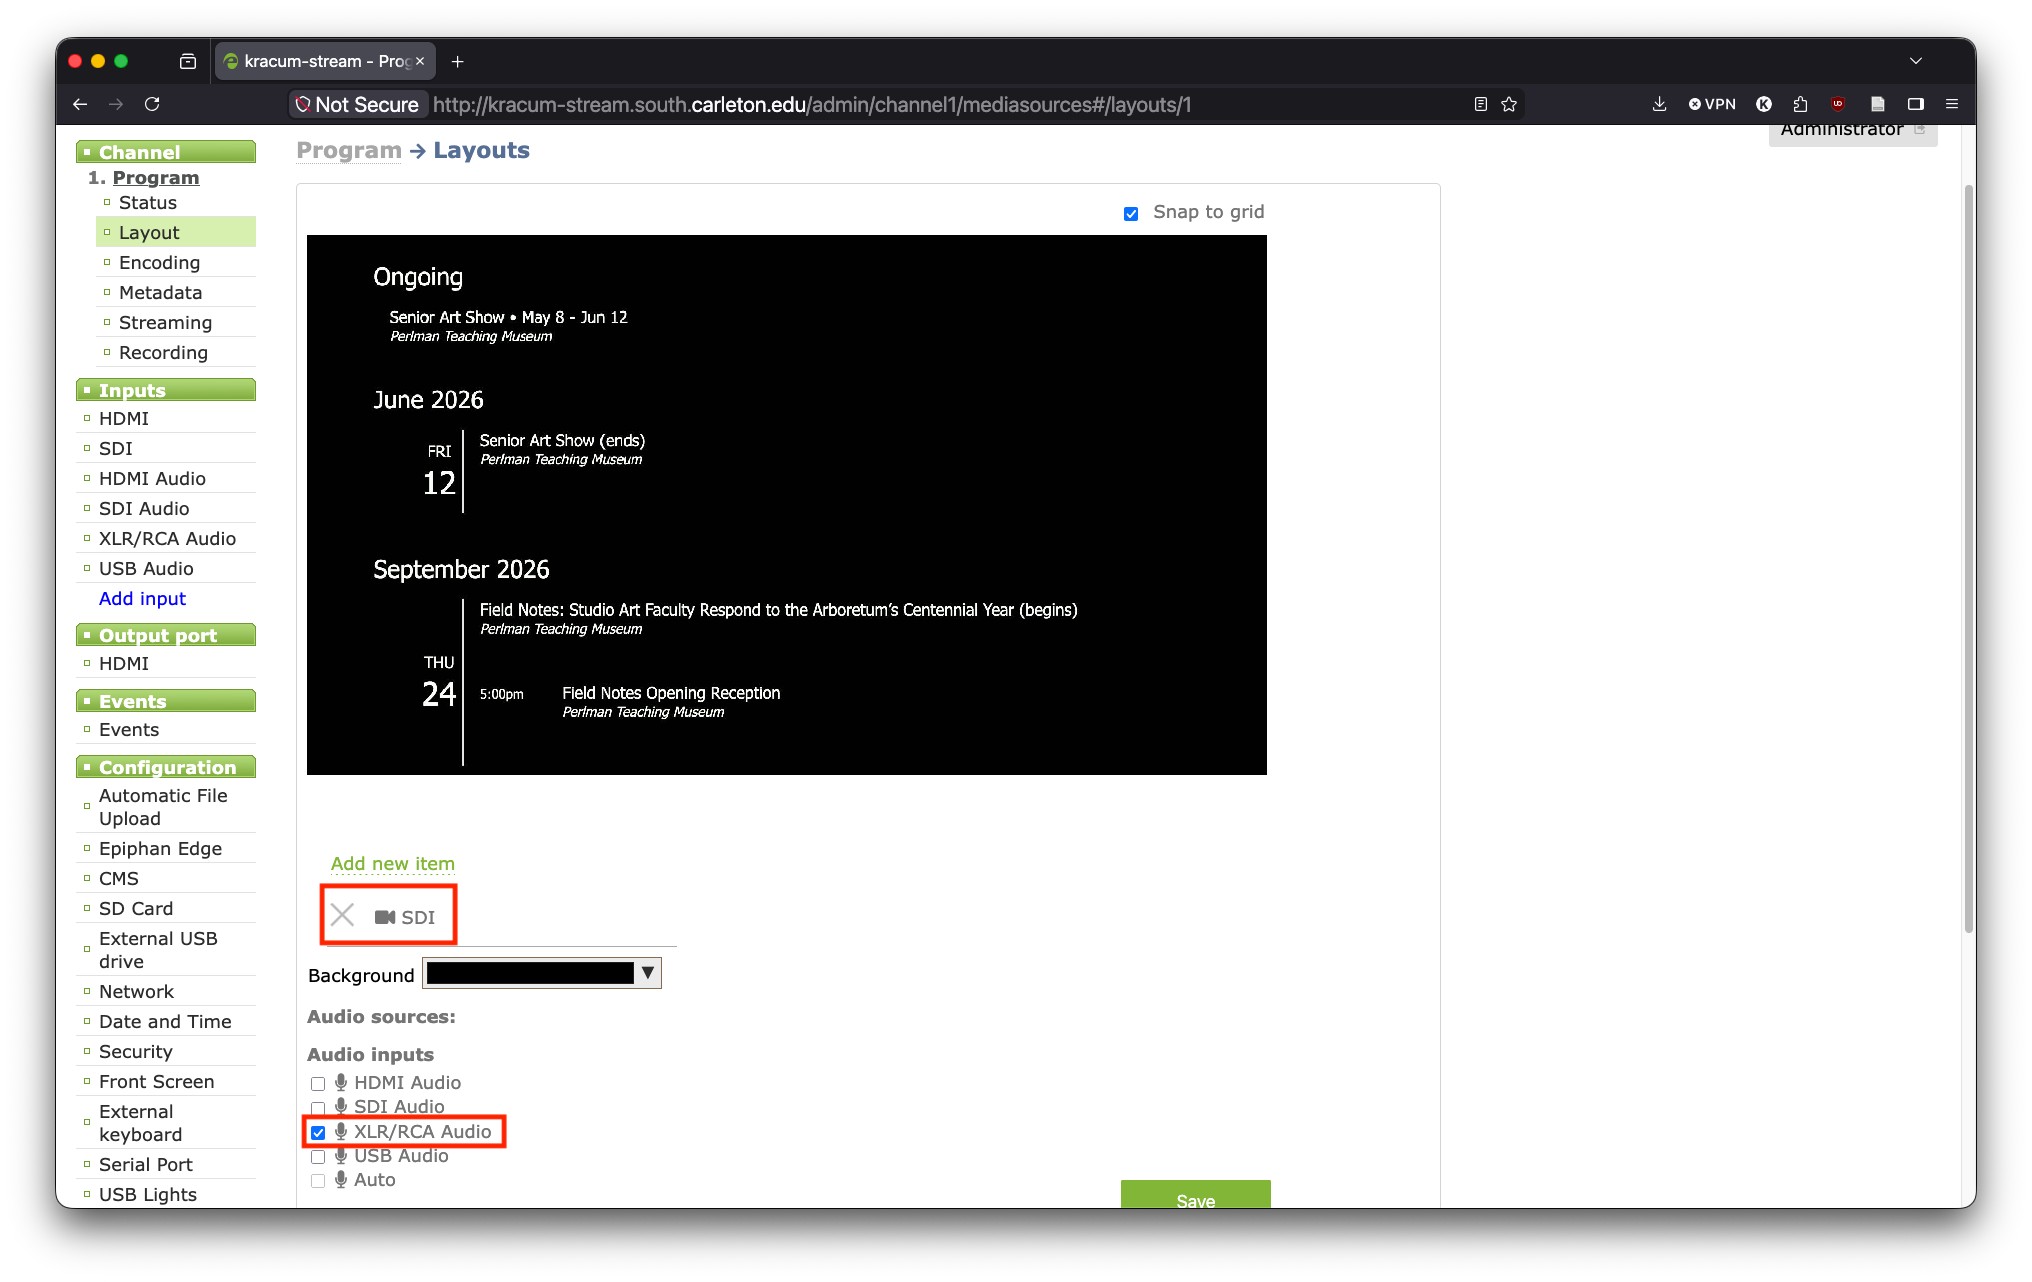
- Layout is where you choose where the inputs are coming from. The video is coming from the SDI loop out of the Hyperdeck (
Output 2of ATEM, always set toProgram). The audio takes the dedicated livestream feed from the QL1 (MTRX 1 and 2); this comes out of the XLR omni ports from the QL to the Nano. If you don’t want to use livestream audio (and want clean audio instead), this is where you’ll need to select SDI audio and deselect XLR/RCA audio.
- You can change the encoder settings, enter the RTMP server information, and the automatic file upload location in the following locations.
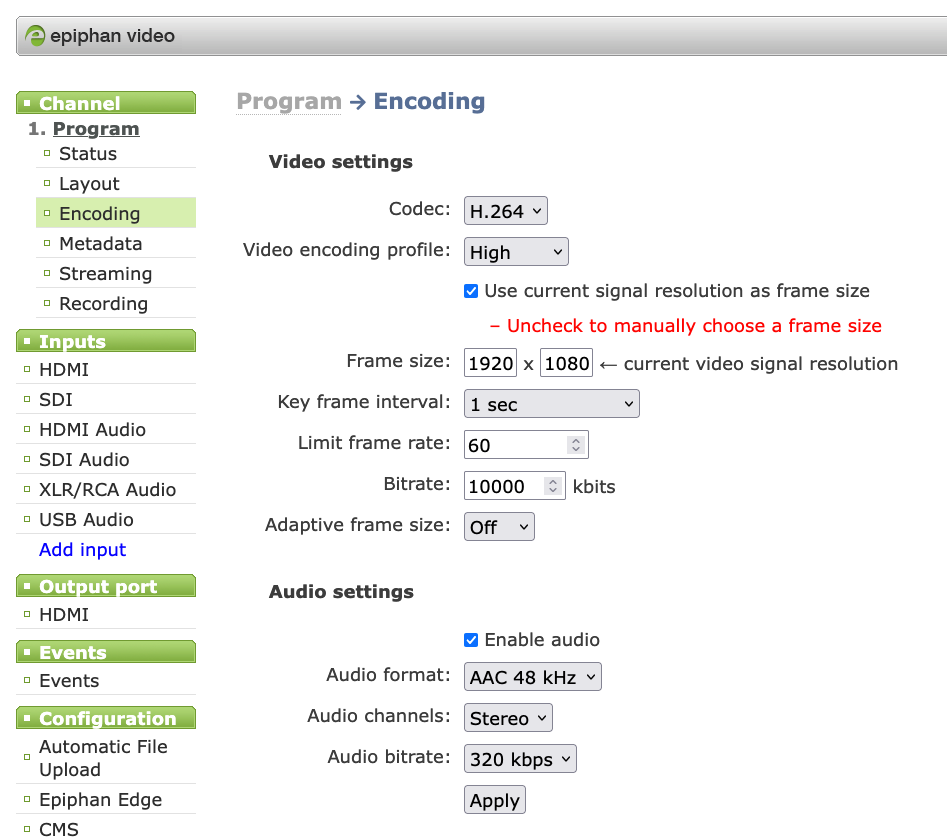
Pearl Nano Encoder Settings
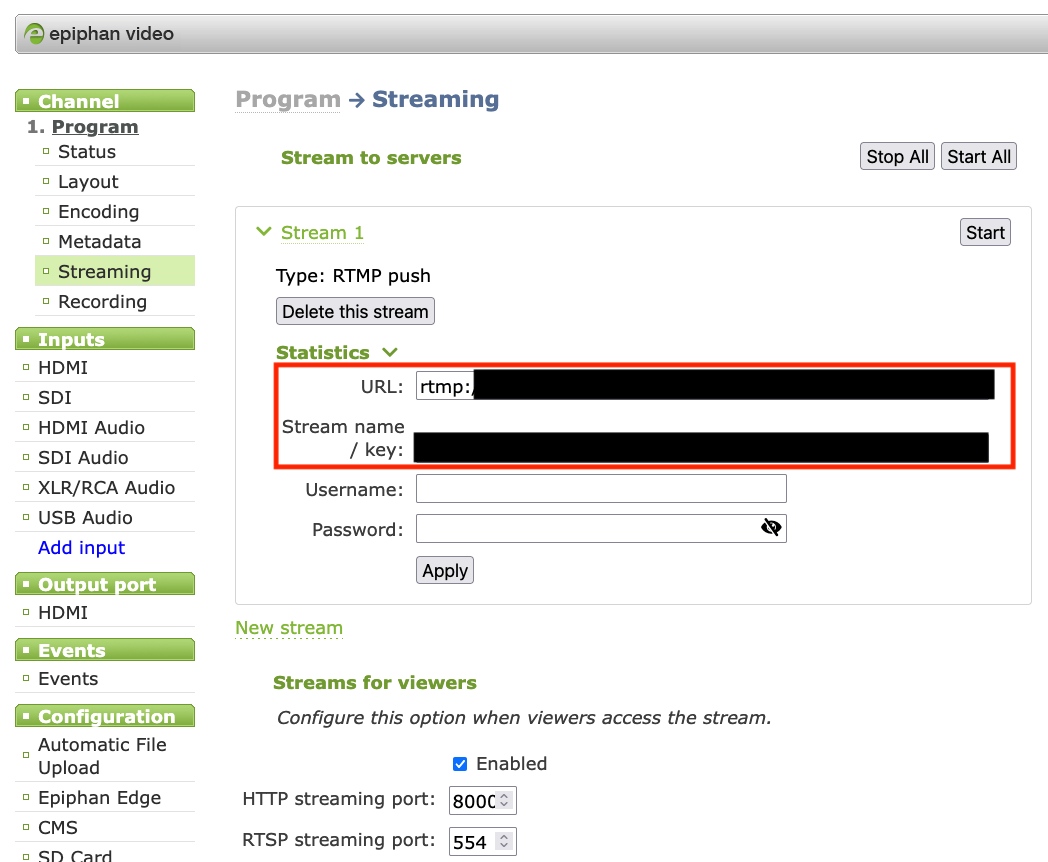
Pearl Nano Stream Settings
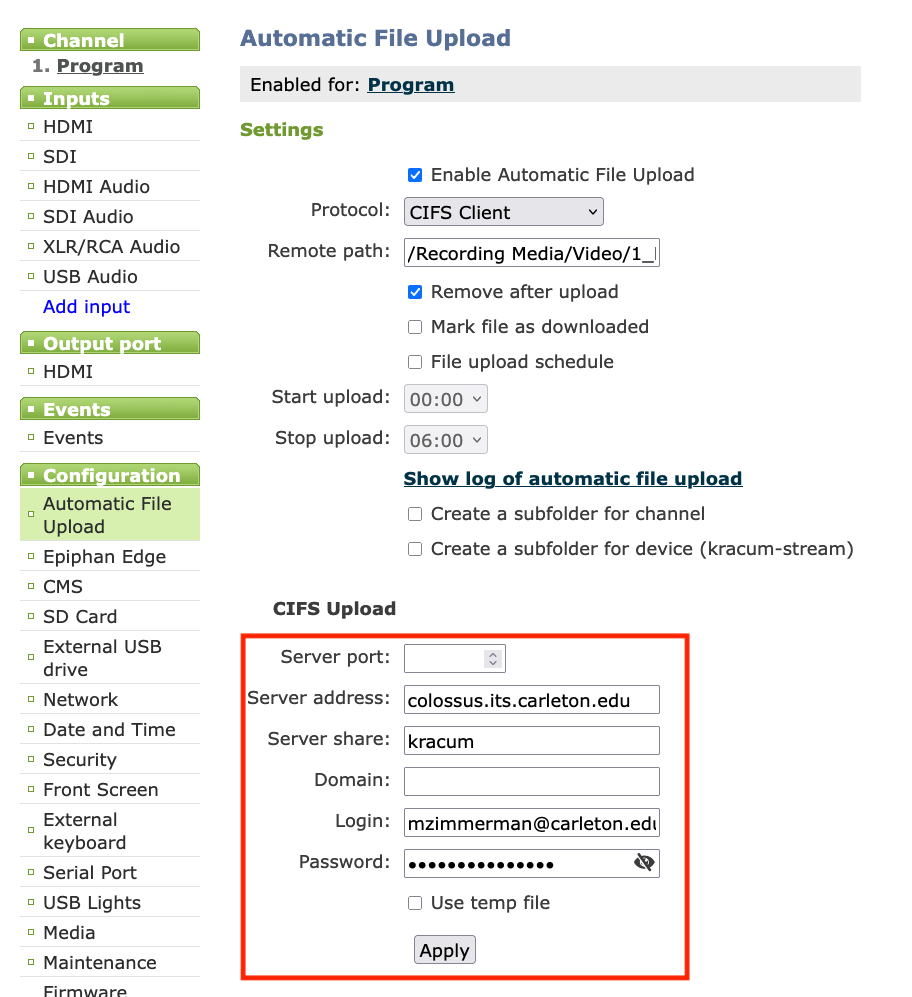
Pearl Nano NAS connection
Preshow checklist
By this point, you should be able to start a show. Typically, this is what a tech shift will look like. (Your exact responsibilities will depend on the shift you’re assigned to.)
Arrival
You’re typically scheduled to arrive 1-2 hours before the event. Performers typically arrive 15-30 minutes after you arrive.
- Video: You should use the time before artists arrive to start building the QLab graphics. At the very least, you should be able to complete the Title page.
- After completing the title page, you should run the cue with
space. This brings it ontoInput 7of the ATEM. - Set Output 1 (Crestron DA) to QLab. (You can also achieve this via
Macro 2in ATEM.)
Rehearsals
Rehearsals start 1-1.5 hours before the event. Performers may run pieces according to the program, but they may not.
- Video: LBOs should bring the stage to their actual lighting cues during the show. You can use this opportunity to adjust the camera exposure and save any presets if needed.
- Use this rehearsal time to finish any lower-thirds and credits.
- Adjust the audio levels during run-throughs.
Preshow
- 30 minutes before the event, you should finish all prep work, including any graphics, presets, and audio levels.
- When done, press
spaceto bring up theTitlecue in QLab, and bring the QLab input (Input 7) toProgram, and set Output 1 (Crestron DA) toProgram. (You can also achieve this viaMacro 1in ATEM.) - We typically start and end transitions with a wide shot; you can use
House Centerfor this. Once you’ve done that, wait until the house opens, and bringInput 2toProgram. - Once you’ve brought
Input 2toProgram, you canescapeto panic the QLab title cue. This is to prevent theTitlecue to overlap with any following Lower Thirds cues. - 15 minutes before the event, format an SD card and start the stream, if applicable. You can greet the audience in the livestream chat, if you want. You should use one of the Carleton computers, so you’re logged in as
Carleton College. - 5 minutes before the event, start the recording.
- You may use the following cue to start recording and streaming at the same time.

- When you don’t need to stream, make sure you
disarmthe streaming cue by unchecking theArmedbox of theStart Nano StreamingCue. This disables this particular cue from running.
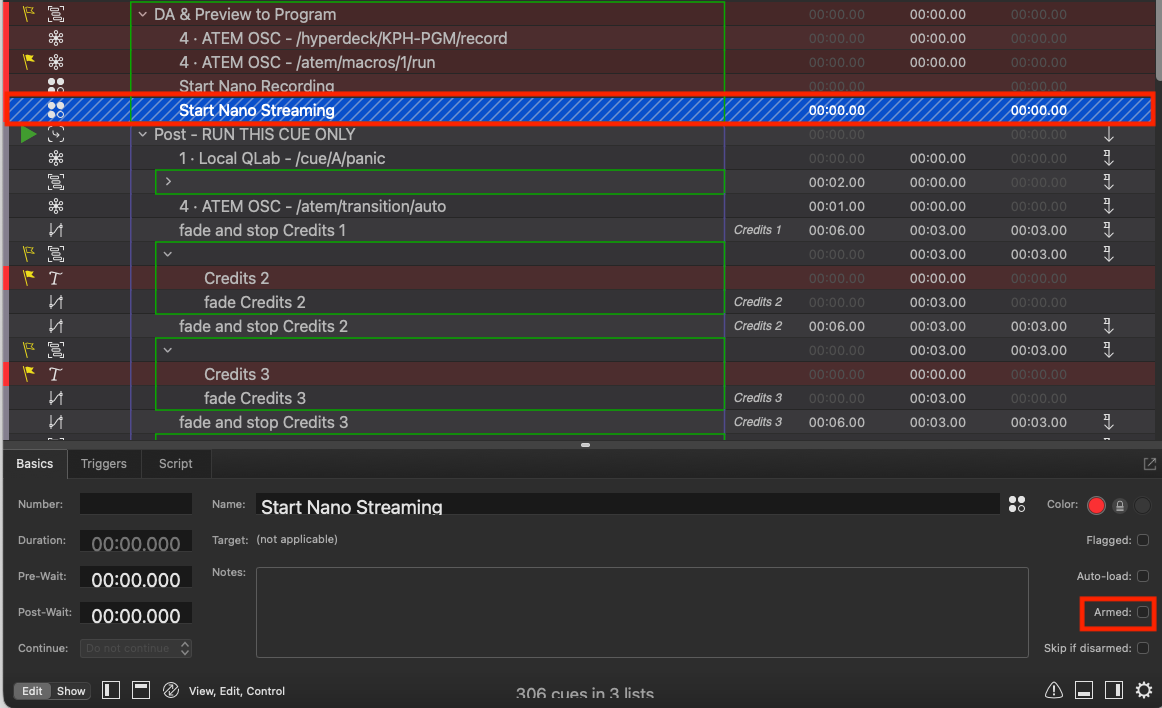
During the show
- Press space to advance the lower thirds cues. Select / use
upordownarrows to choose different cues in case order changes.
Postshow
- Fire the post-show sequence
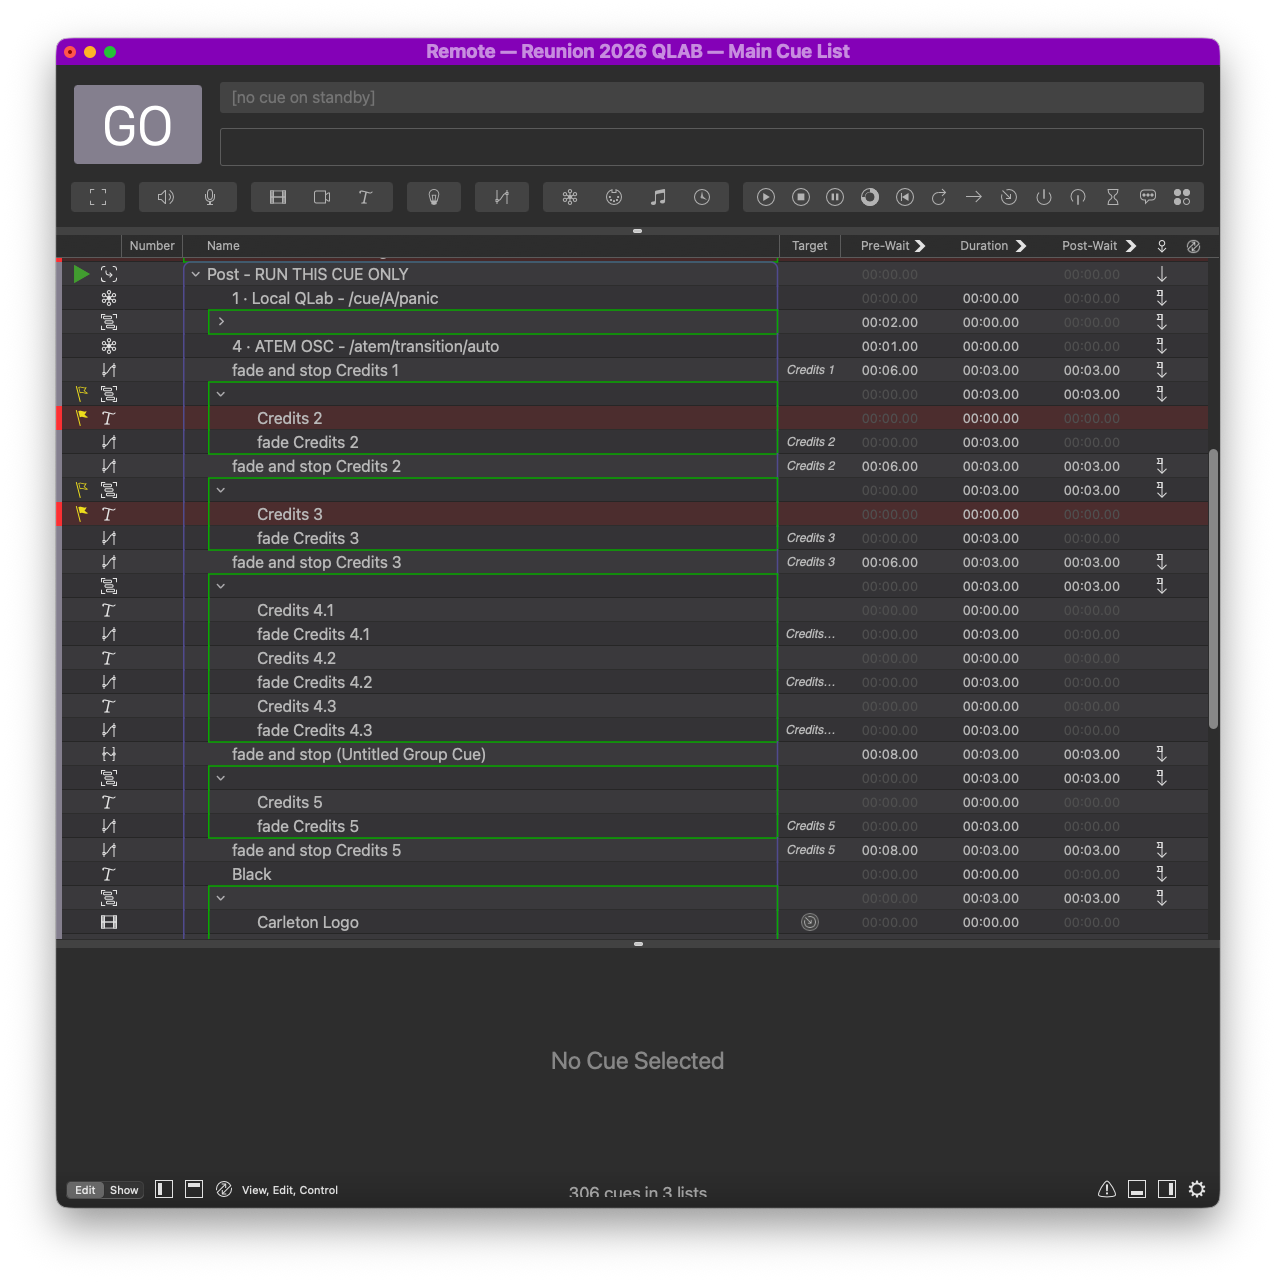
- The postshow sequence in QLab will automatically stop the Hyperdeck recording. The Pearl Nano recording needs to be stopped manually.
- When the indicator light on the Hyperdeck stops being red, this means the deck has finished writing to the disk. Do not take out the SD card until AFTER the disk has finished writing.
- The Pearl Nano will automatically transfer its recording to our NAS.
- Manually transfer the Hyperdeck recording to the Mac Studio in the recording booth (M102A). Give the file a legible name consistent with our naming convention, and store it under the
Pre-Edited Mediafolder in theKPH Team Drive. - Shut down and leave.
- Alternatively, you may use
Hyperduckto transfer recording from the Hyperdeck to the NAS. See here on how to do it.